Aggregation
Two types of aggregate tables are discussed.
The first is where all non-additive facts and one or more dimensions are removed from a fact table. Typically this results in a smaller table that can answer a subset of the queries that could be posed against the fact table. This aggregate table still maintains full integrity to the remaining dimensions, and consequently reflects all changes to those dimensions.
The second type, we will call an aggregate summary, or summary table. This table includes additive measures and in some cases hierarchical elements of one or more of the dimensions providing a rolled-up summary of the fact table data. For example we may choose to deal at product group level rather than product SKU which is the granularity of the dimension.
When using the Oracle database the aggregate tables are seen as pre-built materialized views with reduced precision and query rewrite enabled.
Creating an Aggregate Table
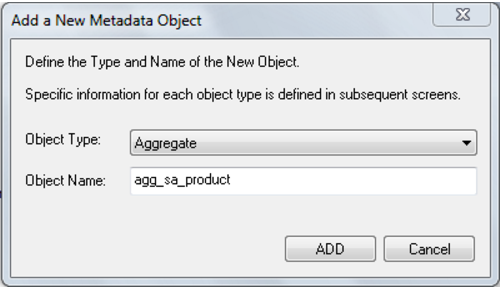
1 In the left pane double click on the aggregate group to list the aggregates in the middle pane and set aggregates as the drop target.
2 From the Data Warehouse browse (right) pane drag a fact table into the middle pane and enter the aggregate name. Click ADD.
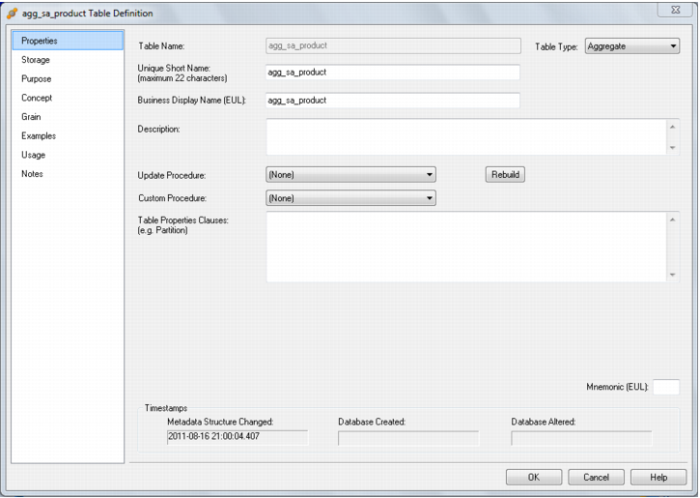
3 The aggregate properties are displayed. Click OK.
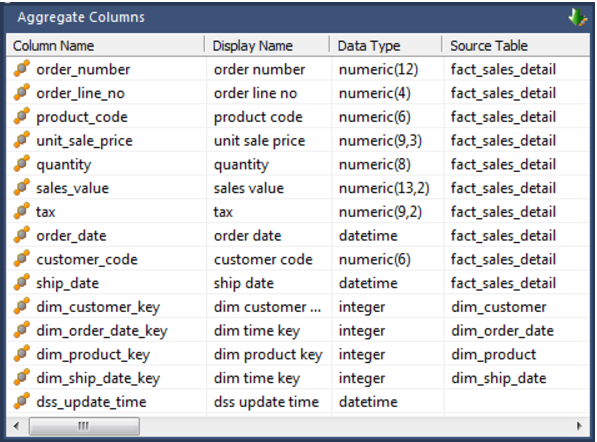
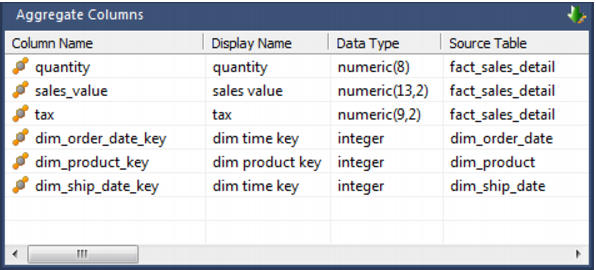
4 The list of columns in the Aggregate is displayed in the middle pane:
5 Remove any columns that will not make sense at an aggregated level. For example, dss_fact_table_key, any business keys, any non-additive facts, any measures that relate to detail (e.g, unit price) and any dimension keys not required:
Note: All aggregate table columns (other than dss columns) should always have a source table specified, even if a column transformation is in use.
6 Create the aggregate table in the database by right clicking on the aggregate and selecting Create(ReCreate).
7 Create a procedure to update the aggregate by right clicking on the aggregate, selecting Properties and selecting (Build Procedure...) in the Update Procedure field.
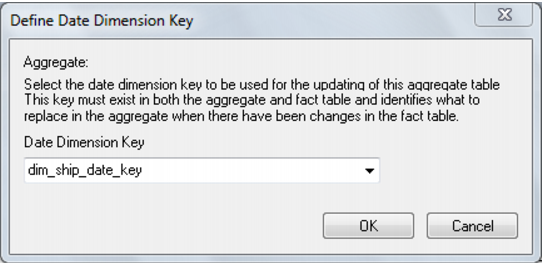
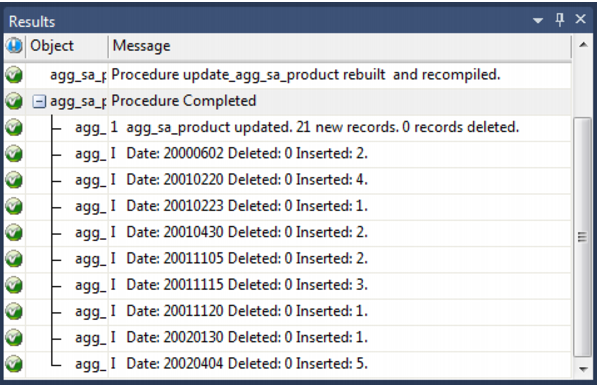
Note: QAD Data Warehouse Designer generated update procedures for aggregates are incremental. Incremental updates are based on a date dimension key and number of look back days. The aggregate update process looks at any records that have been updated in the fact table in the last 7 days (by default).
To support this, a date dimension key must be selected. The columns chosen must be in both the source fact table and the aggregate. Select this column and click OK.
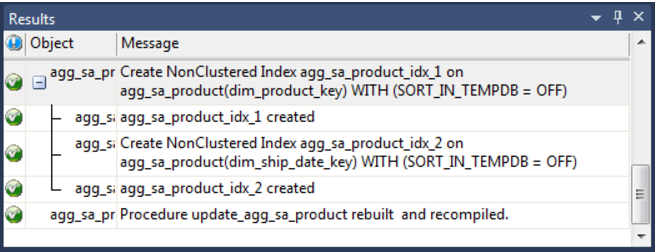
8 Update the table by right clicking and choosing Execute Update Procedure.
Note: Any column transformations added to a measure column of an aggregate table must always include an aggregate function, usually SUM. For example, an ISNULL added to forecast_quantity should be entered as: SUM(ISNULL(forecast_quantity,0)).
Oracle: When the procedure runs it first removes the materialized view, then updates any changes from the fact table into the aggregate. It then re-establishes the materialized view, enabling query rewrite.
DB2: When the procedure runs it first removes the materialized query table, then updates any changes from the fact table into the aggregate. It then re-establishes the materialized query table, enabling query rewrite.
Change an Aggregates Default Look Back Days
QAD Data Warehouse Designer generate update procedures for aggregates that are incremental. Incremental updates are based on a date dimension key and number of look back days.
The aggregate update process looks at any records that have been updated in the fact table in the last number of look back days.
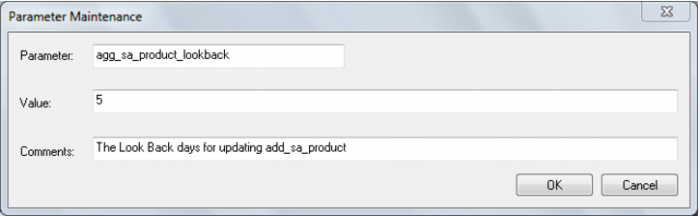
The default number of look back days is 7. The default is set in each update procedure. To change the number of look back days for an aggregate table, create a QAD Data Warehouse Designer parameter called AggregateName_lookback and enter the required number of look back days as the parameter value.
For Example, add the following parameter to change the look back days to 5 for agg_sa_product:
See Parameters for more information on QAD Data Warehouse Designer parameters.
Creating an Aggregate Summary Table
The creation of a summary table proceeds initially in the same way as an aggregate table.
1 In the left pane double click on the aggregate group to list the aggregates in the middle pane and set aggregates as the drop target.
2 From the Data Warehouse browse (right) pane drag a fact table into the middle pane. Remove any columns that will not make sense at an aggregated level. For example, dss_fact_table_key, any business keys, any non-additive facts, any measures that relate to detail (e.g, unit price).
3 Drag over columns from dimensions that are linked to the fact table. Delete the dimension keys to allow a rollup to the level of the dimension elements.
Note: All aggregate summary table columns (other than dss columns) should always have a source table specified, even if a column transformation is in use.
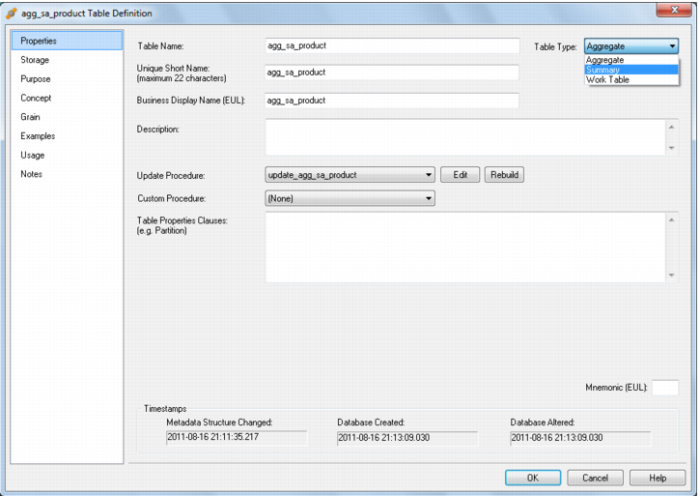
4 In the properties of the aggregate table change the 'Table Type' to 'Summary':
5 Create the aggregate summary table in the database by right clicking on the aggregate and selecting Create(ReCreate).
6 Create a procedure to update the aggregate summary by right clicking on the aggregate, selecting Properties and selecting (Build Procedure...) in the Update Procedure field. The aggregate summary table is totally rebuilt each time the procedure is executed.
Note: Any column transformations added to a measure column of an aggregate summary table must always include an aggregate function, usually SUM. For example, an ISNULL added to forecast_quantity should be entered as: SUM(ISNULL(forecast_quantity,0)).