Configuring the QAD ADS
To configure the QAD ADS Windows service:
1 Start the QAD ADS through Start|Programs|QAD AdminService 6.00|Settings. A shortcut icon is created in the system tray of your machine.
2 Double-click the QAD icon in the system tray or right-click it and choose Settings.
QAD Icon
The Instances window displays showing the available instances, and their status on QAD ADS.
Instances Window
3 Right-click and choose Add to add a new instance.
Note: Similar options are available for Edit, Copy, and Delete.
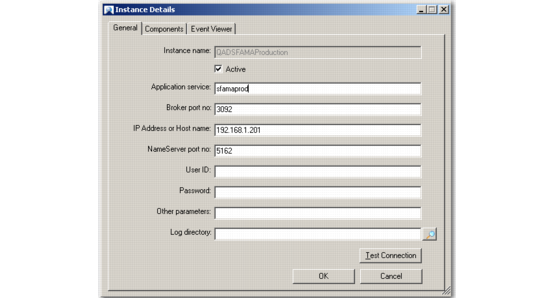
The Instance Details screen displays.
Instance Details-General
4 Enter the instance name and other details in the General tab of the Instance Details screen. Select the Active check box to activate the new instance.
Important: For a given application service, apart from the Instance Name and Other Parameters fields, all other field values must match those entered in the AppServer Service Maintenance screen of QAD CRM (see
Configuring AppServer Settings).
5 Click Test Connection to verify that the AppServer connection is established and running successfully.
6 Click OK to save the new instance or Cancel to return to the Instances window. When you save a new instance, QAD ADS sends a message confirming the creation of a new instance and provides an option to restart the QAD ADS service.
7 Exit QAD ADS and restart the service on your machine. This operation ensures that QAD ADS pick up all of the latest settings when running the instance.