Installing QAD CRM on End-User PC
Before setting up QAD CRM clients, verify that you have met the following prerequisites:
• Your network is operating.
• Create the folder C:\temp on your client PC if a it does not exist.
• You have permission level required on your PC to install new applications such as QAD CRM WebClient, which requires access to update the Windows registry file.
The installation of QAD CRM WebClient on an end-user PC consists of two steps:
1 Install Progress WebClient (if not already installed).
2 Install QAD CRM.
Once you have finished hosting your CRM WebClient application .cab files on the Delivery Server (a Tomcat server), do the following:
1 Start Internet Explorer as Administrator.
2 Go to this URL:
http://<DeliveryServerIpAddressorHostName>:<TomcatPortNo>/<qadcrmwebclient>/web_image/bootstrap.htm
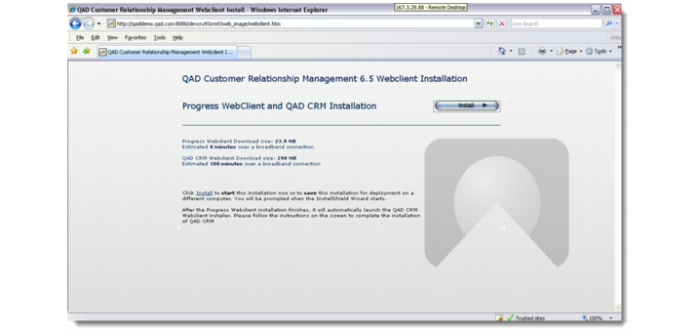
3 If Progress WebClient is not installed on your machine, Internet Explorer displays the Progress WebClient and QAD CRM installation page.
Click the Install button to launch the installation process.
1 It installs the required version of Progress WebClient application, then launches the CRM WebClient application download and eventually starts the CRM.
Note: You might be required and prompted to restart your PC after Progress WebClient has been installed.
2 If you already have Progress WebClient installed on your machine, the installer displays a warning message and prompts you to exit.
Exit the installer and go to the following URL to proceed to download the CRM WebClient application:
http://qaddemo.qad.com:8080/qadcrmwebclient/qadcrm/qadcrm.prowcapc
If you used qadcrm_all.wcp to generate the CRM .cab files, the URL can be different as the following:
http://qaddemo.qad.com:8080/qadcrmwebclient/qadcrm/qadcrm_all.prowcapc
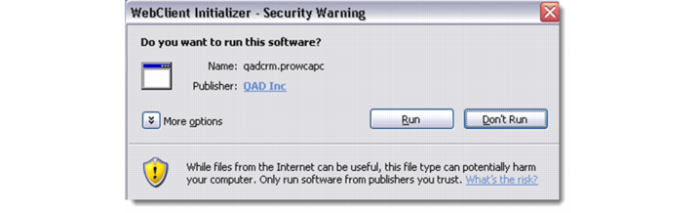
3 At the Security Warning message box, click Run to launch the QAD CRM installation process.
4 When installation is complete, a QAD CRM WebClient icon is created on the Windows Desktop. QAD CRM WebClient shortcut menus are also created.
• QAD CRM WebClient: Launch QAD CRM in the WebClient mode.
• QAD CRM WebClient AppManager: View detailed information about QAD CRM WebClient installed on your machine, such as configuration file and application directory.
• Uninstall QAD CRM WebClient: Uninstall QAD CRM WebClient from your machine.
Note: If you are installing a CRM WebClient on a test server (instead of an end-user PC) so that it can be shared with multiple users via remote desktop into that test server, then you will need to open up the Properties of the CRM WebClient Window icon, and blank out the “Start in” value before you click on this icon to launch the WebClient for the first time.
5 Launch CRM WebClient either by clicking the application Desktop icon or selecting the application shortcut command from the Start menu.
6 When you run QAD CRM WebClient for the first time on your machine, you get a message similar to one shown below.
Click OK to install required components. When installation is complete, launch QAD CRM WebClient again.
Note: During the first launch of the CRM WebClient application, it could take some time depending on the connection speed between the Tomcat server where your CRM application is hosted and your own computer on which you are trying to launch CRM WebClient. However, this delay will be experienced only during first time you access CRM. Subsequent access to the CRM system is quicker.
If a user launched the QAD CRM WebClient and did not perform the initial installation on a client PC, the user will encounter an error similar to the one following even if the user belongs to a local admin group:
Unable to install/run <application name>. You must have full access to the Application Key in the windows Registry. HKEY_Local_MACHINE\Software\QAD Inc.\<application name>.
Contact your System Administrator.
To resolve this issue, take the following steps:
1 Go to the registry and select following node:
• Windows 32-bit clients:
HKEY_LOCAL_MACHINE\Software\<VendorName>\<ApplicationName>
• Windows 64-bit clients:
HKEY_LOCAL_MACHINE\Software\Wow6432Node\<VendorName>\<ApplicationName>
2 Select the application name. Then, right-click and choose Permission.
3 Select Users from Group or user names section.
4 Select Full Control from Permissions for user group and select Allow.
5 Click OK and restart the QAD CRM WebClient.
Note: Running the CRM WebClient application does not require the user to have admin permission. The user only needs access permission to the registry nodes.