Integrating with QAD SE
If you need to integrate CRM 6.6.1 with your QAD SE system, you must implement the steps under the following sections:
Note: QADCRMInstallDir refers to the newly installed CRM 6.6.1 folders on your Windows Deployment server.
On the first use of an upgraded CRM 6.6.1 application on any client, run Initial Address Data Load to bring all the necessary county data from the QAD SE system to the CRM 6.6.1 application.
Important: Do the following steps only once.
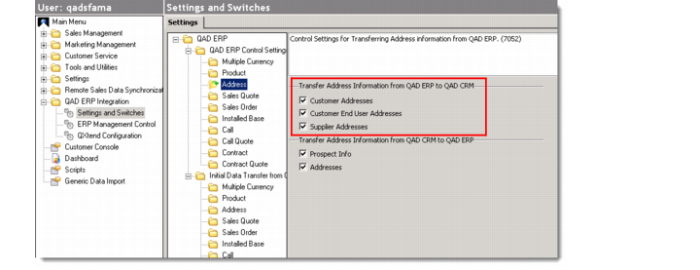
1 Go to QAD ERP Integration|Settings and Switches|QAD ERP|QAD ERP Control Settings|Address. Make sure that you check all your required options under Transfer Address Information from QAD ERP to QAD CRM.
QAD ERP Control Settings - Address
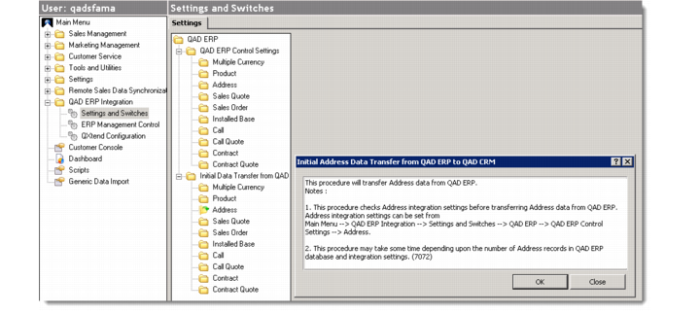
2 Go to QAD ERP Integration|Settings and Switches|QAD ERP|Initial Data Transfer from QAD ERP|Address. The Initial Address Transfer from QAD ERP to QAD CRM screen pops up.
Initial Address Transfer from QAD ERP to QAD CRM Screen
3 Click OK on the pop-up screen to finish the address data load.