Converting 6.6.1 Databases to 6.6.2 Format
1 After CRM 6.6.2 is installed, remove all the Progress compiled code (*.r files) in the following folders from the newly installed QAD CRM 6.6.2 CD environment:
• dataexch
• lib
• integration\mfgpro
• progs
• report
• system
• triggers
2 Modify the crm662_install_dir\qadsfamaupgrade.pf file to connect to the QAD CRM 6.6.1 databases in multi-user mode. If your QAD CRM 6.6.1 databases have been configured in the self-service (shared memory) mode on your database server, temporarily restart using the client server mode to allow the CRM 6.6.2 Deployment Utility to access the databases from the Windows Deployment server.
3 Make sure no other user or Progress process, including any AppServer process, is using the QAD CRM 6.6.1 databases that you are upgrading.
Note: In a CRM 6.6.1 system that is integrated with QAD ERP, shut down all the QAD ERP AppServers and those applications that would also have connections to the CRM 6.6.1 databases.
4 Convert your CRM 6.6.1 database to the Progress version that CRM 6.6.2 uses.
a Click QAD CRM Deployment Utility.
Note: If you are running QAD CRM 6.6.1 databases on the server using Progress 10.1C while your CRM 6.6.2 is set up against Progress 10.2Bxx, you might get an error message after you click the QAD CRM Deployment Utility icon.
To resolve this error, connect to the QAD CRM 6.6.2 session using the Progress version that is compatible with the CRM 6.6.1 Progress version:
b Modify all QAD CRM .ini files in crm_install_dir of your QAD CRM 6.6.2 installation. Change the DLC system variable and other Progress configuration parameters to point to a Progress version that is compatible with the Progress version that the CRM 6.6.1 database server uses.
c Modify the CRM 6.6.2 shortcut icons created as a result of CRM 6.6.2 installation, and ensure that they also reference the compatible Progress file prowin32.exe.
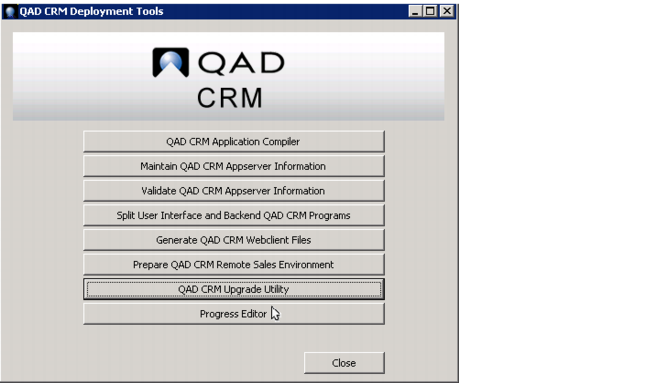
5 On the QAD CRM Deployment Tools screen, click Progress Editor.
6 In the Procedure editor window, run the program punfreezetbl.p.
a Enter the following command:
run <crm662_install_dir>\conversion\punfreezetbl.p.
b Select Compile|Run from the menu or Press F2.
c The program sets _frozen = no for all tables in CRM databases. After the program is executed, a confirmation message appears; click OK and close the editor window.
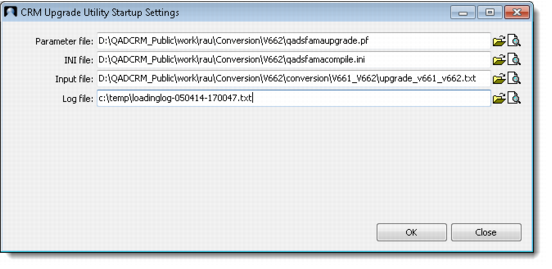
7 On the QAD CRM Deployment utility screen, click QAD CRM upgrade Utility, fill in the following Utility settings, and click OK.
Parameter file.
Specify the name of the parameter file (qadsfamaupgrade.pf) to connect to your CRM 6.6.1 databases running in multi-user mode.
INI file.
It is pre-populated for you by default.
Input file.
Specify the path to the upgrade_v661_v662.txt file. You can locate this file in the <crm662_install_dir>\conversion\v661_v662 folder.
Log file.
Specify the name of the log file.
8 After you fill in the Utility settings, you are prompted to check whether you have backed up the databases. Make sure that you have backed up the databases and click Yes to continue.
9 You see the following message after the data loading has been completed. You can click Yes to see if there are any errors recorded in the log file.
Note: Some .df loading errors might be reported in the log file, since CRM uses Progress tools for loading the .df file. If the .df loading fails for some reason, see the bisgen.e, bisgmenu.e, and dataexch.e files under crm662_install_dir.
If you encounter errors during the
.df loading, make sure that you resolve the errors and restore the databases from the backup and continue again from
step 3.
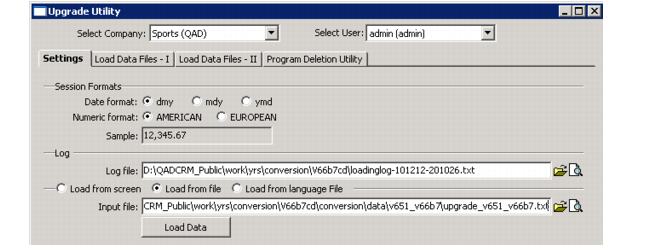
10 When the .df loading is correct and there are no .e files in crm662_install_dir, the Upgrade Utility screen appears.
a Make sure that the Load from file option is selected; by default, it is selected.
Important: Do NOT change the Session Formats selected by default, even if you are not using the date and the numeric format.
b Make sure that the Input file field displays the conversion file that you specified earlier; that is, crm662_install_dir\conversion\v661_v662\upgrade_v661_v662.txt.
c Click Load Data.
Note: After you click Load Data, you are prompted once again to confirm that your databases have been backed up. Click Yes to continue.
d After the data loading is complete, the system prompts you to view the log file. If you need any help to resolve errors in the log file, contact QAD CRM support.
e Close the Upgrade Utility window and any other Deployment utility windows, including the main Deployment Tools window.
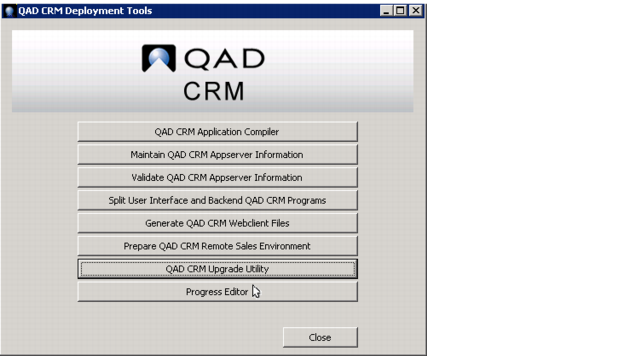
11 Restart the Deployment Tools window again and click Progress Editor.
a Restart Progress Editor and run the pfreezetbl.p program. To run the program, enter the following command, then select Compile|Run from the menu or press F2.
run <crm662_install_dir>\conversion\pfreezetbl.p
This command sets _frozen = yes for all tables in CRM databases. After the program is run, a confirmation message appears; click OK and close the editor window. Click No when you are prompted to save changes in the Progress Editor buffer.
b Close the Deployment Utility. If you do not see any errors in the log file, your CRM 6.6.1 databases have now been upgraded to 6.6.2.