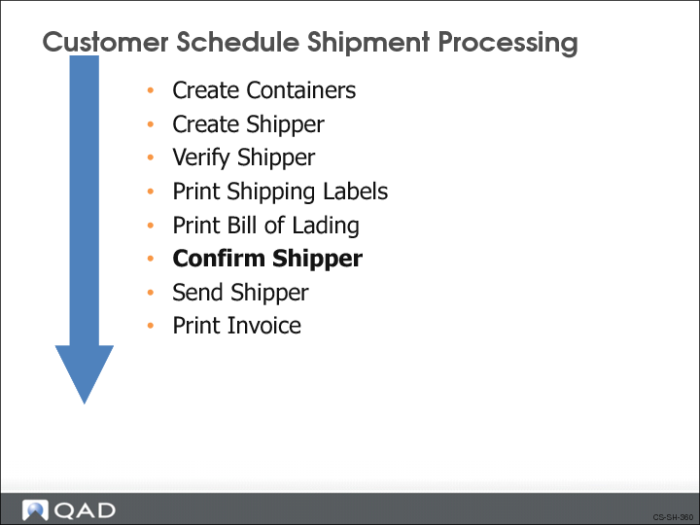
Confirm Shipper
During the process of confirming the shipper, the system:
• Decreases finished goods inventory
• Uses the requirement quantity to increase the cumulative shipped quantity
• Decreases the net requirement for the order line item
• Performs the first step in invoicing
• Updates general ledger (GL) accounts
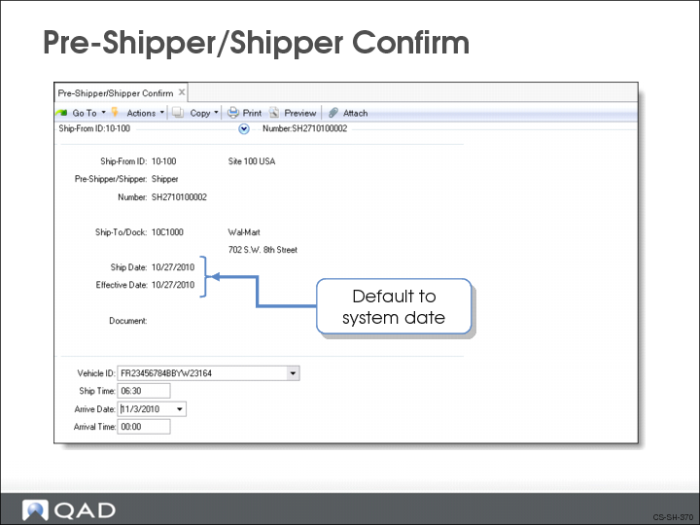
Pre-Shipper/Shipper Confirm
Use Pre-Shipper/Shipper Confirm (7.9.5) to:
• Record the shipments
• Convert pre-shipper to shipper
Requirement quantities are considered open until you confirm the shipper. Once a shipper is confirmed:
• Pegged quantities are transferred to shipped quantities
• Shipped quantities are incremented by the ship line quantities
• Pegged quantities are decremented by the ship line quantities
Field Definitions
Ship-From
The site shipping the shipment.
Pre-Shipper/Shipper
Enter the document you are confirming (pre-shipper or shipper).
If confirming a pre-shipper, the system converts it to a shipper before beginning the confirmation process. The system displays a message box advising you that it is converting pre-shipper to shipper and shows you the shipper number
Number
Number identifying the pre-shipper or shipper you want to confirm.
Ship-To/Dock
The location receiving the shipment.
Ship Date
The last date the system processed a shipment for the scheduled order associated with this shipper. Defaults to the system date
Effective Date
The date of the shipment. Defaults to the system date
Note: A detail window allows entry the time of shipment, the specific vehicle ID the shipment is loaded onto, and the estimated time of delivery.
Handling Shipment Dates at a GL Period End
Usually the ship date and effective date of the shipment are the same. However, you can assign an effective date that is earlier or later than the actual ship date.
• Effective date must be in an open GL calendar period
• Useful if a GL period ends before all shipments from that period have been fully processed
If you are not automatically posting and printing the invoice at confirmation, make sure the same date is used for:
• Effective Date in Pre-Shipper/Shipper Confirm
• Invoice Date in Preview Invoice Print (7.13.3)
• Effective Date in Invoice Post and Print (7.13.4)
If you use different dates, your shipment history for the GL period will not correspond to the Accounts Receivable and GL balances.
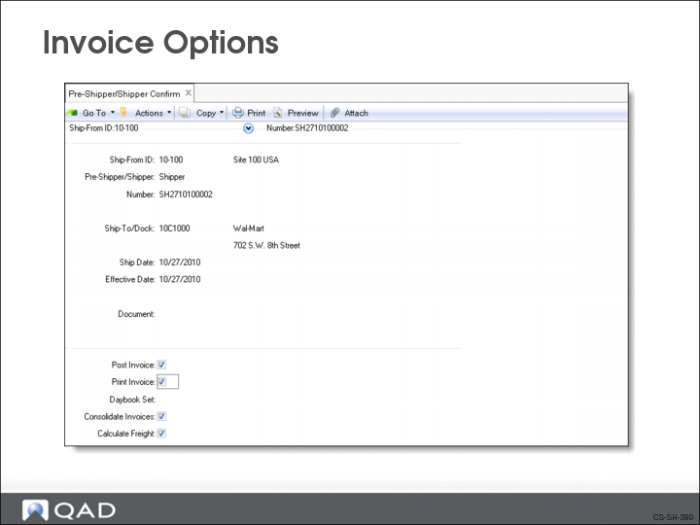
Invoice Options
You use the fields in this frame to determine how the system processes the invoices generated by the shipment.
Post Invoice
The confirmation process can perform the first step in invoicing. The value defaults from the Auto Inv Post field set in Scheduled Order Maintenance.
Note: You can override this setting for individual shippers.
• If Yes, confirmation automatically posts the invoice to the customer’s AR account. You can print the invoice during the confirmation process or later using Invoice Print or Reprint (7.13.12) or Invoice Export (35.8)
• If No, you follow the normal invoice process, manually posting and printing the invoice using Invoice Post and Print (7.13.4)
Print Invoice
Determines if the invoice is printed when the shipper is confirmed. You can only set this to Yes when Post Invoice is Yes.
Consolidate Invoices
Only has an effect if Post Invoice is Yes.
Calculate Freight
Determines if the system recalculates the freight charges for all scheduled orders attached to the shipper being confirmed.
• If Yes, the system recalculates freight charges
• If No, the system does not recalculate freight charges
After you complete entering all information, the system prompts you twice. The first is to ask if all information is correct. The second is to ask if you want to print the invoice.
Printing Invoices
If you want to print the invoice, a frame displays asking for invoice printing information.
Form Code
Use to specify the format for printing the invoice. Defaults to 1, standard format.
Exercise: Confirm the Shipper
Use Pre-Shipper/Shipper Confirm (7.9.5) to confirm the shipper you just created.
1 Accept the default header information.
2 Accept the default invoice information. Select Yes at the system prompt.
3 Accept the default invoice detail information.
4 Print the invoice.