Finance Charge Key Features
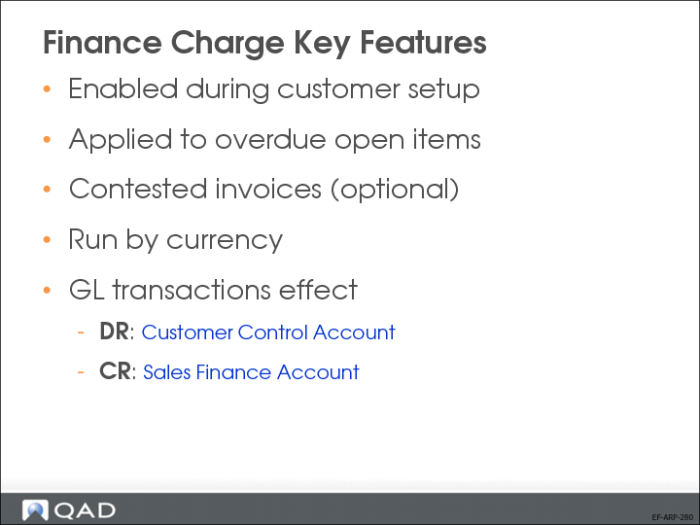
The Finance Charge functionality is optional. You can enable the Finance Charge functionality during customer setup by selecting the Finance Charge and Statement Cycle fields on the Payment tab of the customer record.
Finance charges are applied to overdue open items (such as invoices, adjustments, or previous finance charges). You can exclude contested invoices from finance charge selection, based on the invoice status code.
The Finance Charge invoice postings are as follows:
• DR: Customer Control Account
• CR: Sales Finance Account (from the finance charge profile in the Accounting tab of the customer record)
Finance Charge Setup
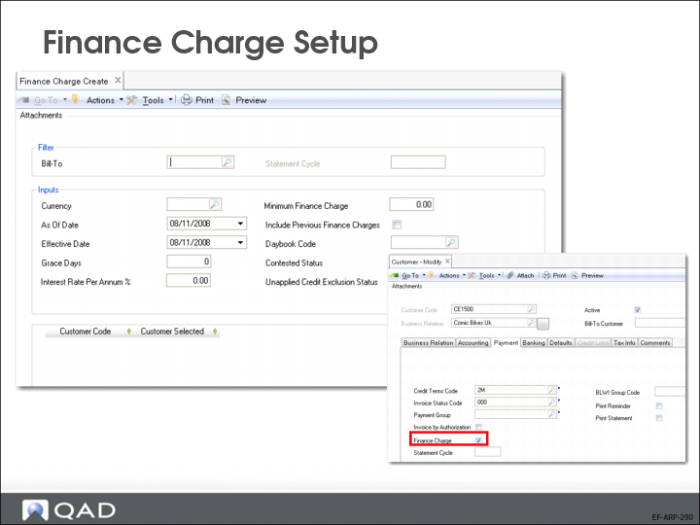
Use Finance Charge Create (27.5.1) to create charges that apply to overdue customer open item amounts. You normally run finance charge calculations on a monthly basis, before issuing customer statements.
The system only calculates finance charges for customers for which the Finance Charge field is selected on the Payment tab in the customer record. You can also define the statement cycle for the customer using the Statement Cycle field and select overdue items by statement cycle.
US Exercise: AR Payment
Log in to entity 10USACO.
When not specified in the exercise, use the following data when needed:
• Sub-account: Gserv
• Cost Center: Adm
• SAF structure and SAF: choose any from the lookup list.
1 Use Payment Format Maintenance (25.11.1) to create a new payment format.
a Right-click in the grid and choose Insert a New Row.
b Specify the following values for the row:
Field | Value |
Format Name | US-CUST_CH |
Description | Customer Checks US |
Module | Accounts Receivable |
Payment Type | Both |
Payment Instrument | Check |
Active | Yes |
c Save your changes.
2 Use GL Account Create (25.3.13.1) to create a new bank GL account.
Field | Value |
GL Account | 1105 |
Description | US Bank |
GL Type | Bank Account |
Category | Asset |
| |
Posting Tab | |
Auto/Manual | Manual |
| |
Currency Tab | |
Currency Code | USD |
| |
Banking Tab | |
Entity Code | 10USACO |
Default | Yes |
Bank Format | XX |
Own Bank Number | 11223344 |
Bank Daybook Profile | BEUSD |
Deduction Daybook Profile | DedDaybookProfile |
AP Discount Account | 5700 |
AR Discount Account | 4220 |
3 Use Bank Payment Format Link (25.11.2) to link the newly created payment format US-CUST_CH to the current bank account (11223344).
4 Use Customer Modify (27.20.1.2) to add the combination of the payment format US-CUST_CH and the current own bank account to the Banking tab of customer 10C1003, Pacific Health Care Systems.
Field | Value |
Default | Yes |
Bank Format | XX |
Customer Bank Number | NA |
Own Bank Account Number | 11223344 |
Payment Format | US-CUST_CH |
Note: Before you save, ensure that only one bank number is marked as default for the entity 10USACO.
5 Use Customer Payment Status Create (27.6.2.1) to set up payment statuses for checks:
Status 1
Field | Value |
Payment Instrument | Check |
Status | Initial |
Bank Account Code | 1105 |
Daybook Code | <blank> |
GL Account | <blank> |
Status 2
Field | Value |
Payment Instrument | Check |
Status | For Collection |
Bank Account Code | 1105 |
Daybook Code | ARPAY |
GL Account | 1380 |
Status 3
Field | Value |
Payment Instrument | Check |
Status | Paid |
Bank Account Code | 1105 |
Daybook Code | ARPAY |
GL Account | 1380 |
6 Use Customer Invoice Create (27.1.1.1) to create a customer invoice for customer 10C1003, Pacific Health Care Systems.
Field | Value |
Description | Misc. Items |
Daybook Code | CIM |
TC Invoice Amount | 1500 |
Currency | USD |
Invoice Status Code | C-OK |
Taxable | No |
7 Use Customer Payment Create (27.6.4.1) to record the check payment of 1500 USD for customer 10C1003.
Field | Value |
Customer Code | 10C1003 |
Amount | 1500 |
Currency | USD |
Reference | CH001 |
Status | For Collection |
a Click the Allocate button.
b Use the fields and Search button to locate the customer invoice created in step (6).
c Allocate the payment to the invoice by selecting the Full field for the invoice line in the grid.
d Click OK.
e Save the payment.
8 Use Customer Payment View (27.6.4.3) to view the customer payment.
9 Use Customer Activity Dashboard (27.18.1) to view both the customer invoice and the customer payment.
10 Use Customer Payment Mass Change (27.6.4.5) to change the status of the check from For Collection to Paid.
Field | Value |
Creation Date | Enter the invoice posting date. |
Customer Code | 10C1003 |
a After entering your customer number, click Add. All payments for this customer display in the grid.
b Select your payment in the grid by clicking the Select field on the left of the grid row.
c In the fields under the grid, select the Change Status field and choose Paid in the New Status for Selected Rows field.
d Click Apply to apply the new status.
e Click Save.
11 Use Journal Entry View (25.13.1.3) to review the postings generated in the ARPAY daybook.
EMEA Exercise: AR Payment
Log in to entity 22UKCO.
When not specified in the exercise, use the following data when needed:
• Sub-account: Gserv
• Cost Center: Adm
• SAF structure and SAF: choose any from the lookup list.
1 Use Payment Format Maintenance (25.11.1) to create a new payment format.
a Right-click in the grid and choose Insert a New Row.
b Specify the following values for the row:
Field | Value |
Format Name | UK-CUST_CH |
Description | Customer Checks UK |
Module | Accounts Receivable |
Payment Type | Both |
Payment Instrument | Check |
Active | Yes |
c Save your changes.
2 Use Bank Payment Format Link (25.11.2) to link the newly-created payment format UK-CUST_CH to the current bank account (UK5564999).
3 Use Customer Modify (27.20.1.2) to add the combination of the payment format UK-CUST_CH and the current own bank account to the Banking tab for customer 22C1000, Auto-Plas International.
Field | Value |
Default | Yes |
Bank Format | XX |
Bank Account Number | NA |
Own Bank Account Number | UK5564999 |
Payment Format | UK-CUST_CH |
4 In Customer Payment Status View (27.6.2.3), verify if the following payment statuses for checks exist. If not, create the statuses using Customer Payment Status Create (27.6.2.1).
Status 1
Field | Value |
Payment Instrument | Check |
Status | Initial |
Bank Account Code | 1120 |
Daybook Code | <blank> |
GL Account | <blank> |
Status 2
Field | Value |
Payment Instrument | Check |
Status | For Collection |
Bank Account Code | 1120 |
Daybook Code | ARPAY |
GL Account | 1380 |
Status 3
Field | Value |
Payment Instrument | Check |
Status | Paid |
Bank Account Code | 1120 |
Daybook Code | ARPAY |
GL Account | 1380 |
5 Use Customer Invoice Create (27.1.1.1) to create a customer invoice for customer 22C1000.
Field | Value |
Description | Misc. items |
Daybook Code | CIM |
TC Invoice Amount | 1500 |
Currency | GBP |
Invoice Status Code | C-OK |
Taxable | No |
6 Use Customer Payment Create (27.6.4.1) to record the check payment of 1500 GBP for customer 22C1000.
Field | Value |
Customer Code | 22C1000 |
Amount | 1500 |
Currency | GBP |
Reference | CH001 |
Status | For Collection |
a Click the Allocate button.
b Use the fields and Search button to locate the customer invoice created in step (5).
c Allocate the payment to the invoice by selecting the Full field for the invoice line in the grid.
d Click OK.
e Save the payment.
7 Use Customer Payment View (27.6.4.3) to view the customer payment.
8 Use Customer Activity Dashboard (27.18.1) to view both the customer invoice and the customer payment.
9 Use Customer Payment Mass Change (27.6.4.5) to change the status of the check from For Collection to Paid.
Field | Value |
Creation Date | Enter the invoice posting date. |
Customer Code | 22C1000 |
a After entering your customer number, click Add. All payments for this customer display in the grid.
b Select your payment in the grid by clicking the Select field on the left of the grid row.
c In the fields under the grid, select the Change Status field and choose Paid in the New Status for Selected Rows field.
d Click Apply to apply the new status.
e Click Save.
10 Use Journal Entry View (25.13.1.3) to review the postings generated in the ARPAY daybook.