Hands On Exercise
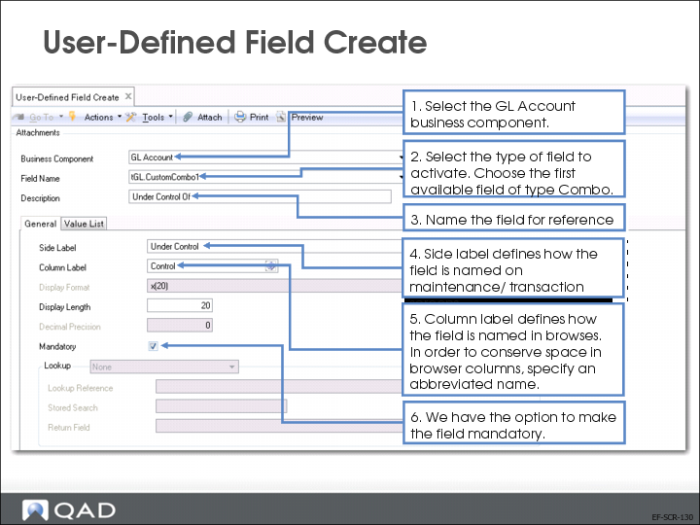
1 Use User-Defined Field Create (36.4.12.2.1) and enter the information noted in the graphic below.
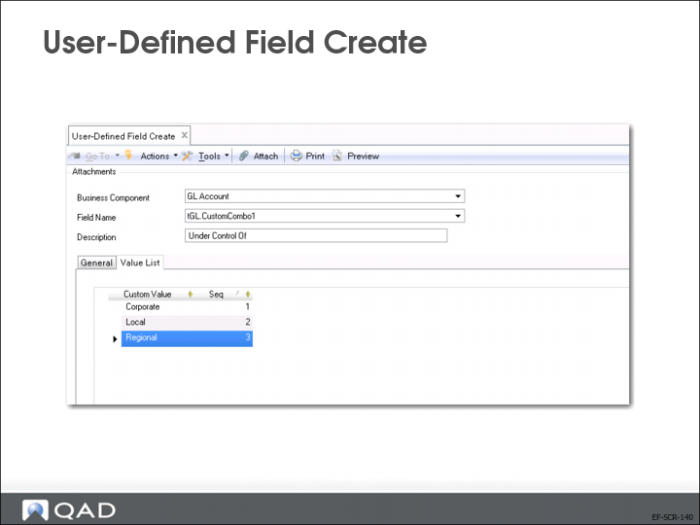
2 Open the Value List tab.
a Right-click and select Insert a new row, enter “Corporate.”
b Right-click and select Insert a new row, enter “Regional.”
c Right-click and select Insert a new row, enter “Local.”
d Click Save.
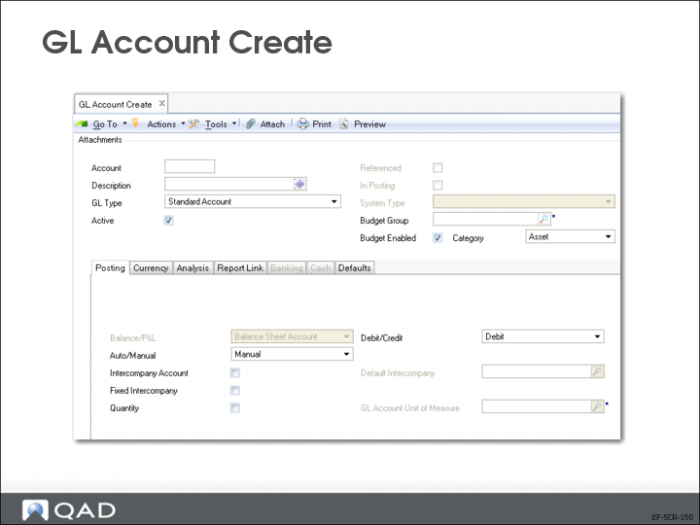
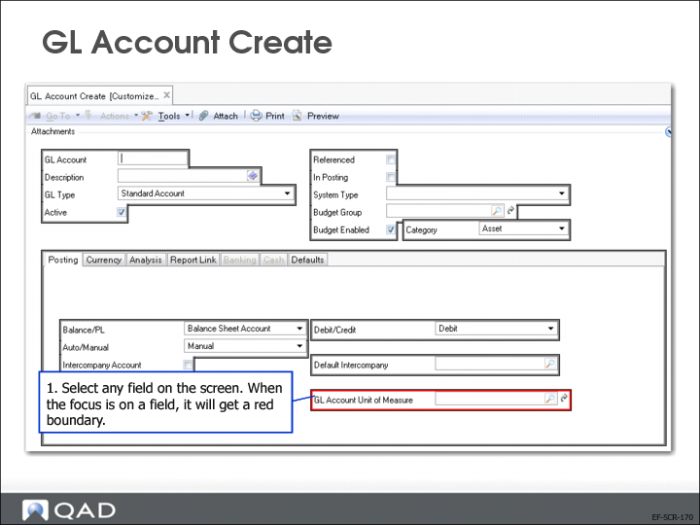
3 Open GL Account Create (25.3.13.1).
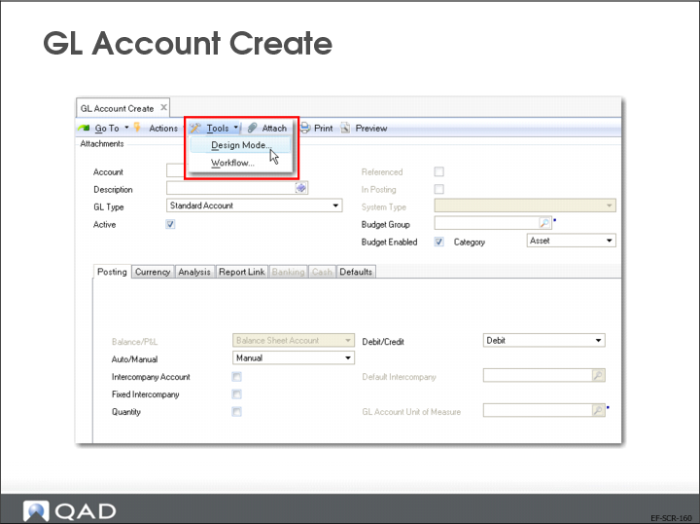
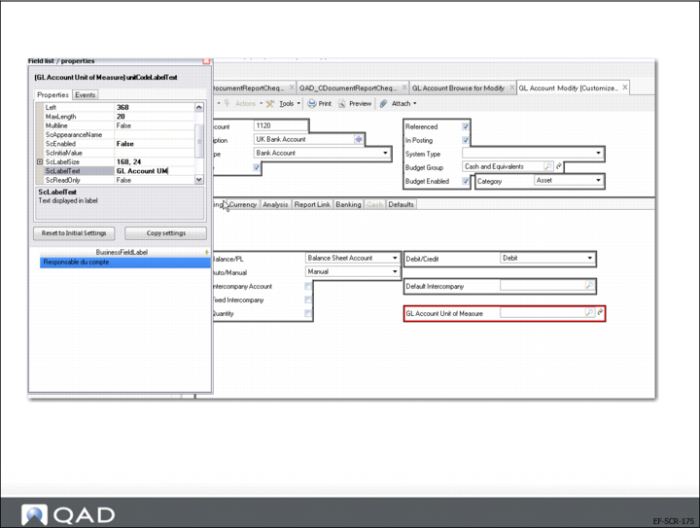
4 In the Tools menu, select Design Mode.
Note: Use Tools in the submenu of the screen to enter Design Mode, and not the Tools menu of the overall QAD Enterprise Applications top menu bar.
5 In the Customization Level drop-down menu, select General and click Ok.
6 Select the GL Account Unit of Measure field. A red border will appear around the field.
7 Change the SCLabelText to “GL Account UM”.
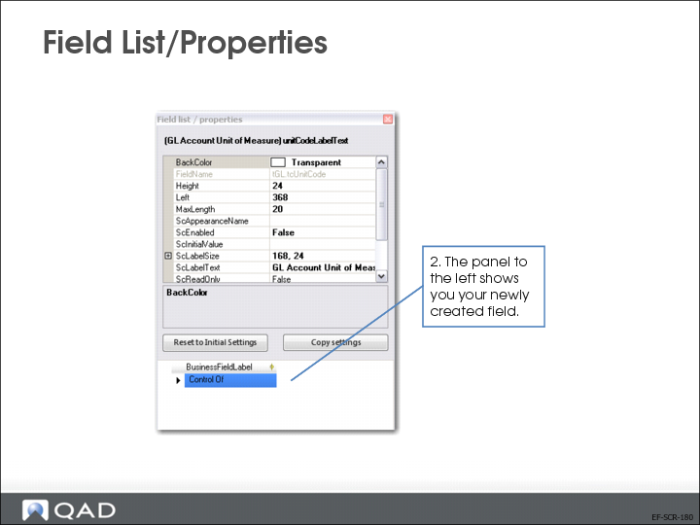
Field List/Properties
The panel on the left of the Design Mode field list displays the field you created.
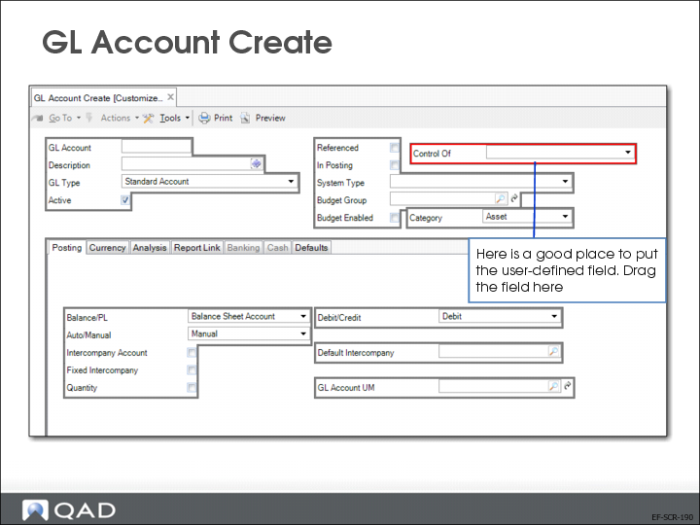
8 Click this field and drag it on the screen. It can be positioned and modified just like any other field.
9 Once you have positioned your field where you want it, close Design Mode by selecting Tools - Design Mode again.
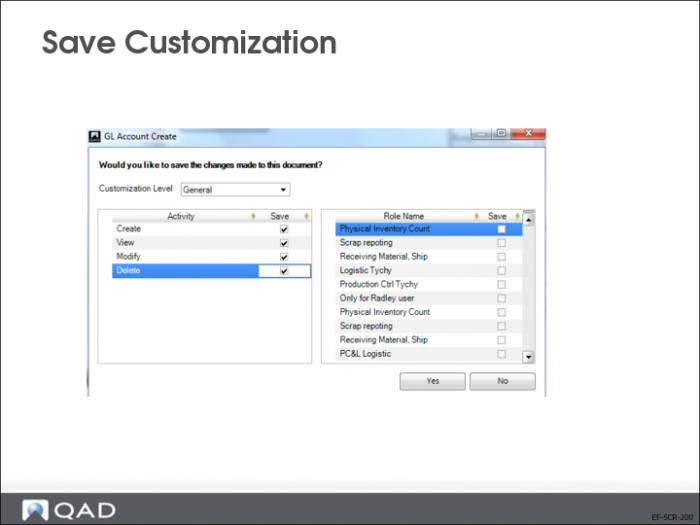
A window pops up, asking what activities you want to implement the screen changes in.
10 Mark them all like the screen shown next.
11 Click Yes to save your changes.
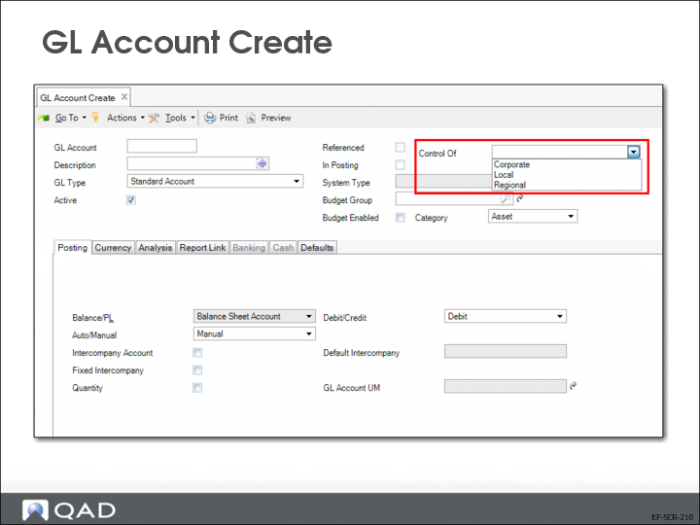
12 The screen now shows the new field with all of the drop-down values defined.