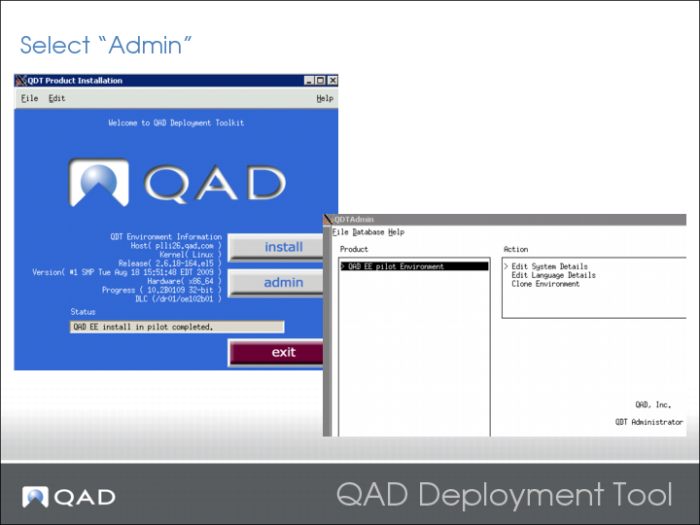
Configure Enterprise Edition
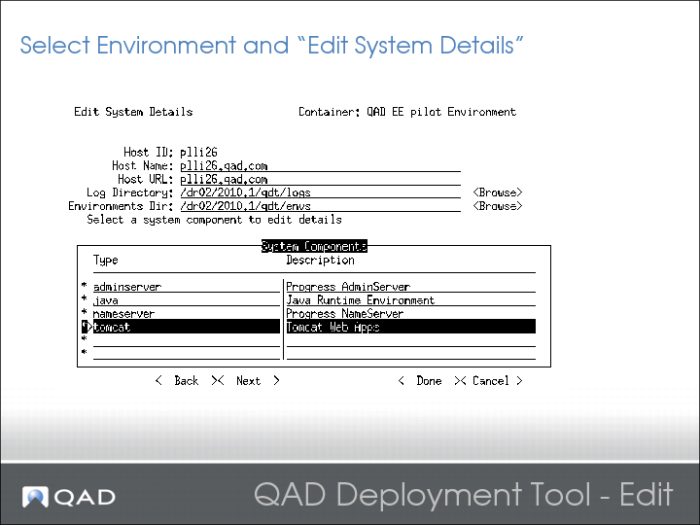
Select Environment and Edit System Details
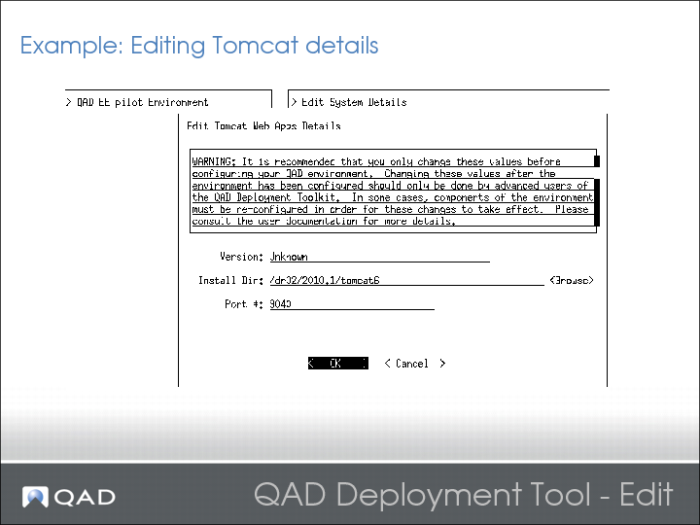
Select each component and verify that the details are correct. The Admin Server port number and the Tomcat Port number often need to be changed.
Edit Tomcat Details
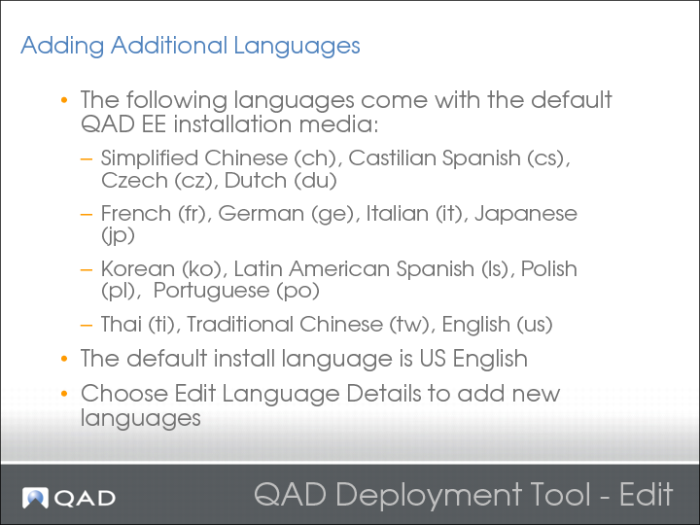
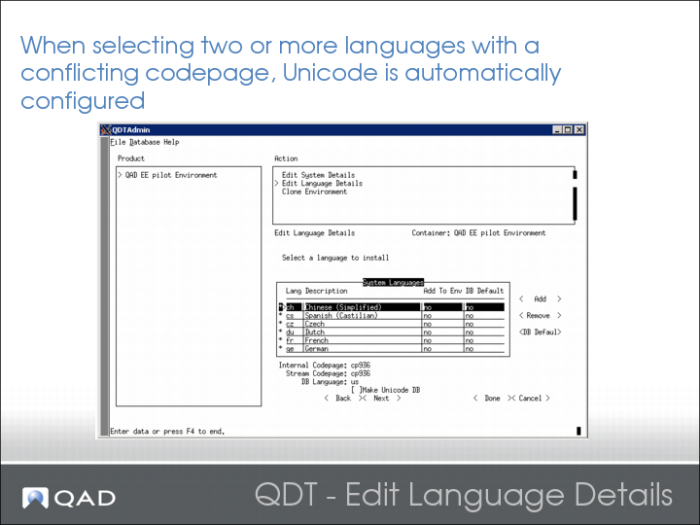
Adding Additional Languages
You can Modify the code page settings by entering the new information in the Internal Codepage or Stream Codepage fields.
Limit your modifications to the codepage settings because erroneous modifications can cause unexpected behavior.
Edit Language Details
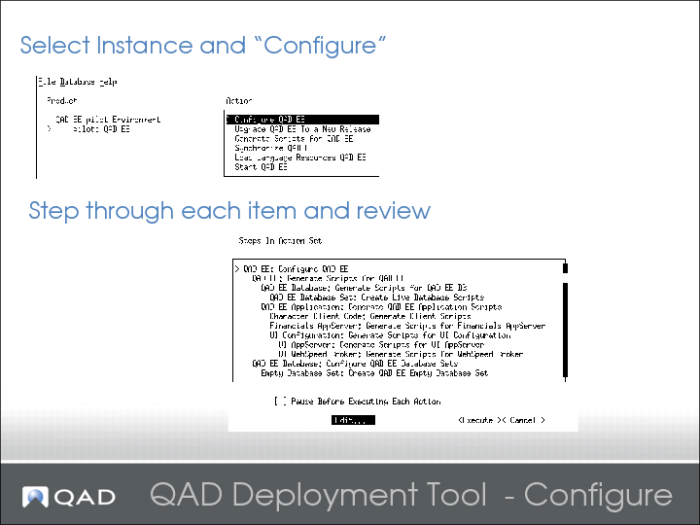
Configure QAD Enterprise Edition
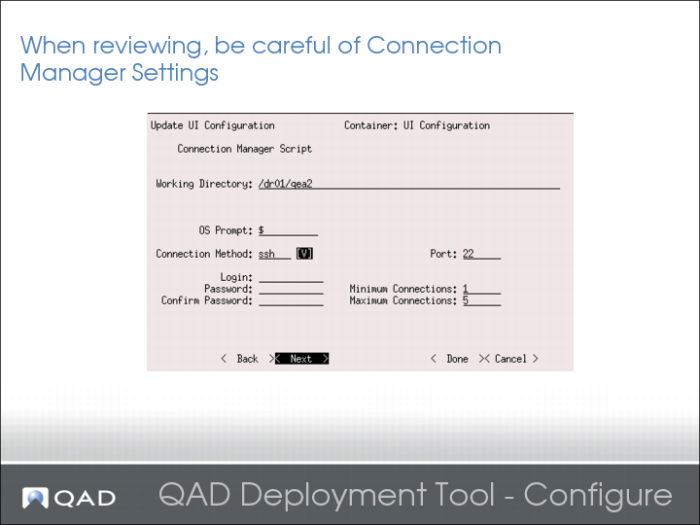
Configure Connection Manager Settings
Also, make sure that your port numbers are OK for the AppServers on the other screens, as well as the min/max agents.
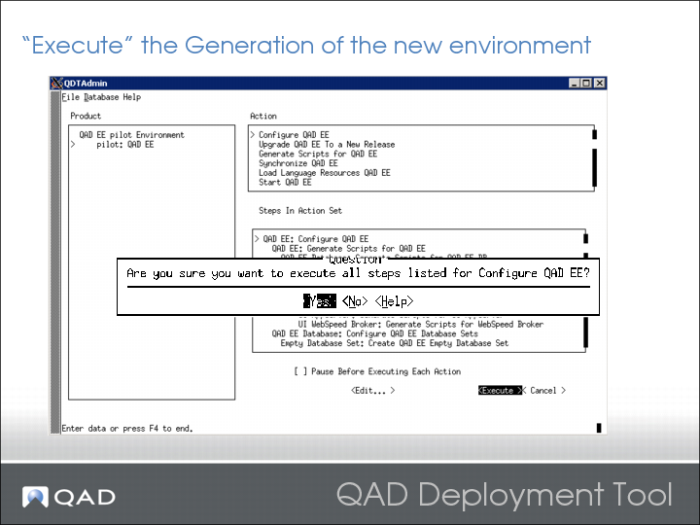
Execute Environment Generation
QDT environment details are stored in $QDT/xml.
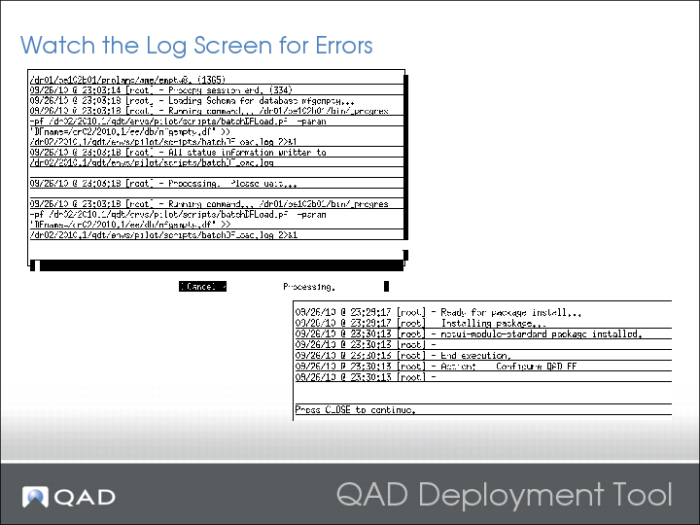
Log Screen
Watch the screen for errors … review the log files under the QDT/logs directory as well.
For example:
[logs]# ls | | |
01batchCompile.log | packageinstalldone.log | package.properties |
install.log | package.log | qdtadmin.log |
jar.log | packageoutput.txt | qdt.log |
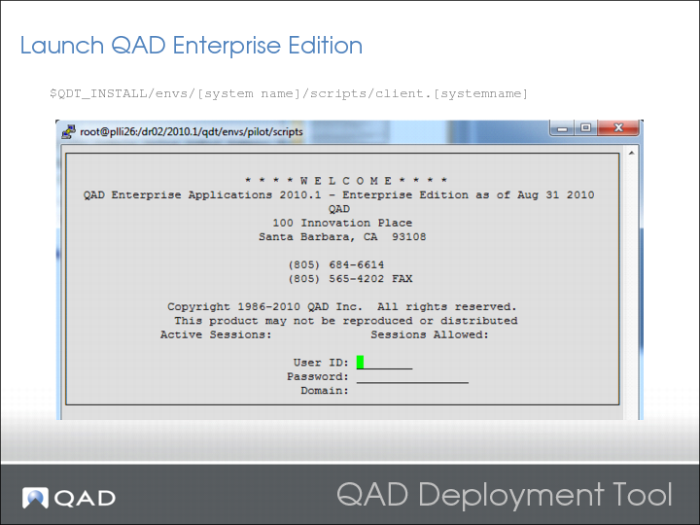
QAD Enterprise Edition
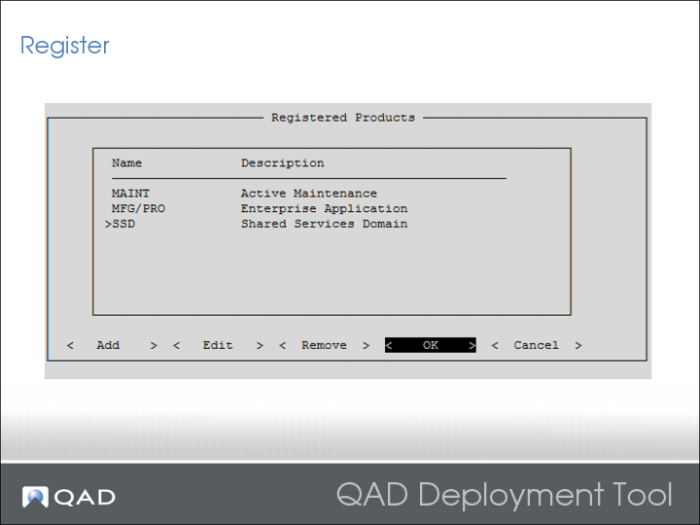
Register
Have your registration information ready.
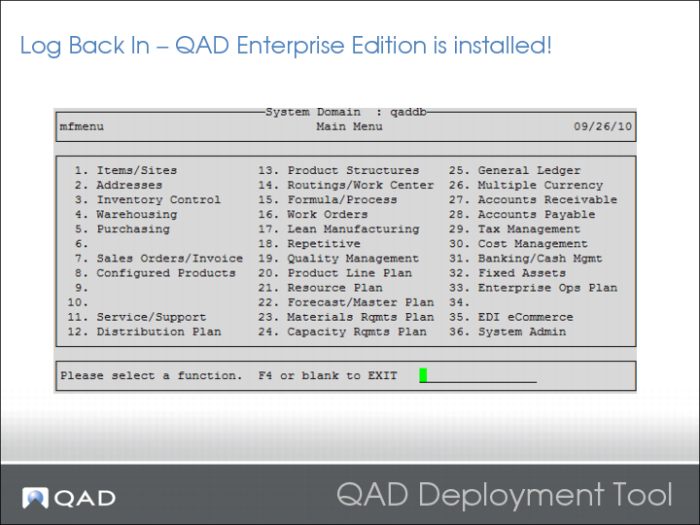
QAD Enterprise Edition Login
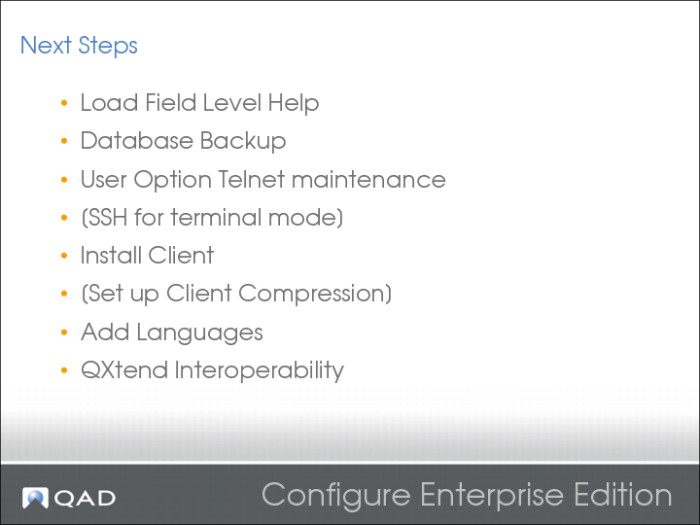
Next Steps
Daemons, Reporting Service, and other additional configuration options are discussed later in this course.
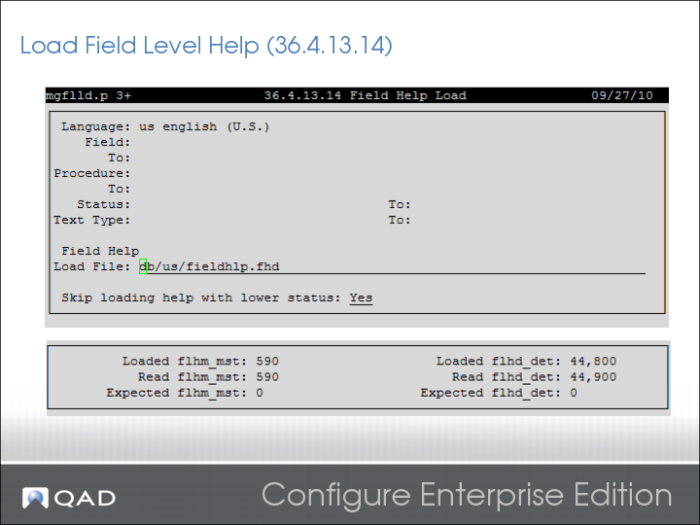
Load Field Level Help
Back up the database after this step:
probkup dbname dbname.probkup
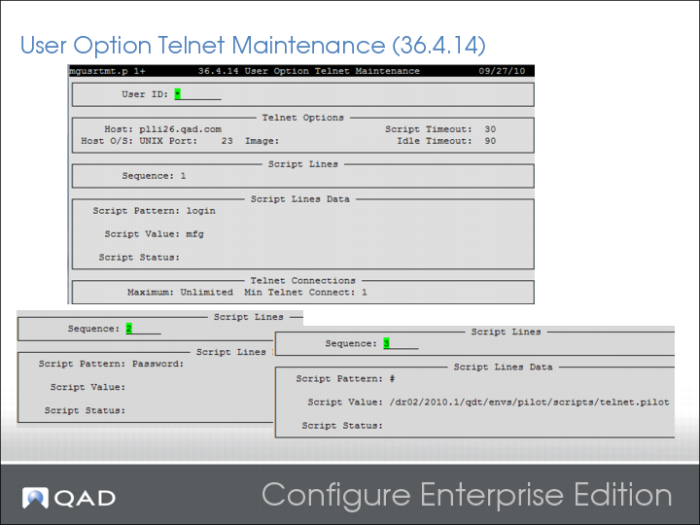
Telnet Maintenance
Used for running terminal mode sessions from within the .NET UI.
The values are examples only.
• Script Pattern: The operating system string to scan for. Example - Login:
• Script Value: The value to enter. Example – mfg
• Script Status: The optional value used for debugging (appears in the Java Console on the client when tracing is enabled).
When the screen detects a script value of “Password” it prompts for a password, with verification. This password is blanked out on the screen.
Once the sequences for logging in are entered, enter the sequences for running the telnet script that QDT created. It is worth running the script manually to see if it works.
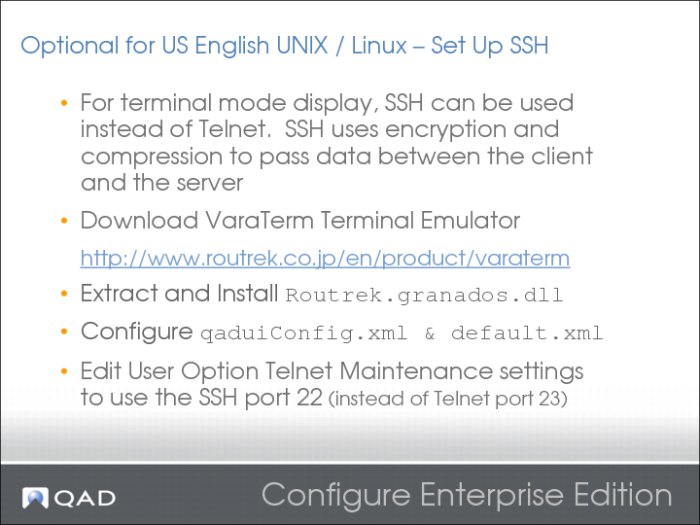
SSH Set Up
To set up SSH, follow these steps:
1 Download granados200.tar.gz from the following link to a temporary directory:
Note: This file is not included with QAD software because of encryption export control laws.
2 Extract Routrek.granados.dll from the archive using gunzip and tar. Use version 2.0.0.0 of the DLL signed by Routrek Networks or SSH does not work.
The gunzip and tar programs are Linux/UNIX utilities. Some WinZip versions support *.tar.gz files.
a Create granados200.tar:
gunzip granados200.tar.gz
b Extract the tar archive:
tar -xf granados200.tar
The DLL file is located in the temporary directory’s /bin directory.
3 Copy the DLL to <tomcat_install_directory>/webapps/<qadhome>, the default location.
4 Open qaduiConfig.xml in <tomcat_install_directory>/webapps/ <qadhome>/client/configs where qaduiConfig is your QAD UI configuration name.
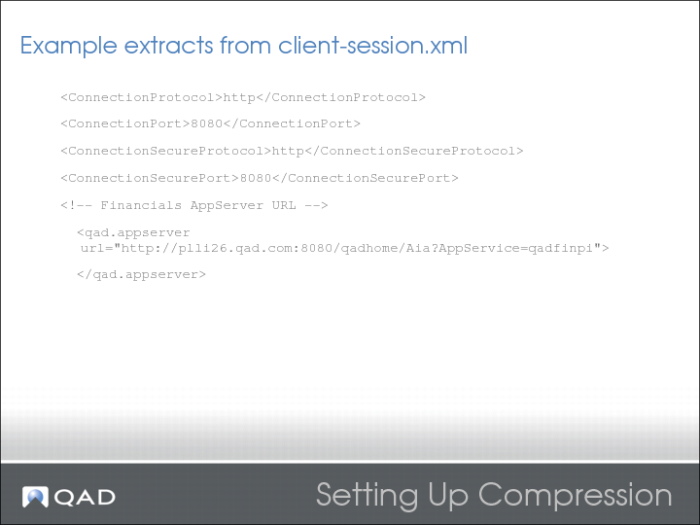
Note: The client session file defines the client session characteristics of the QAD .NET UI. By default, the file is located in:
<tomcat_install_directory>/webapps/<qadhome>/configurations/default/client-session.xml
In the following step, the elements you must edit in client-session.xml include <ssh_provider_url> and <terminal_protocol>.
5 Make the following changes:
a Update the DLL file location:
<add key="SshProviderUrl" value="${HomeServer}/ Routrek.granados.dll" />
${HomeServer} is automatically replaced with the HomeServer configuration value defined at installation time. All ${<variable>} references are resolved against other configuration keys. If a key is not found, the string is not replaced.
b Change the terminal protocol entry from telnet to SSH1 or SSH2 (SSH2 is preferred because it is more secure):
<add key="TerminalProtocol" value="SSH2" />
6 Save the configuration file.
7 Repeat these steps for default.xml in the same directory.
8 In User Option Telnet Maintenance (36.4.14), change the port from 23 to 22 (the default port for SSH).
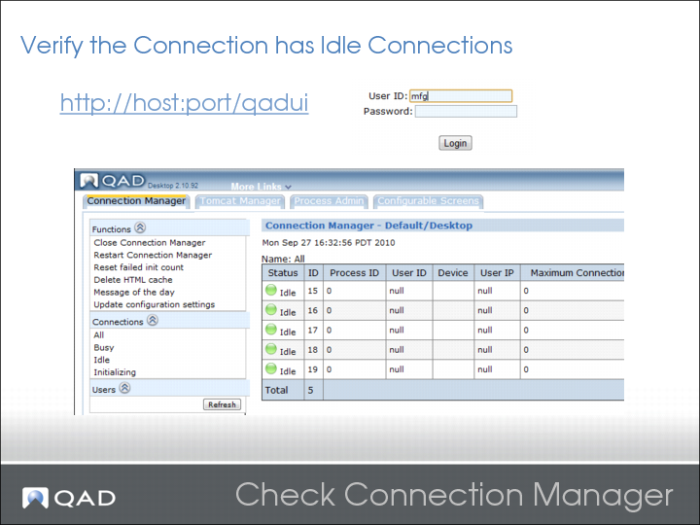
Check Connection Manager
If there are no idle sessions, enter Update Configuration Settings and verify that the Startup Script settings are correct. The QDT initially sets these settings during the configuration phase. Once they are correct, restart the connection manager and check for green/idle sessions.
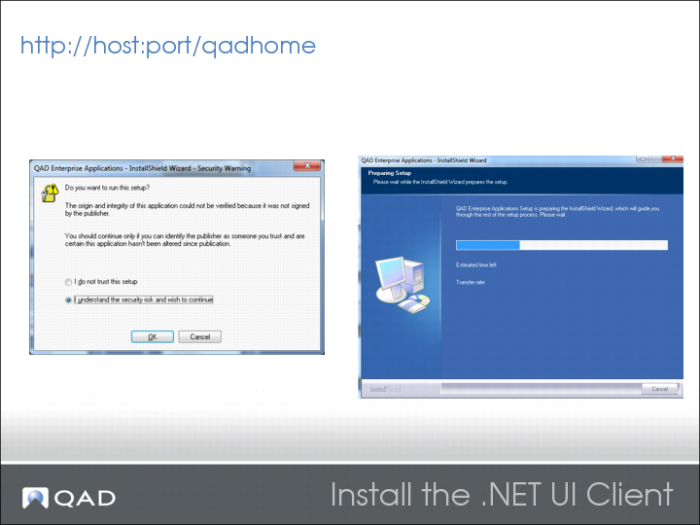
Install .NET UI Client
The installation can take quite a while across a Wide Area Network.
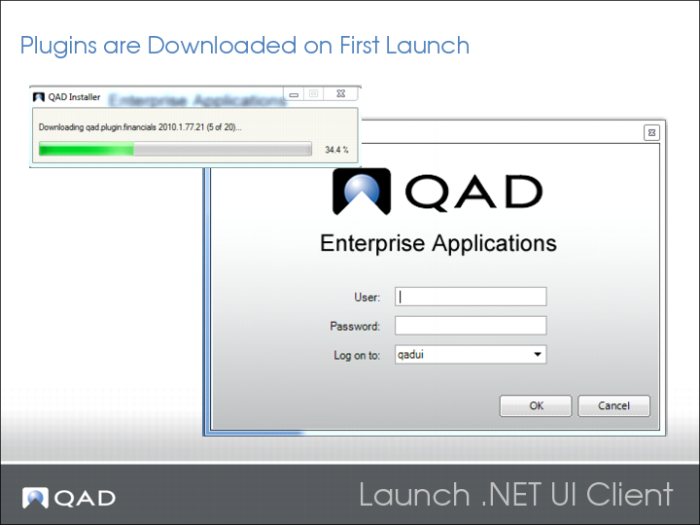
Launch .NET UI Client
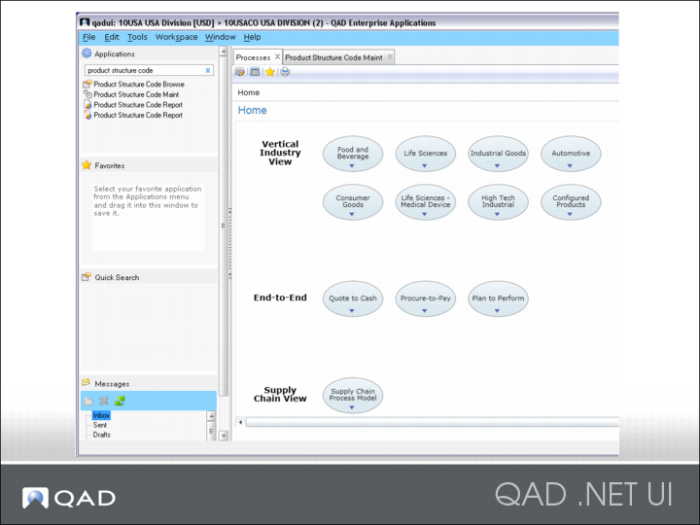
.NET UI
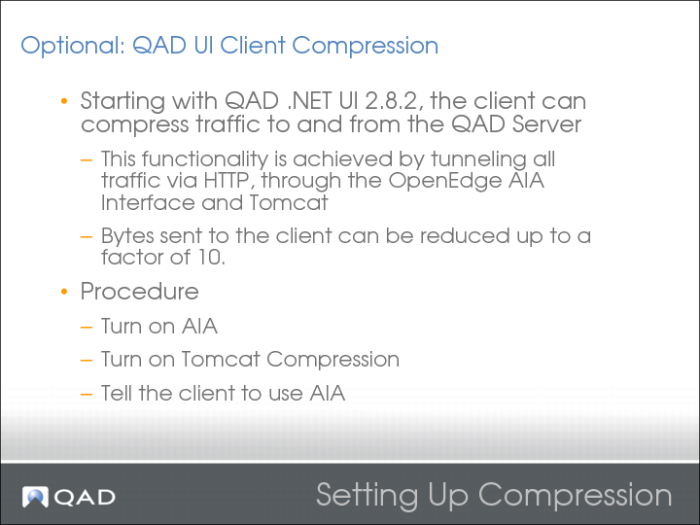
.NET UI Client Compression Set Up
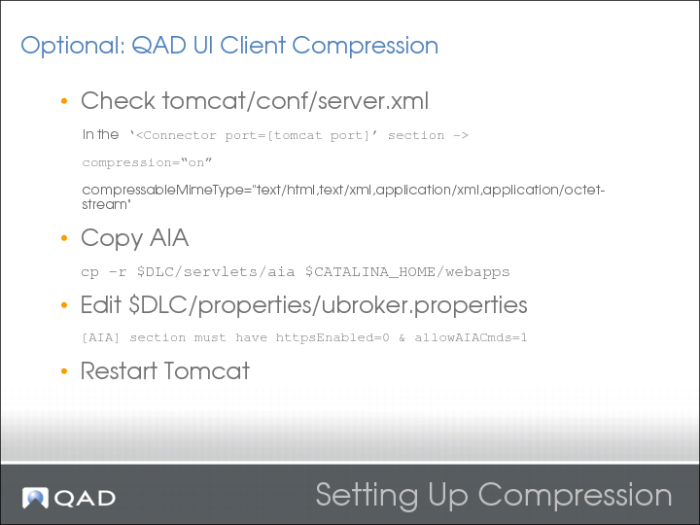
.NET UI Client Compression Set Up 2
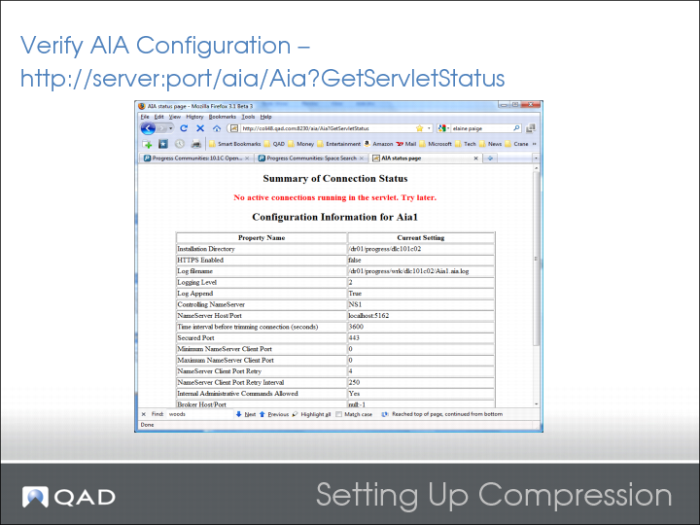
.NET UI Client Compression Set Up 3
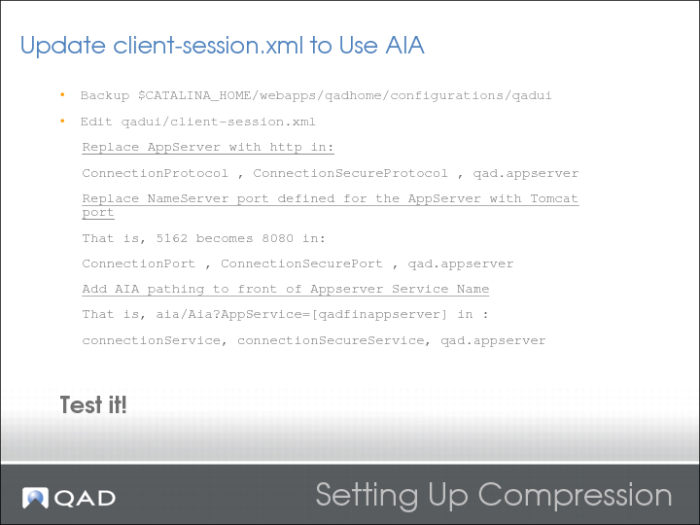
.NET UI Client Compression Set Up 4
.NET UI Client Compression Set Up 5
Adding Additional Languages
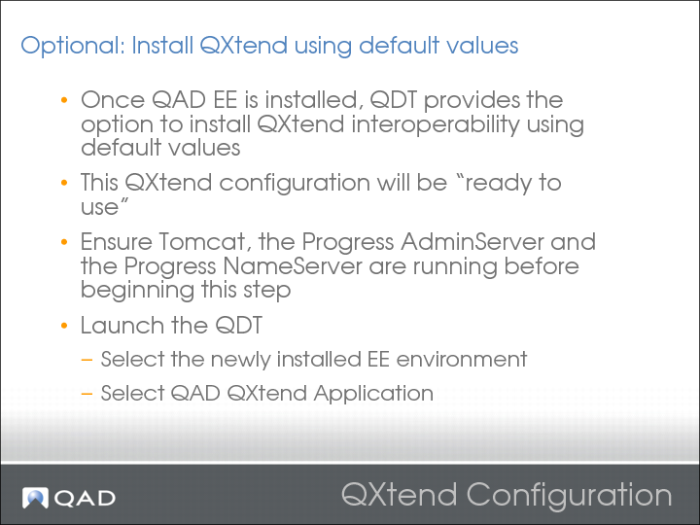
QXtend Configuration
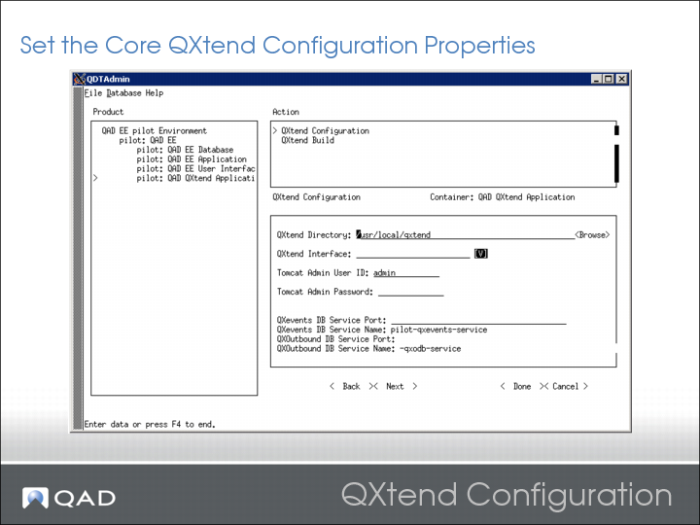
Ensure the codepage in $CATALINA_HOME/conf/tomcat-users.xml is utf-8 (Linux/UNIX/Windows) or windows-1252 (Windows).
QXtend Configuration 2
The Tomcat user ID and password are in $CATALINA_HOME/conf/tomcat-users.xml.
Ensure the codepage in $CATALINA_HOME/conf/tomcat-users.xml is utf-8 (Linux/UNIX/Windows) or windows-1252 (Windows).
QXtend Configuration 3
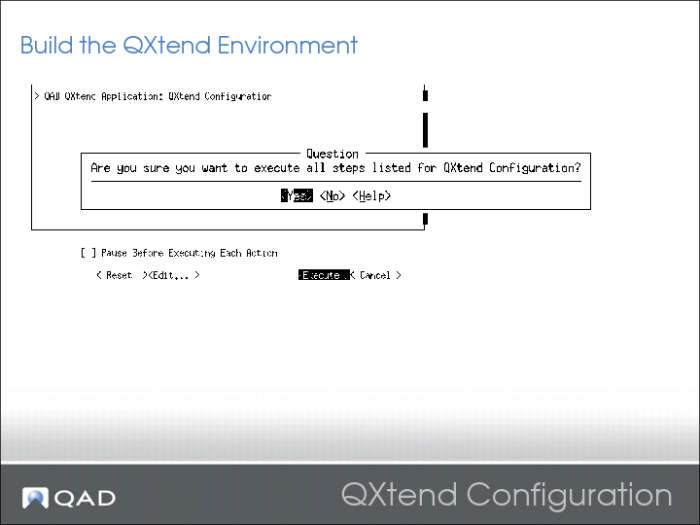
Select Execute.
The QXtend installation is integrated within QDT and usually occurs successfully. However, user errors such as providing incorrect installation parameters or changing the environment (for example, shutting down Tomcat during the installation) can result in an unsuccessful QXtend installation.
Two files are key to resolving an unsuccessful QXtend installation:
• <qxtend_install_directory>/repository.xml controls the QXtend installation. It holds all of the installation configuration parameters propagated from QDT. It also holds the Progress information about which components were installed.
• <qdt_install_directory>/envs/<environment>/scripts/antCmd.log records all of the QXtend status installation output information.
If you first look at <qxtend_install_directory>/repository.xml, you can identify which components are marked as “Incomplete” and which subsequent routines have a status of “error.” Once you identify the routine, you can look for it in the log file.
There are three ways to correct an unsuccessful installation. The first is to reattempt the QXtend installation from QDT.
Another option is to totally remove QXtend and use QDT to install QXtend again. This task is done as follows:
1 Move $TOMCAT/webapps/qxo.war to <qdt_install_directory>\build\QXRepository\Outbound\qxo-ui.war.
2 Move $TOMCAT/webapps/qxi.war to <qdt_install_directory>\build\QXRepository\Inbound
\qxtendserver.war.
3 Remove the qxi and qxo Web applications. This action includes the qxi and qxo directories under the Tomcat webapp directory and qxi.war and qxo.war.
4 Remove the QXtend destination directory. This is the directory for qxodb and qxoserver.
5 Remove the QXtend adapter. This is the qxtend directory under QAD_HOME.
6 Remove the qxevents database (located in the QAD_HOME db directory).
7 Remove the <qdt_install_directory>\envs\<environment_name>\scripts
\antCmd.log file.
QDT checks the log file for errors.
Note: If you encounter an error on the initial run, successive runs add lines to the bottom of the log. This behavior causes previous errors to remain in the log file where they can incorrectly be interpreted as real errors when you rerun the process.
8 Attempt to reinstall QXtend using QDT’s QXtend Configuration option.
The final option is to install QXtend using the stand-alone QXtend installer (not QDT) to resume the QXtend installation at the point where it failed. This approach provides greater insight into the installation process, but without the benefits that QDT offers.
The QXtend installer is available from the QAD download center. See Installation Guide: QAD QXtend for information about how to point to your configuration as a local file (<qxtend_install_directory>/repository.xml).
Note: You can change the parameters or configuration defined by QDT, but only using the QXtend installer’s GUI mode. See Installation Guide: QAD QXtend for more information.
Summary