Step 2: Run a Replenishment Request
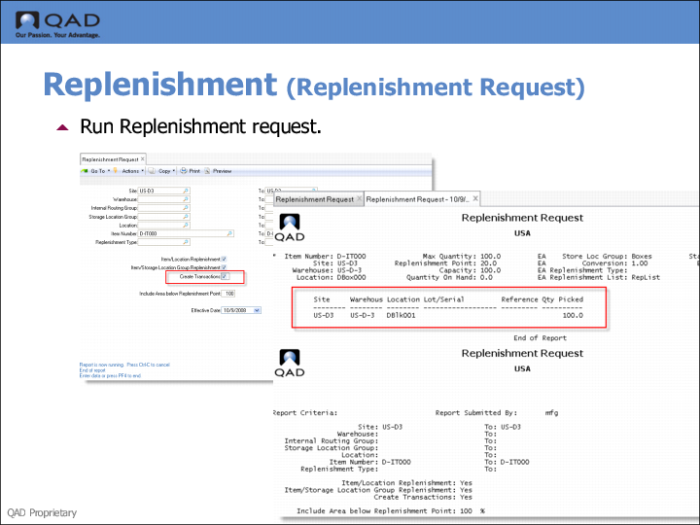
When you have created a replenishment list and linked it to a location or storage location group, you can start a Replenishment Request.
By default, the Create Transactions field is set to No. This lets you generate a report listing the replenishments to be done, simulate a picking, and have a list of all potential transactions, without actually creating the transactions. You can run this report several times using different percentages each time, until you select a quantity of work that can be handled by the current staffing levels.
When you are satisfied that the replenishment report contains a manageable workload, change the Create Transactions field to Yes, and then run the report again.
Field Descriptions
Create Transactions
Indicate whether to run a simulation of replenishment using the parameters you input. Entering default No in the fields allows simulation. To create transactions and carry out a replenishment request, change this field to Yes.
Effective Date
Indicate the date you want to run the replenishment request.
Include Area below Replenishment Point
This field enables you to adjust the value of the replenishment point defined in the Replenishment Location Maint or Replenishment-SLG Maintenance.
On-line Replenishment
You use this screen to carry out replenishment for one or more locations on-line.
End Date
Enter the last date the replenishment should be carried out.
Internal Routing Group
Enter the first internal routing group in a range for selecting items for replenishment.
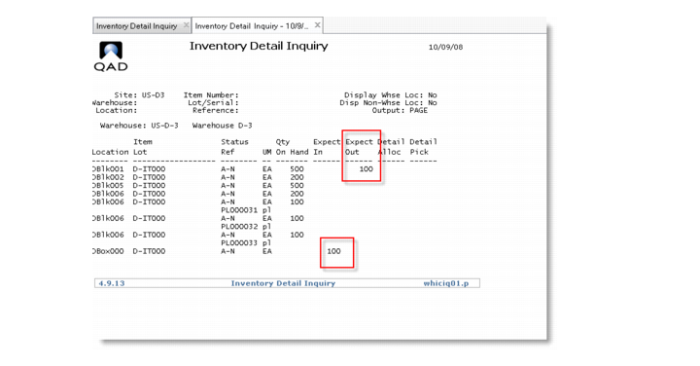
Once you run the request, you can recheck Inventory Detail Inquiry to see changes in the Expected In/Out quantities; see the following figure.
Recheck Quantity in Inventory Detail Inquiry