Logging into RF as User A or User B
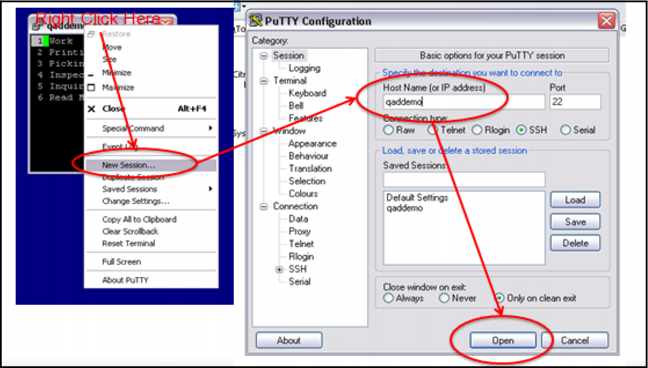
To log into the RF software as UserA, the user in many of the exercises in this training guide, use the following procedure:
1 Select the RF Putty application.
2 When the qaddemo.qad.com putty session starts, log in as demo.
3 Enter the password as qad.
The qaddemo Main Menu displays.
4 Enter R to start the RF warehousing software.
The RF login frame displays.
5 At the RF login frame, enter:
User ID = UserA
Password = qad
Site = 10-301
Warehouse = 01
Note: Alternatively, you can enter the login User ID = demoRF, Password = qad. This moves you to the third frame of the RF menu.
6 Set up QMI on the RF, using the same method:
User ID = qmi
Password = blank
7 Enter other user data, such as warehouse, WLG, location, or task.
Note: You can leave these fields blank, or accept the defaults unless otherwise noted in this training guide or by the instructor.
User A Login
Logging In as UserB
To login as UserB for the exercises, follow all steps for logging in as User A, but change the RF user ID to UserB.
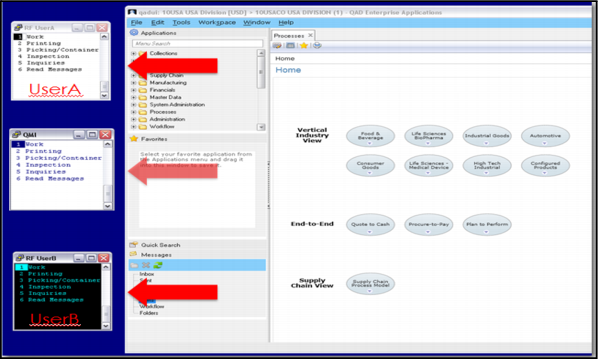
You should be able to see two putty sessions, one for User A and another for User B from the QAD database user interface.
User A and User B Sessions
With both UserA and UserB RF sessions setup, you can resize the windows (target 20x10) and align them to fit within the QAD screen. This helps you visualize the RF interactions with QAD Warehousing.
Optionally, you can set up the QMI RF session to demonstrate real-time task assignment and labor management.
Important: Putty RF sessions do not reboot from a save snapshot. For a demo, you can retrieve a snapshots from QPC, but you need to set up the RF sessions again.
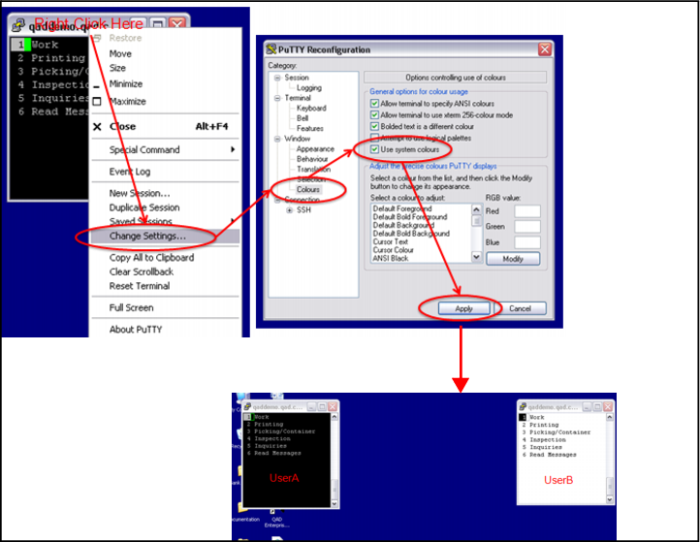
Reconfigure User Screen Color