Configuring QDT
To configure QDT to use the most recent Progress version during upgrades or conversions, use the following steps:
1 Shut down the existing environment using the script:
<QDT_install_directory>/envs/<environment_name>/scripts/stopenv.<environment_name>
2 Shut down the existing Progress AdminServer:
proadsv –stop
3 Install the new Progress and/or Tomcat version (see the Progress/Tomcat installation documentation).
4 After the new Progress version is installed, start the AdminServer:
proadsv –start
5 Update the $DLC and $CATALINA_HOME environment variables to use the new Progress and Tomcat versions.
6 Start QDT.
Windows: Select Start|All Programs|QAD Deployment Toolkit|Start QDT.
Linux/UNIX: Go to <qdt_install_directory> and run the qadinst installation script.
For Red Hat 6 environments, run the qadinst_RH6_64bit or qadinst_RH6_32bit executable. See Installation Guide: QAD Enterprise Edition - Progress Database for more information regarding Red Hat 6 requirements.
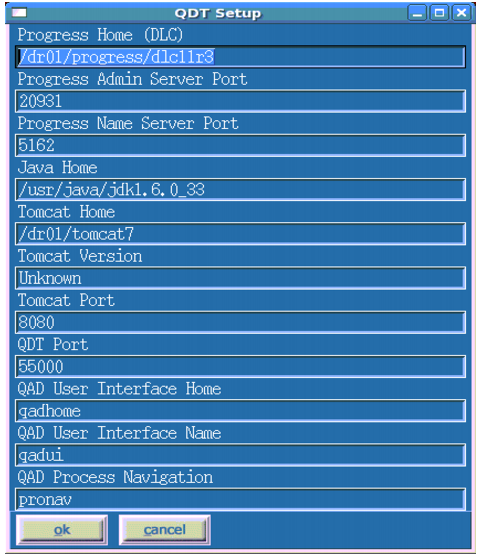
7 Select Edit|System Default Settings from the QDT Menu.
Selecting System Default Settings
8 Change the Progress Home (DLC) field to the new Progress version home directory. Also update the Tomcat home field to the new Tomcat home directory.
Progress Home (DLC)
9 If the Name Server Port values for the new Progress install and previous version are different, update the port number here. Perform the same check for the Tomcat port. Modify the port number as needed.
10 Click OK. The internal references in QDT are adjusted so that clicking the Admin button starts QDTAdmin using the new Progress version.
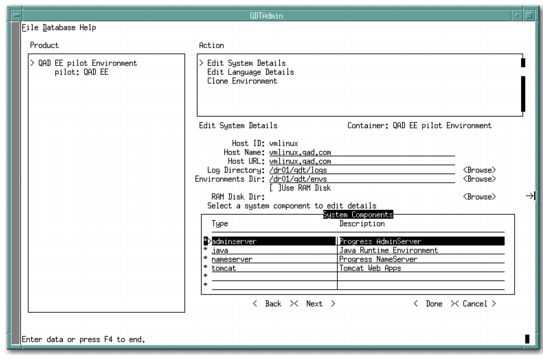
11 Click Admin to start QDTAdmin.
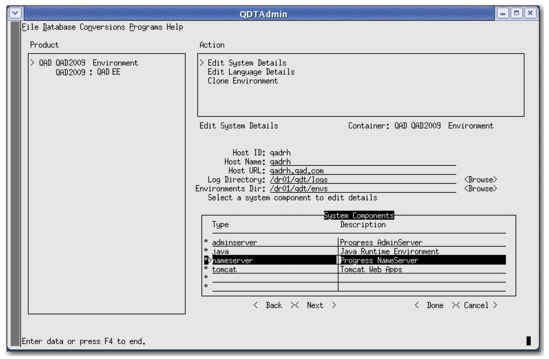
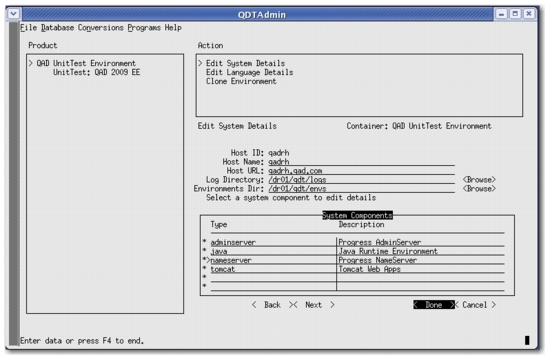
12 In the Products window, select the environment to update.
13 Select Edit System Detail in the Action window.
14 Tab to AdminServer until it is highlighted, then press Enter to select it from the System Components list.
System Details List
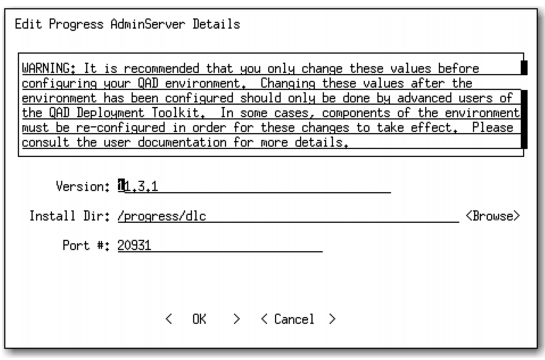
15 Enter the new Progress version in the Progress field.
Specify the Progress Version
16 Change the Install Dir field by typing in the new Progress directory location or by selecting the Browse option.
If you are using the Browse option, navigate to the new Progress directory location, select any file, and press Enter.
Changing the Install Directory Field
17 Select OK and return to the Edit System Details screen.
Edit System Details Screen
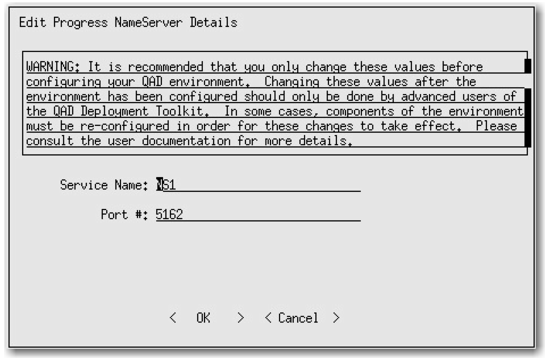
18 On the Edit System Details screen, tab and/or scroll to select the NameServer value until it is highlighted. Then press Enter to select it from System Components list.
Specifying the Progress Name Server
19 Verify that the port number is correct and select OK.
Verifying the Port Number
20 Then select Done.
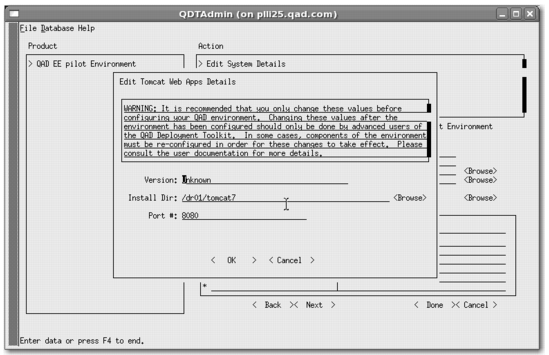
21 Scroll to the Tomcat value and press Enter. Modify the installation directory to point to the new Tomcat installation.
Specifying the Tomcat Value
22 Select OK.
Committing Changes
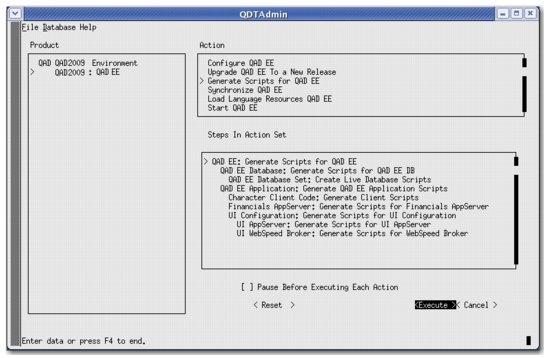
23 Execute the Generate Scripts for QAD EE menu option.
Note: If this step is shown as complete, you may have to repeat it.
Execute Generate Scripts for QAD Enterprise Edition
24 Quit QDT and check the following files to ensure the NameServer port and Progress version were updated correctly.
In <QDT_install_directory>/envs/<environment_name>/configs check:
• server.xml
• cbserver.xml
In <QDT_install_directory>/envs/<environment_name>/scripts check:
• startqadfin*.ksh
• stopqadfin*.ksh
• checkqadfin*.ksh