QXtend Configuration
Following Enterprise Edition installation, QDT provides the option to install QXtend.
Note: Attempts to install QXtend on systems using Tomcat 6 on Windows Server 2008 or 2012 can fail because of a known Tomcat issue. The problem occurs because the tomcat-users.xml file references an invalid code page. To prevent this issue, change the codepage value in tomcat-users.xml to utf-8 or windows-1252. For further information, refer to:
https://issues.apache.org/bugzilla/show_bug.cgi?id=46908
Edit the tomcat-users.xml file to add one or more roles for the QAD admin user. For Tomcat versions before 6.0.30, add the manager role. For Tomcat 6.0.30 and later and Tomcat 7, add the manager-gui and manager-script roles.
To install and configure QXtend, do the following:
1 Verify the following are running:
• Tomcat
• Progress admin server
• Progress name server
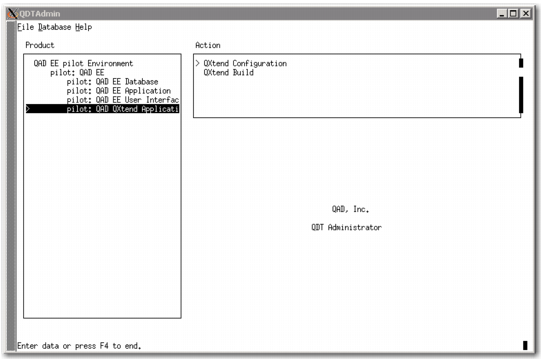
2 Select QAD <environment_name> |QAD QXtend Application under Product.
3 In the Action pane, select QXtend Configuration.
QXtend Configuration
4 Select Edit.
5 Enter the following information in the QXtend Configuration screen:
• QXtend Directory: Enter the QXtend installation directory (you cannot edit the path if it was previously used for a successful QXtend installation).
• QXtend Interface: This field is automatically populated with existing QXtend installations. If multiple environments exist, they are listed under this field in a drop-down menu.
• Tomcat Admin User ID: Enter the Tomcat Admin User ID as specified in <tomcat_install_directory>/conf/tomcat-users.xml. The default is admin.
• Tomcat Admin Password: Enter the Tomcat Admin Password as specified in <tomcat_install_directory>/conf/tomcat-users.xml. The default is mfgpro.
• For Windows, enter port values for the QXEvents DB Service Port and the QXOutbound DB Service Port. The ports specified here must be present in the Services file.
6 Select Next.
7 Select Execute.
8 QDT prompts you to execute all of the steps listed for QXtend Configuration. Select Yes.
9 QDT prompts you to clear the log. Select Yes.
10 The log file is displayed. It provides the QXtend installation status. Select Close.
11 When the processing finishes, select Close.
12 In the QDT Action pane, select QXtend Build.
13 Select Execute.
14 QDT prompts you to execute all of the steps listed for QXtend Build. Select Yes.
15 QDT prompts you to clear the log. Select Yes.
16 QDT prompts you to start Tomcat and click OK once it has fully started. Click OK.
17 Select Close.
18 Wait for the processing to finish. If the installation was successful, the message “QXtend Configuration completed successfully” is displayed. Select Close.
QDT-based QXtend installs usually succeed. However, user errors such as providing incorrect installation parameters, changing the environment, or shutting down Tomcat during the installation can result in an unsuccessful QXtend install.
Two files are key to resolving an unsuccessful QXtend installation:
• <qxtend_install_directory>/repository.xml controls the QXtend installation. It holds all of the installation configuration parameters propagated from QDT. It also holds the Progress information about which components were installed.
• <qdt_install_directory>/envs/<environment>/scripts/antCmd.log records all of the QXtend status installation output information.
If you first look at <qxtend_install_directory>/repository.xml, you can identify which components are marked as “Incomplete” and which subsequent routines have a status of “error.” Once you identify the failed routine, you can look for it in the log file.
There are three ways to correct an unsuccessful installation. The first is to reattempt the QXtend installation from QDT.
Another option is to totally remove QXtend and use QDT to install QXtend again. This task is done as follows:
1 Move $TOMCAT/webapps/qxo.war to <qdt_install_directory>\build\QXRepository\Outbound\qxo-ui.war.
2 Move $TOMCAT/webapps/qxi.war to <qdt_install_directory>\build\QXRepository\Inbound
\qxtendserver.war.
3 Remove the qxi and qxo Web applications and the qxi and qxo directories under the Tomcat webapp directory and qxi.war and qxo.war.
4 Remove the QXtend destination directory (the qxodb and qxoserver directory).
5 Remove the QXtend adapter from the qxtend directory under QAD_HOME.
6 Remove the qxevents database from the QAD_HOME db directory.
7 Remove the <qdt_install_directory>\envs\<environment_name>\scripts
\antCmd.log file.
QDT checks the log file for errors.
Note: If you encounter an error on the initial run, successive runs add lines to the bottom of the log. This behavior causes previous errors to remain in the log file where they can incorrectly be interpreted as real errors when you rerun the process.
8 Back up the ubroker.properties file and remove references to qxo and qxi from the file.
9 Attempt to reinstall QXtend using QDT’s QXtend Configuration option.
The final option is to install QXtend using the stand-alone QXtend installer (not QDT) to resume the QXtend installation at the point where it failed. This approach provides greater insight into the installation process, but without the benefits that QDT provides.
The QXtend installer is available from the QAD Download Center or QAD Store. See Installation Guide: QAD QXtend for information about how to point your configuration to the QDT-generated configuration (<qxtend_install_directory>/repository.xml) as a local file.
Note: You can change the parameters or configuration that QDT defines, but only using the QXtend installer’s GUI mode. See Installation Guide: QAD QXtend for more information.