Financial Report Run
Using Financial Report Run, you can run all reports of Financial Report Writer.
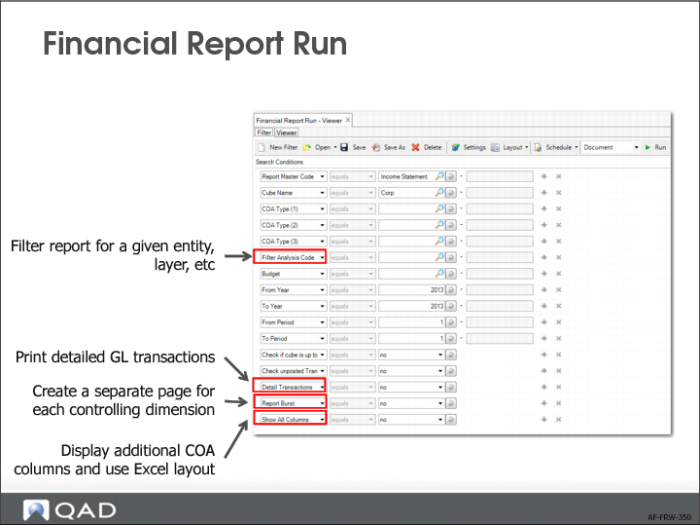
You specify a report master code and the a report cube to retrieve the balances from.
Next, you specify the selected period range (from-to).
The selection screen has a COA Type option that allows you to explode the report in detail (for example, individual GL accounts, cost centers, and so on).
Another option allows you to specify a Filter Analysis Code. Using this option, you can filter the entire report for a given entity, layer, and so on. If you have configured a report analysis code to have a controlling dimension and want to generate reports for that dimension, specify the analysis code in this field. To create separate sub-reports for the controlling dimension, you must also set the Report Burst selection criteria to Yes.
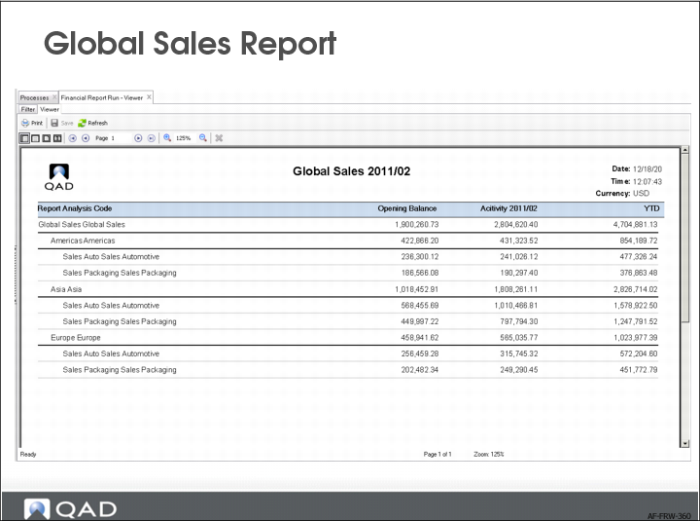
You click the Run button and, within seconds, you have the result on the screen or in any other desired output format. For example, you can create a generic report for all entities and run the report for a given single entity by adding a filter for that entity.
You can print transaction details on the report. To use this option, you must also select All or Selected in the Print GL Transactions field on the report master. If you set the Detailed Transactions field to Yes, but have not configured the required setup in Report Master Create or in Report Tree Maintenance, the report displays an error message.
If you have set up controlling dimensions for report analysis codes, a Report Burst selection setting of Yes allows you to create a separate report page for each controlling dimension. You must also specify the report analysis code with the controlling dimension in the Filter Analysis Code. Select No in Report Burst to create a separate report page for each controlling dimension.
You also have the option to display additional columns on the report. To use this option, select Yes in Show COA Columns. When you set Show COA Columns to Yes and Detail Transaction to Yes, the report displays additional COA columns and uses an Excel layout to allow the additional COA columns to display.
If you set Show COA Columns to Yes, but the COA Type fields are blank and the Detail Transactions field is set to No, an error message displays indicating that the Show COA Columns option requires a COA Type and that Detail Transactions must be set to Yes.