QAD 2016 Enterprise Edition Training Guides
>
Financials-Advanced
>
Self-Billing
>
Self-Billing Options
Self-Billing Options
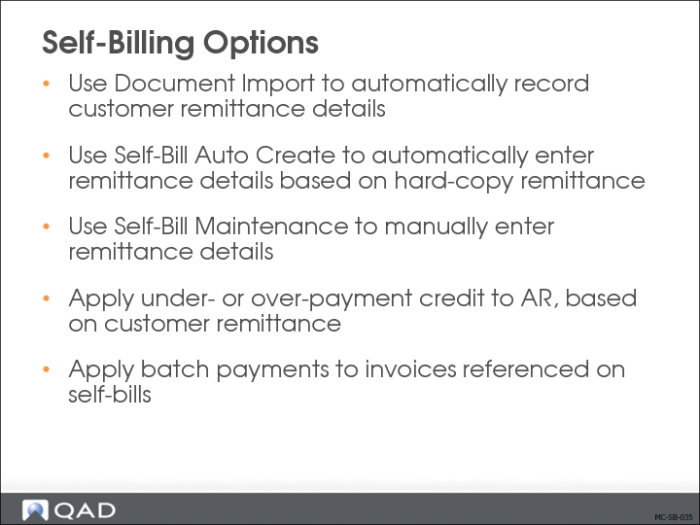
A number of self-billing options are available to you. You can:
• Create new self-bills by automatically loading customer remittance information using EDI Document Import (35.13).
• Use Self-Bill Auto Create (27.6.12.4) to automatically create self-bills by entering information from hard-copy customer remittance advice.
• Use Self-Bill Maintenance (27.6.12.1) to manually create self-bills.
In addition, you can use self-bills as the basis to:
• Apply under- or over-payment credit to accounts receivable.
• Apply batch payments to invoice references on self-bills.
Self-Billing—Prerequisite Data
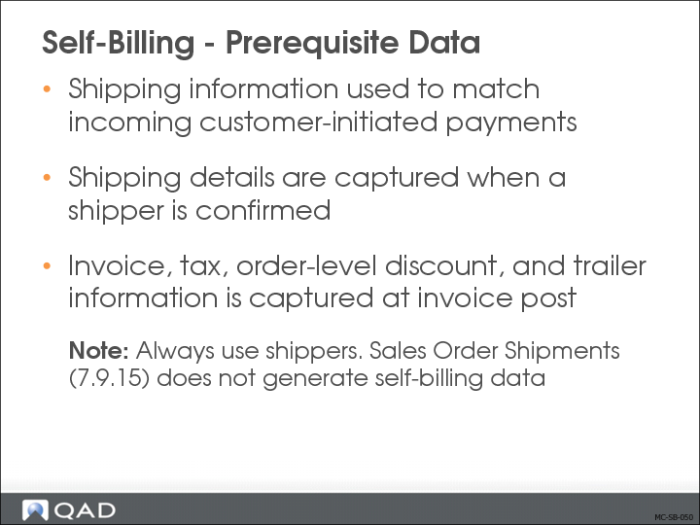
AR Self-Billing uses processed shipping information to match incoming customer-initiated payments. The system must first process shipping information for the incoming remittance.
Shipment details are captured at the time a shipper is confirmed. Invoice, tax, order-level discount, and trailer information is captured at the time of invoice posting.
Note: The Sales Order Shipments (7.9.15) does not capture self-billing information.
Activating Self-Billing
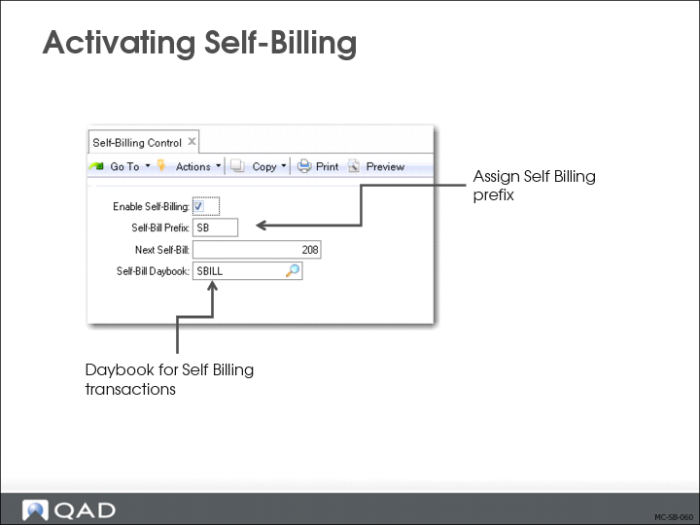
You activate self-billing using Self-Billing Control (27.6.12.24). The following describes the three fields other than the Enable Self-Billing field:
Self-Bill Prefix
Define the three-character, self-bill numbering prefix according to your requirements. In cases where the customer supplies the remittance prefix and number, you can choose to leave this field blank.
Next Self-Bill
Enter the next self-bill number (maximum 22 characters). In cases where the customer supplies the remittance number, you can choose to leave this field blank.
Self-Bill Daybook
Select a self-billing daybook to use for self-billing transactions. You must define at least one daybook of type Self-Bill Invoices in the system.
Setting Up Self-Billing for Customers
Configure the following self-billing fields in Customer Data Maintenance (2.1.1):
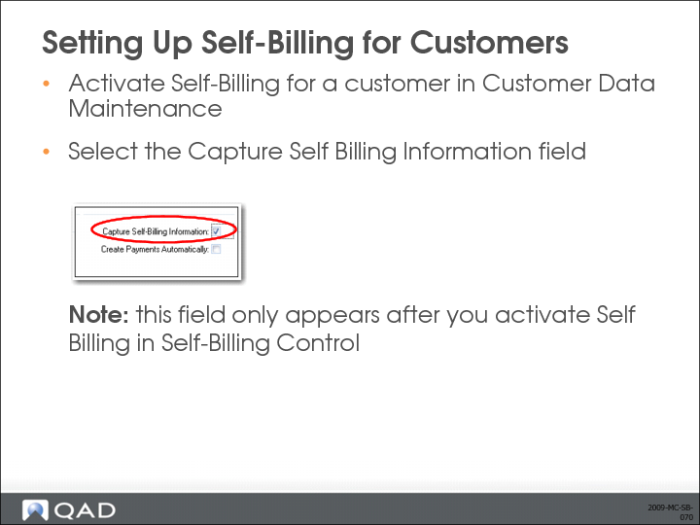
Capture Self-Billing Information
Select this field to capture self-billing information for this customer bill-to address. When sales orders or schedules are used with shippers, this field triggers the creation of shipment invoice cross-reference records for every line item of a shipment. These cross-reference records are updated when the invoice is created, and can then be retrieved by the Self-Billing program. The records do not include sales order shipment postings.
This field is displayed only after you activate self‑billing in Self‑Billing Control.
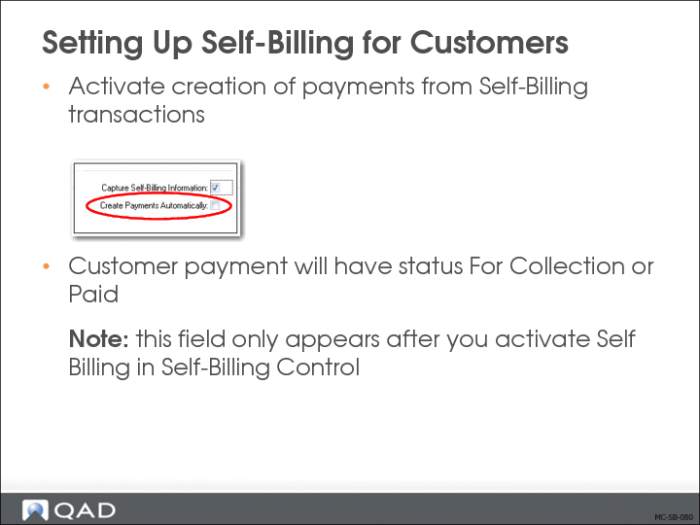
Create Payments Automatically
Select this field to automatically create a customer payment from the self-bill transaction. The customer payment is created with a status of For Collection, or Paid. The default customer bank account to be used for the payment is selected on the Banking tab of the Customer record, and you must also select a status for the payment from a drop-down menu on this tab.
You can then process the payment using the standard customer payments flow. If you do not select this field, you process the self-billing invoice using any of the other customer payment processes or a banking entry.
This field is displayed only after you activate self‑billing in Self‑Billing Control.
Designate Customer Bank Account for Use with Self-Billing
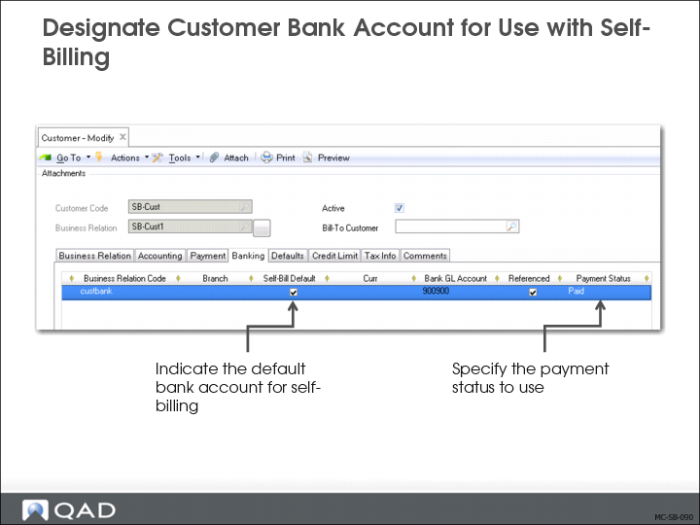
You must indicate the bank account to use for a customer’s self-bills by selecting the Self-Bill Default field for the account in the Banking tab of Customer Create or Customer Modify.
As stated previously, the customer payment is created with a status of For Collection (if this status is already defined for the customer), or Paid (if no status is defined for the customer). Therefore, you must ensure that both these statuses are defined in Customer Payment Status Create for the self-bill default customer bank GL account.
You must also specify a status for self-bill payments from the customer bank account using the Payment Status drop-down list in the Banking tab of Customer Create or Customer Modify. Ensure that you assign the status of Paid.
Self-Billing Data
Self-Bill Auto Create
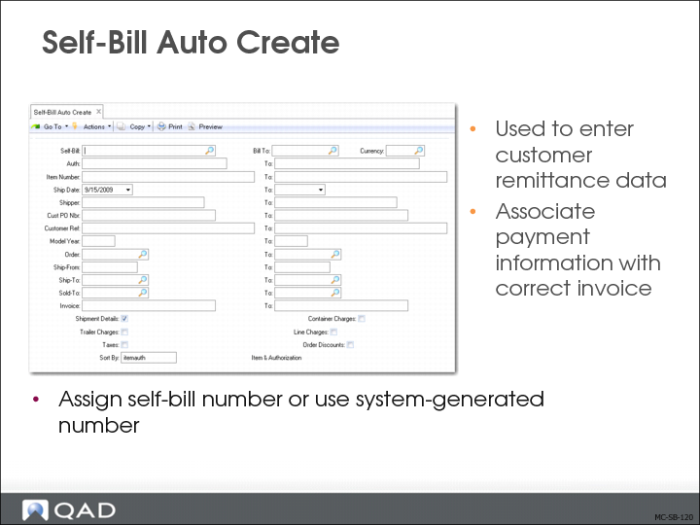
Self-Bill Auto Create (27.6.12.4) lets you enter customer remittance advice into your system. Specify a range of selection criteria as shown on the customer’s remittance advice, and then associate the payment information with the correct invoice. You can assign a self-bill number to the document you are creating, or let the system auto-generate the self-bill number.
To create a self-bill:
1 Enter a previously-created self-bill number, or leave Self-Bill blank when creating a new self-bill.
2 Enter any identifying information in the auto-create selection screen. Enter as much or as little information as you have from the customer’s remittance advice you are re-creating. Significant information you should enter is:
• Shipper number
• Sold-to
• Ship-to
• Item number
• Date of shipment
• Authorization number
Note: The more selection criteria you provide, the narrower and more accurate your selection becomes.
3 Specify whether to include shipment details, trailer charges, taxes, container charges, line charges, or order discounts on the selection display screen.
When you click Next in the Self-Bill Auto Create main screen and if the system can locate shipper data that matches your selection criteria, the Workbench frame displays.
See
QAD Financials User Guide for more information on Self-Bill Auto Create.
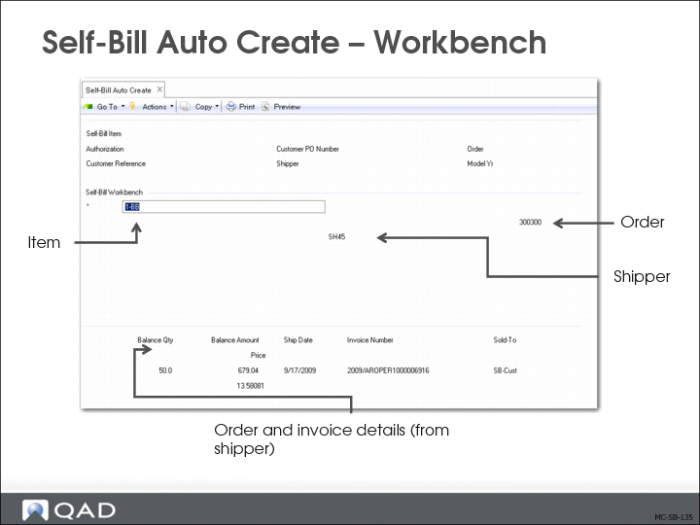
Self-Bill Auto Create — Workbench
The system analyzes your customer’s shipment data and displays a list of possible shipper numbers that might be associated with the customer’s remittance advice document. This information is displayed in the screen according to the sort order you previously indicated.
Use the workbench area to refine your selection by deselecting any lines that should not be referenced by this self-bill. The item number is the customer’s item number, which was originally used on the order.
• Use Next/Previous functions to navigate from entry to entry.
• Deselect any entry that does not belong on the self-bill. An asterisk (*) indicates selection.
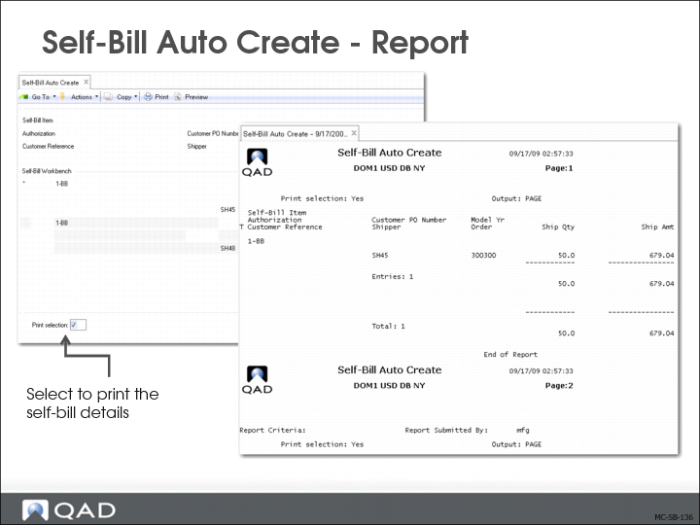
Self-Bill Auto Create — Report
You can print a report of the shipment details for which you created self-bills by selecting the Print Selection field at the end of the Workbench frame. You then select the output type and click Next to generate the report.
See
QAD Financials User Guide for more information on Self-Bill Auto Create.
Importing Self-Bills
Use Document Import (35.1) to import EDI self-bills into the system with EDI eCommerce. This function loads self-bill information from an EDI file and processes it to create a self-bill document in your QAD database.
During import, the system tries to associate incoming electronic self-bill data with invoice data. Once loaded into your database, the information can be manually modified using Self-Bill Maintenance.
EDI self-bill lines should always be associated with a QAD invoice number. However, the system might not be able to make this association for some self-bill lines due to incorrect or incomplete information in the EDI file. These problems are reported in the EDI load report produced during import.
Lines that the import process cannot associate are tagged as adjustment entry lines. You can manually associate adjustment self-bill lines to the correct invoice in Self-Bill Maintenance.
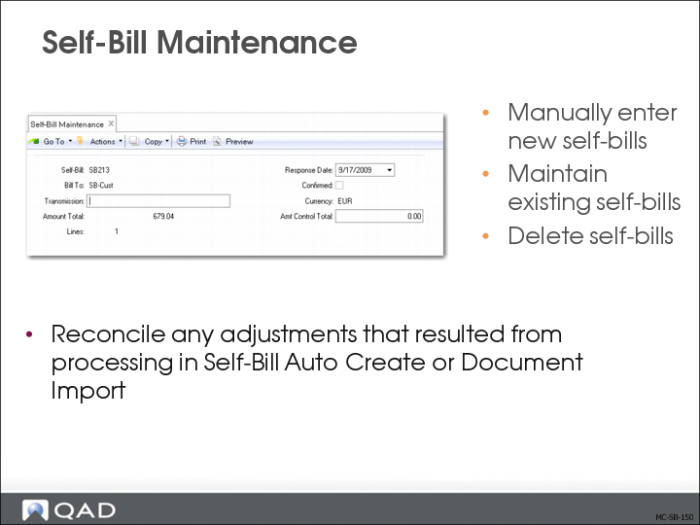
Self-Bill Maintenance
Use Self-Bill Maintenance (27.6.12.1) to manually enter new self-bills and delete and maintain existing self-bills. Use this function to reconcile any adjustment lines that result from processing a self-bill using Self-Bill Auto Create (27.6.12.4) or Document Import (35.1).
In certain situations, you might not be able to associate some lines from a customer’s remittance advice to the self-bill you are creating. These lines are labeled adjustment self-bill lines. You must manually associate these lines with the corresponding invoice lines using Self-Bill Maintenance (27.6.12.1).
Self-Bill Maintenance — New Self-Bill
You usually use Self-Bill Auto Create or Document Import to create a new self-bill. However, under some circumstances you might have to use Self-Bill Maintenance to create a new self-bill.
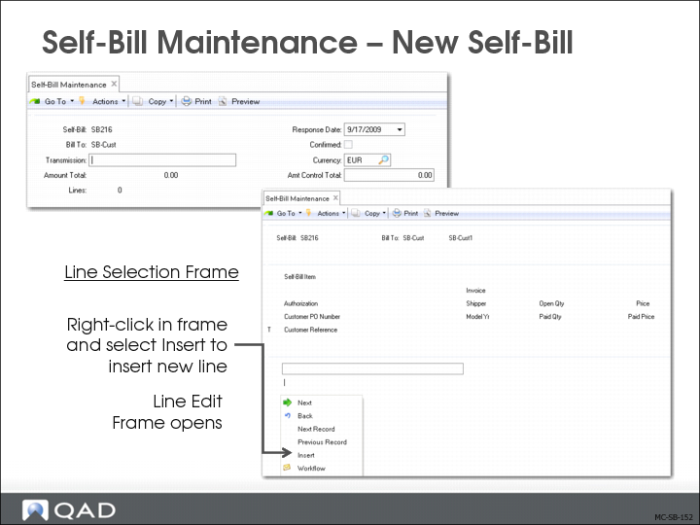
Follow these steps to create a new self-bill using Self-Bill Maintenance. In the program header do the following:
1 Enter a new self-bill number.
Leave blank for the system to create a new number from the information in the control program.
2 Enter or select a customer bill-to address.
On a new self-bill, information defaults for Response Date and Currency.
3 Edit Transmission, Response Date, and Amt Control Total as needed. Press Next.
A self-bill line selection frame is displayed.
4 Right-click the blank self-bill line and choose Insert to insert a line.
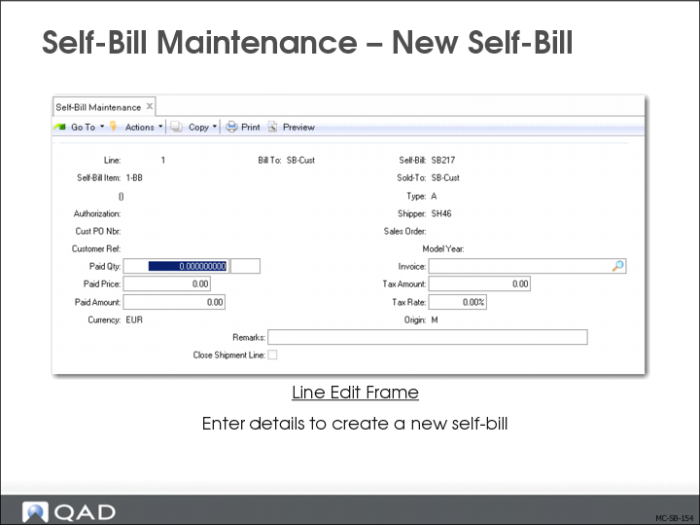
The self-bill line edit frame is displayed.
5 Enter the Self-Bill Item or Sold-To.
6 Enter any other identifying information available. If you enter an item number associated with a customer item in Customer Item Maintenance (1.16), the customer item number is displayed below the Self-Bill Item field.
When you press Next, the system matches shipment invoice records based on the information in these fields.
For Type:
• Leave blank if entering a shipment line.
• Enter A for an adjustment line. Use this code when creating an adjustment line to reference a write-off.
• Enter C for trailer charges line.
• Enter D for discount line.
• Enter T for tax line.
• Enter L for line charges line.
• Enter X for container charges line.
7 When the system finds multiple matches for the information you enter, a shipment selection frame is displayed. Use this frame to select the correct line.
• Use the arrow keys to scroll from line to line.
• Press Enter to select the correct line.
If only one match is found, or after you select the correct shipment line from the line match frame, the financial detail frame is displayed.
8 Enter or edit financial details and remarks for the line. Press Next.
Matching shipment information is displayed in the last frame.
See
QAD Financials User Guide for more information on Self-Bill Maintenance.
Self-Bill Maintenance — Modifying an Existing Self-Bill
After using Document Import to process EDI self-bills or Self-Bill Auto Create to automatically create self-bills, use Self-Bill Maintenance to make any adjustments.
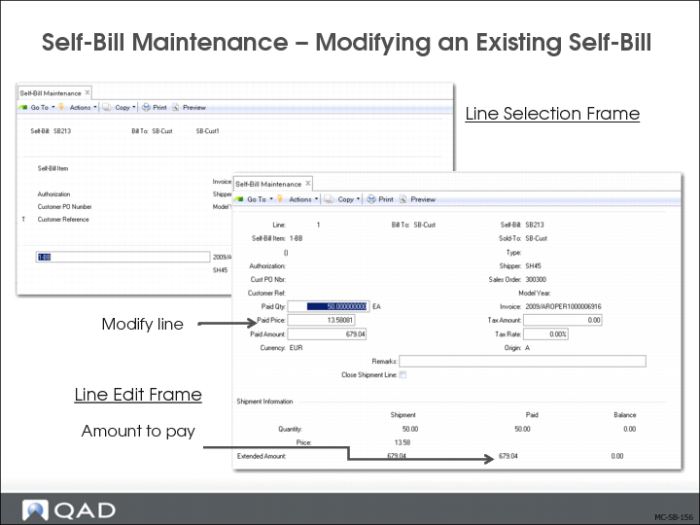
Once the header information has been entered into the Self-Bill Maintenance header or you have finished the initial auto-create procedure, the line selection frame is displayed. Use this frame to edit, delete, or add new self-bill lines. Use this frame also to link adjustment self‑bill lines to shipments, which in effect changes self‑bill adjustment lines to shipment self‑bill lines.
When modifying an existing self-bill in the Self-Bill Maintenance, you cannot edit the Self-Bill, Bill-To, or Currency fields in the header, which default from Self-Bill Auto Create.
Use the following steps to modify a self-bill:
1 In the header frame of Self-Bill Maintenance, enter the Bill-To and Self-Bill number of the self-bill you want to modify.
2 Click Next twice.
3 In the Line Selection Frame, select the self-bill line that you want to edit and press Next.
The Line Edit Frame opens.
4 Adjust the quantity, price, or amount to pay as required.
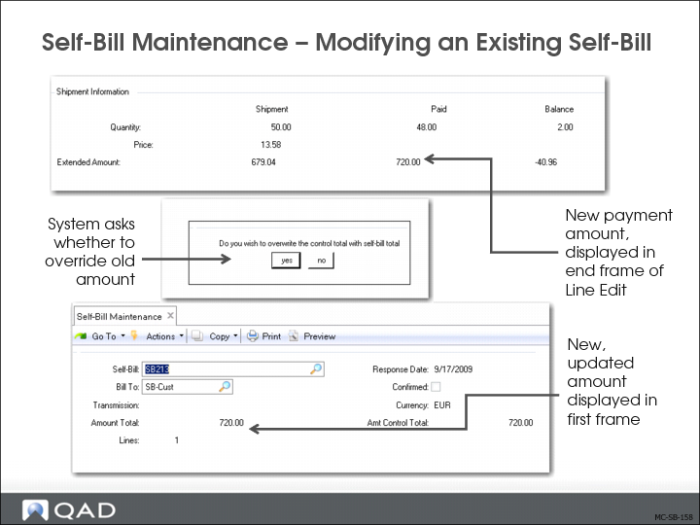
The new amount is displayed at the end of the Line Edit frame (see the next slide).
5 When you click Next, the system asks you whether you want to overwrite the original self-bill amount.
6 When you click Next and eventually return to the first frame in Self-Bill Maintenance, the frame displays the updated amount (720 Euros, the original amount was 679.04 Euros).
See
QAD Financials User Guide for more information on Self-Bill Maintenance.
Deleting Self-Bills
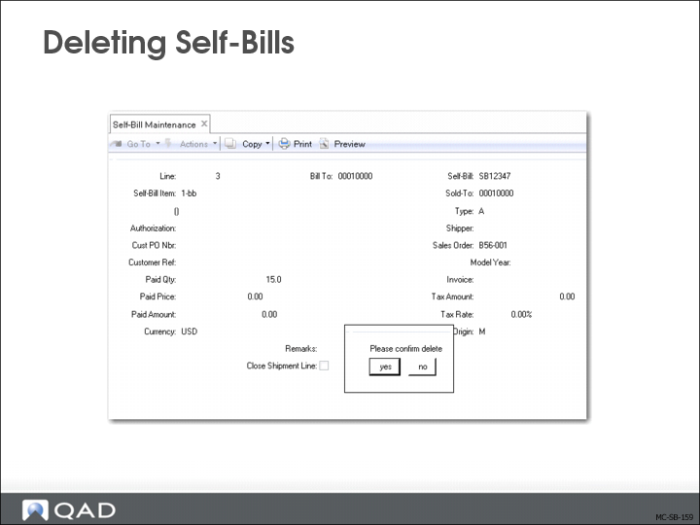
You can use Self-Bill Maintenance (27.6.12.1) to delete an entire self-bill or a specific self-bill line. When a self-bill or a self-bill line is deleted, any shipment-invoice cross-reference records associated with it are released and the invoice lines can be selected on another self-bill.
Note: A self-bill or self-bill line cannot be deleted if payment has been applied to it.
To delete a self-bill line:
1 Select the self-bill that has the line you want to delete.
2 In the line selection frame, select the line to delete. Press Delete.
The self-bill line detail frame and a delete confirmation prompt appear.
Applying Payments to Self-Bills
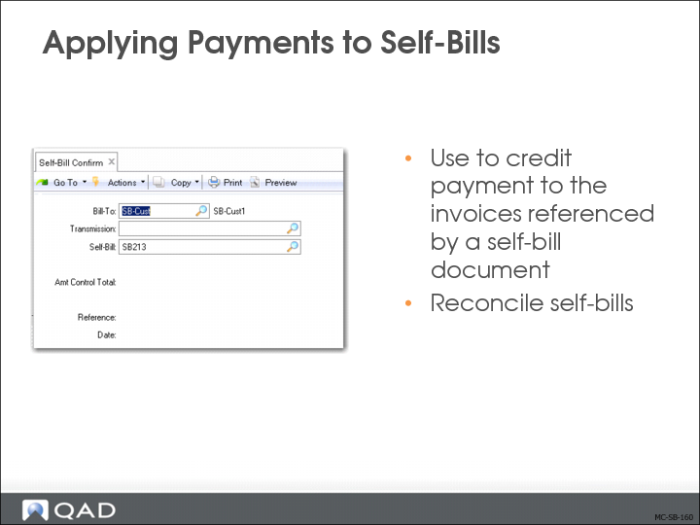
Once a self-bill has been created and payment has been received, payment must be credited to the appropriate QAD invoices. Use Self-Bill Confirm (27.6.12.7) to apply payment to all of the invoices that are referenced by a self-bill document.
Important: You cannot apply payment to a self-bill if the Amt Total does not equal the Amt Control Total.
When you use this program to apply payment, the payment is applied to the invoice specified on the self-bill detail line.
When a payment is applied, four different situations are possible:
• Payment is credited to the invoice.
• When no invoice is specified—the Invoice field is blank—the amount paid is applied to unapplied cash with a reference to the self-bill and the self-bill line.
• When payment is greater than the amount open on the invoice, the overpayment amount is applied to unapplied cash with a reference to the invoice.
• When payment is greater than the invoice line, the overpayment is applied to unapplied cash with a reference to the self-bill and self-bill line.
See
QAD Financials User Guide for more information on Self-Bill Confirm.
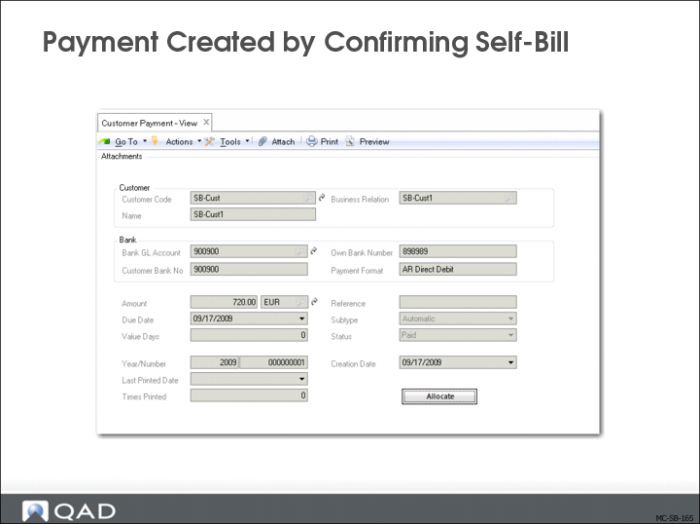
Payment Created by Confirming Self-Bill
The slide displays the customer payment automatically created by confirming the payment in Self-Bill Confirm (27.6.12.7).