Report Customization
Objectives
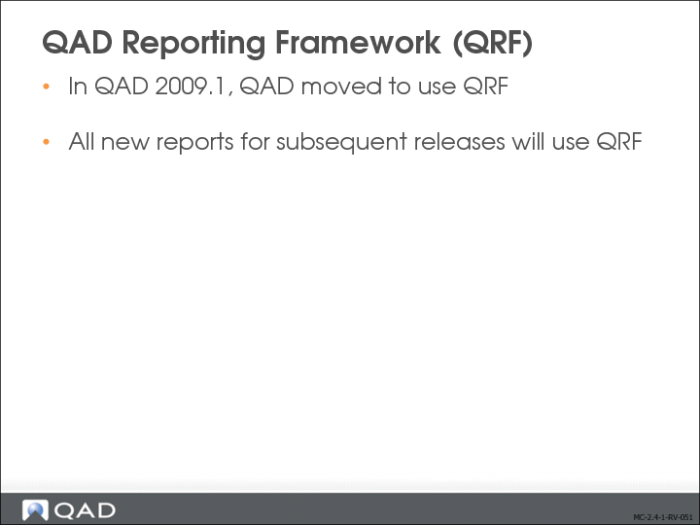
QAD Enterprise Applications includes two types of reports: reports that present the report output using the QAD Reporting Framework (QRF), which is the current report development standard, and reports that are presented using Crystal Reports. QRF is the preferred standard for Enterprise Financials and, to that end, QAD is involved in a continuing process to convert the remaining Financials Crystal Reports to QRF.
You can customize QRF report settings, create new report filters, or add user-defined fields to the report output.
Reports developed using Crystal Reports can be customized to optimally support your company processes and best practices. You can:
• Add or remove report filter criteria, assign default values, and save custom report variants by user, role, or system-wide.
• Use the Crystal Reports designer tool to modify the report layout, add and remove data fields, add calculation logic, or change sort order and grouping.
• Customize system-supplied report templates that contain formatting information such as fonts, logo, and paper orientation (landscape, portrait) using the Crystal Reports designer tool.
Note: You must have a license to use the Crystal Reports designer tool.
QAD Reporting Framework (QRF)
Customizing QRF Reports
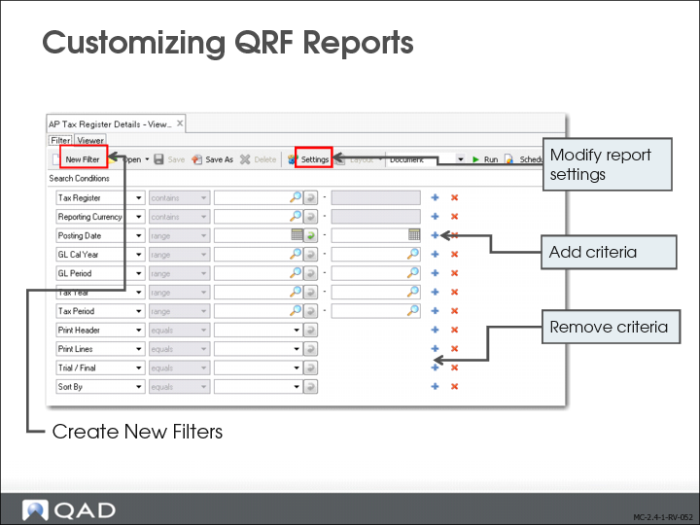
By default, a QRF report displays all records available in the source data. However, you can retrieve just a certain range of records in the report; for example, sales records between last September and this March. You do this by setting filter conditions to filter data in the report.
The search operators include the following:
• equals
• not equals
• contains
• range
• starts at (the default)
• greater than
• less than
• is null
• is not null
If you choose the Range operator, enter a beginning value of the range in the first search box. Optionally, enter an ending value of the range in the second search box.
To refine your search further, click the plus (+) icon to add another search row. You can add as many rows as needed, each with different search values and operators. When you specify several criteria, note that multiple criteria for the same field are treated as a logical AND condition.
To remove a search criteria row, click the delete (X) icon.
Optionally, save the new filter conditions as a filter for future reuse.
On the toolbar, select an output format from the list next to the Settings button. You can choose from three output formats when the report is run:
• Document: The report is displayed in the Report Viewer window.
• Excel: The report is generated in Microsoft Excel format. You can save the file and open it in the Report Viewer window.
• PDF: The report is generated in PDF format.
You can also use the Report Settings option to customize how certain elements of data will be displayed in the rendered report.
Changing QRF Report Settings
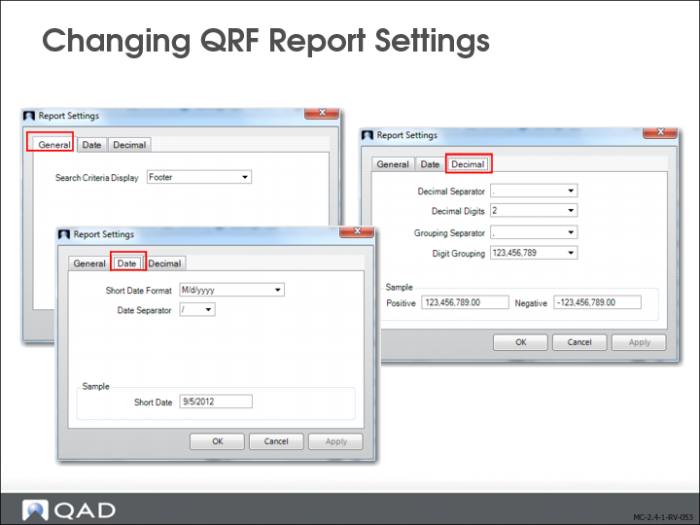
In the Filter screen of a QRF report, click Settings on the toolbar to open the Report Settings dialog box.
General Tab
Specify whether to display search criteria in the report, and if yes, whether to display this information in the report header or footer.
Date Tab
Select a format for dates to be displayed in the report and specify a date separator. You can see a sample of the date format you specify at the bottom of the dialog box.
Decimal Tab
Specify how numbers will be displayed in the report, including decimal separator, decimal digits, grouping separator, and grouping format. A sample number is displayed at the bottom of the dialog box.
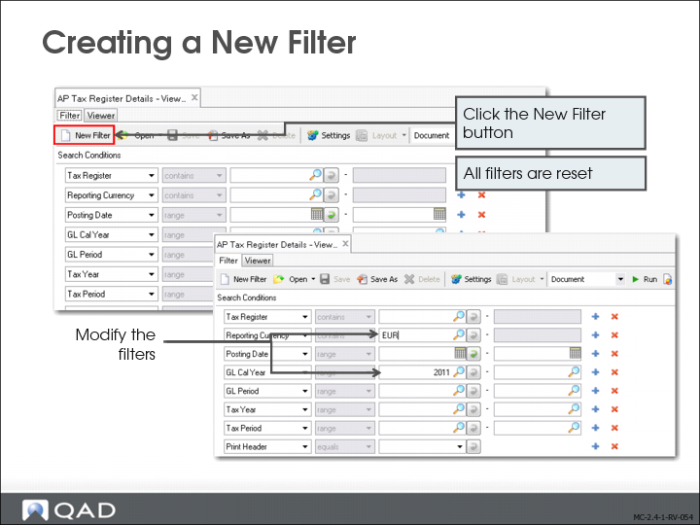
Creating a New Filter
If a report always contains a certain range of data and is exported to a certain format, you do not have to define the filter criteria and output settings every time you generate the report. You can save the search conditions and output settings as a filter and open it to load the same set of configurations when you run the report later.
A filter is a personalized set of search conditions and settings, which means that the filters you created can only be accessed and managed by you and the administrator, and no one else.
1 In the Filter window, click New Filter on the toolbar.
All the search conditions are reset to the default values.
2 Change the filter criteria.
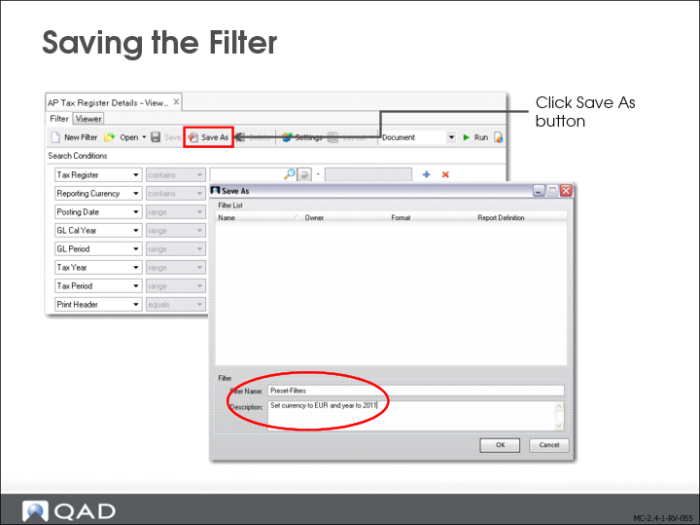
Saving the Filter
3 On the toolbar, click Save As.
4 In the Save As dialog box, enter a unique filter name, and optionally, a brief description. Then click OK.
The filter is created.
5 If you make further changes to the search conditions, click Save on the toolbar to save the changes.
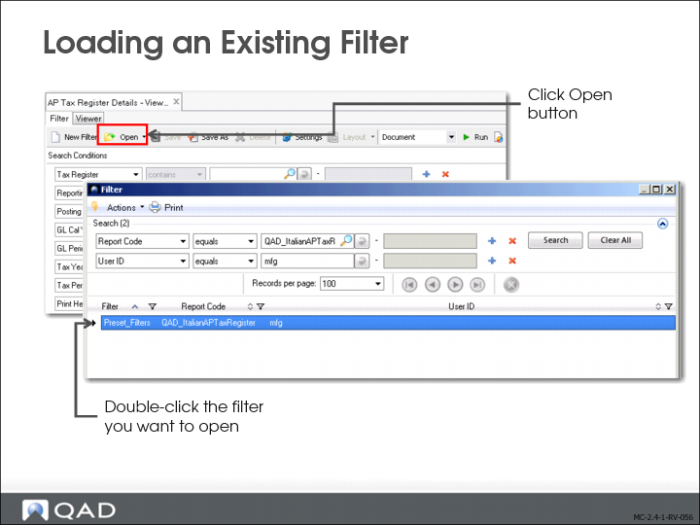
Loading an Existing Filter
1 On the toolbar, click Open and then select an existing filter from the list.
2 If the list is too long, click More to choose the filter from a browse window.
After you select an existing filter, its search conditions and settings are loaded in the Filter window.
3 If you want to save any changes to the loaded filter, click Save on the toolbar.
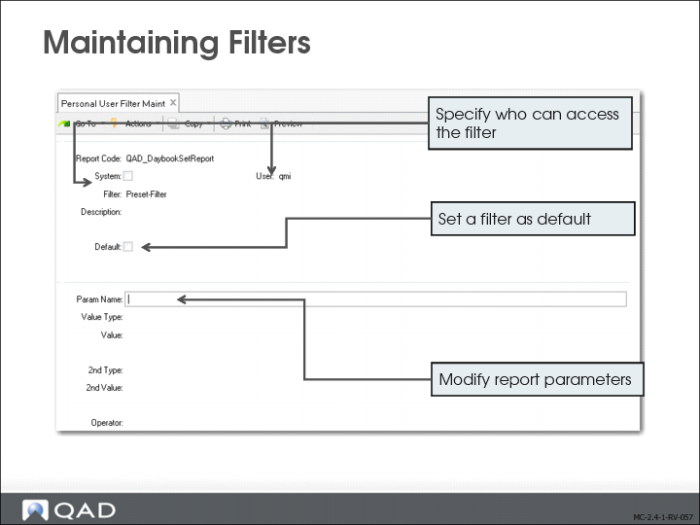
Maintaining Filters
Filters are user-specific, and you can use Personal User Filter Maintenance (36.4.21.14) to maintain your own filters.
System
Specify whether or not the filter is system-defined.
User.
View or enter the user for whom to define the filter. When the filter is system-defined, this field is disabled.
Filter.
Enter a filter name.
Description.
Enter the description of the filter.
Default.
Indicates whether this is the default filter in Report Viewer.
Param Name.
Enter a parameter name in the filter criteria. If the parameter name already exists, you can either create a new parameter with the same name or update the existing one.
Crystal Report Variants
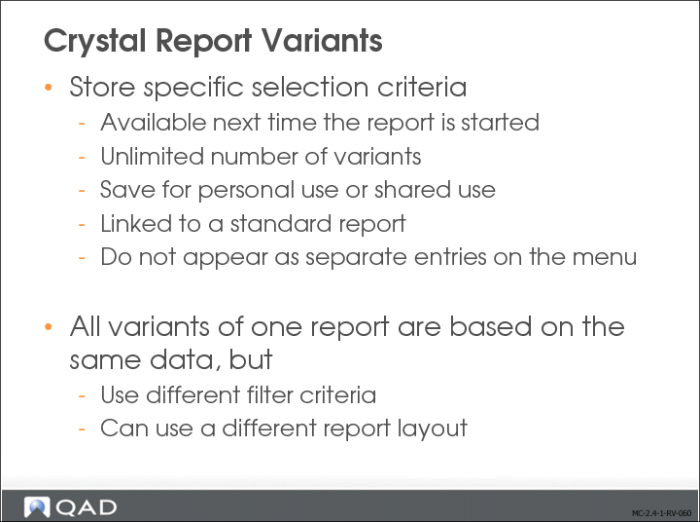
Crystal report variants let you store the settings for a report under a user-defined name. By storing settings in a variant, you avoid defining report settings each time the report is run.
You can store an unlimited number of variants for your personal use or share them with other users in a specific role.
Report variants do not appear as separate entries on the menu. They are linked to and accessible from a standard report menu.
Managing Filter Fields
The Manage Filter Fields option in the Tools menu lets you indicate which filter fields to use for the current report variant, and how the fields will appear in the Selection Criteria tab for the report.
You can use Manage Filter Fields to:
• Change the order in which the filter fields appear in the Selection Criteria tab.
• Specify whether a filter field should appear on the Selection Criteria tab (Use column).
• Define an initial value or range of values for the filter field.
For a detailed explanation of fields, refer to
QAD Financials User Guide.
Report Options
The Report Options option in the Tools menu lets you specify reporting runtime parameters. These settings are stored at report variant level, and affect how the report is printed.
For a detailed explanation of fields, refer to
QAD Financials User Guide.
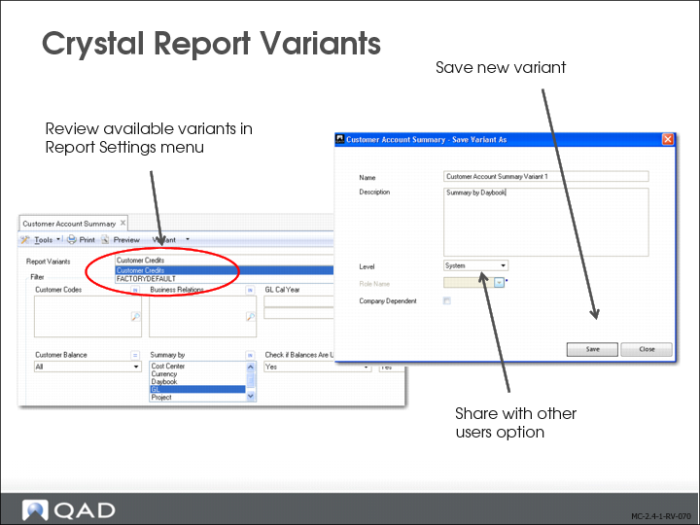
Use the Variants menu to save report variants, and the Variants drop-down list to select saved variants.
You can use an existing report variant, modify the report settings and save them to the existing report variant, or select another report variant to update.
Use Report Variant Delete (36.4.21.25.3) to delete unwanted variants from the system.
Select an option from the Level drop-down list to specify whether you want to keep a variant for your personal use, or share it with other users. For use by you only, select User; to share with other users of the same role, select Role; or to share with all users, select System.
Report Variant Reuse
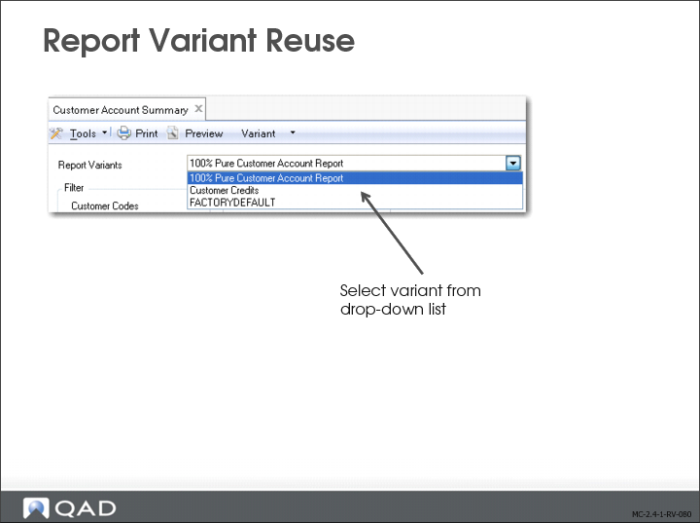
Once saved, reuse a report variant by selecting it from the drop-down list under Report Variants.
Hands-On Exercises