QAD Enterprise Edition Training Guides
>
Reporting Framework
>
Introduction
>
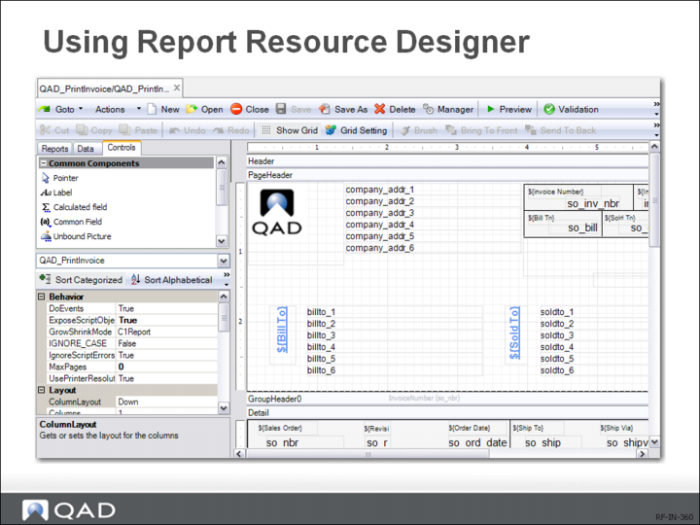
Using Report Resource Designer
Using Report Resource Designer
To use the Report Resource Designer:
1 Type Report Resource Designer in the menu search field and press Enter.
2 Click the New icon on the Report Designer Toolbar. The Report Wizard window appears. Select the report resource you previously created and click Next.
3 Select a report template or select None to use the default built-in report template. Click Next.
4 Select a table as the report data source and click Next. All the available tables you can select as data sources are listed in a tree.
5 To view all the fields in a table, click the plus sign next to the table to expand the tree.
6 This screen offers you several options to define how the data will be organized on the page. Select the layout that best approximates what you want the final report to look like.
7 Select Fields into the report.
8 The Summary screen recaps the information you have specified for the report definition. If you want to modify the settings, click Back to return to previous steps to edit them; otherwise, click Finish to complete the basic report setup and exit Report Wizard.
9 When you return to the Report Designer main screen, the report displays in the visual design mode in the Design pane based on the newly created report definition. Save the report as a new report definition. You can further customize it in Report Designer.