QAD Enterprise Edition Training Guides
>
Reporting Framework
>
Introduction
>
Using Template Designer
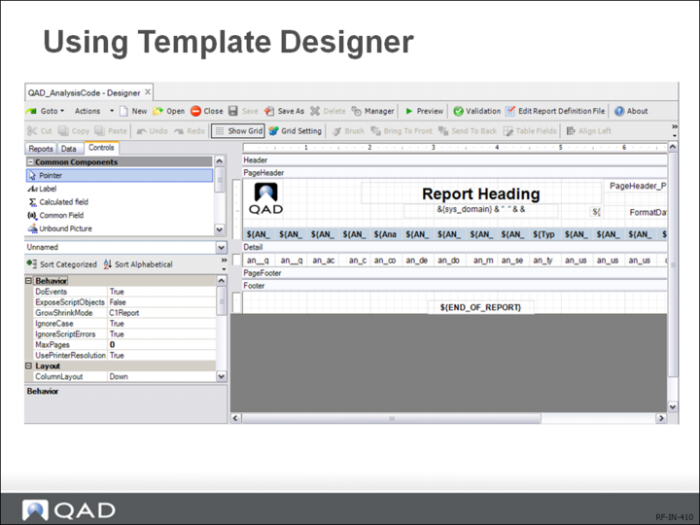
Using Template Designer
The Template Designer works similarly to the Report Resource Designer, but there are a few important differences.
Fields placed in template sections (except for the Detail section, to be discussed next) behave much like fields in Report Resource Designer: the fields themselves will get put onto any reports whose sections inherit from the template sections. For example, the logo, title, and other fields in the PageHeader section of the template will automatically appear as fields in all reports that have sections pointing to the template’s PageHeader section.
Fields in the Detail section of a template have a completely different behavior: they do not actually appear on any reports, but instead can be used to define properties (e.g. font, fore color) that can be inherited by actual fields in reports. Report fields can specify which template field to inherit properties from.
To use the Template Designer:
1 Launch Template Designer. Type Template Designer in the menu search field and press Enter.
2 Click the New button on the toolbar.
3 In the Create Template dialog box, enter a unique template name and click OK.
Important: QAD-provided built-in reports, report resources, and templates all begin with “QAD_”. Do not create or modify reports, report resources or templates with this prefix. Otherwise, your customized changes will get overwritten during system upgrades from QAD.
4 In the Design pane, create and format field classes in the same way as you work with fields when working with a report definition. Provide unique class names for the classes.
5 If you want to define a header, page header, page footer, and footer section class name, click the default section name and enter a new name in the (name) field in the Properties pane.
6 If you want to add new sections, use the following steps:
a Click the New Group button on the toolbar.
b In the Edit Group dialog box, click Add and specify the properties for the new group.
c Click OK.
7 Configure the default section and field class mapping to specify the default classes to be applied to the corresponding sections and fields in the report definition.
a Click the Configure button on the toolbar. The Class Configuration Form dialog box appears.
b Under the Section Configuration tab, specify a class name for each section type.
c Under the Field Configuration tab, for each data type, select a section in the template and specify a class defined within that section.
d Click OK.
8 Back in the Template Designer main screen, click the Save button on the toolbar to save the template.