Processing Self-Billing Invoices
Self-billing invoice information can be generated through EDI eCommerce or manually entered using Self-Bill Invoice Maintenance. In this user guide, we only focus on the manual creation and posting of self-billing invoices.
Creating a Self-Billing Invoice
Use Self-Bill Invoice Maintenance to create self-billing invoices from the self-bill information from customers. You can also maintain existing self-billing invoices in Self-Bill Invoice Maintenance.
To create a self-billing invoice:
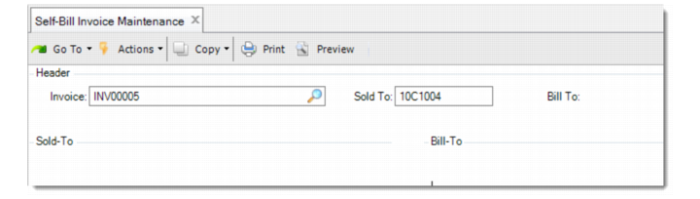
1 On the invoice Header frame, enter an invoice number, as well as the Sold-To and Bill-To customer.
The invoice number is not the invoice number that is to be posted to the GL.
Self-Billing Invoice Header
Invoice
Enter the invoice ID from the customer to identify the self-bill. This field is not the internal ID number for the self-billing invoice. The internal customer invoice ID is generated when the invoice is posted.
Sold To
Enter the code of the customer who placed this order.
Bill To
Enter the code of the customer who pays the self-billing invoice. If no bill-to customer is specified, this field is populated with the sold-to customer.
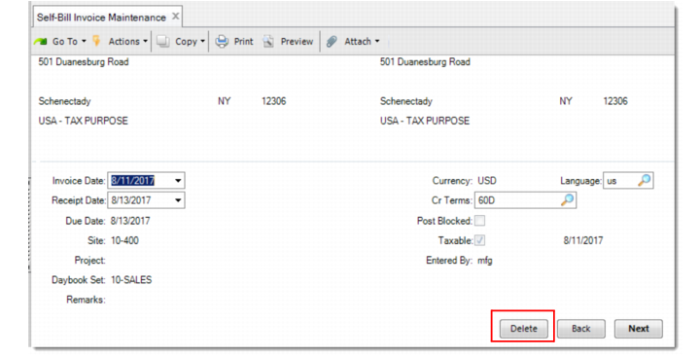
2 On the bottom part of the header, enter additional information.
Self-Billing Invoice Header
Invoice Date
The self-bill invoice date. The invoice date defaults to the current system date. You can change it as needed.
Receipt Date
The date on which you received the self-bill. The receipt date defaults to the current system date. You can change it as needed.
Cr Terms
Specify the default credit terms for this bill-to customer. The credit terms defaults from the terms of the bill-to address.
Due Date
The self-bill invoice due date according to the Customer. The due date defaults to the system current date. You can change it as needed.
Site
The site from which the items were shipped. This information is retrieved from the discrete sales order or customer scheduled order.
Post Blocked
When selected, all lines on the self-bill invoice are blocked from posting. You cannot post the invoice. Before posting, ensure that this field is not selected.
Taxable
If this invoice is subject to taxes, select this field. For sales-related invoices, this field depends on the taxable status of the associated order.
Project
Optionally select the project, from the list, that the invoice is due to.
Daybook Set
Specify the daybook set you want to use. The default value is the daybook set associated with the supplier in Customer Data Maintenance.
Remarks
Enter annotations as needed.
3 Choose whether to import lines from unmatched shippers when prompted.
Important: The proceeding steps depend on the choice made in step 3. If you want to import lines from unmatched shippers, follow steps 4 and 5. If not, go to steps 6 and 7.
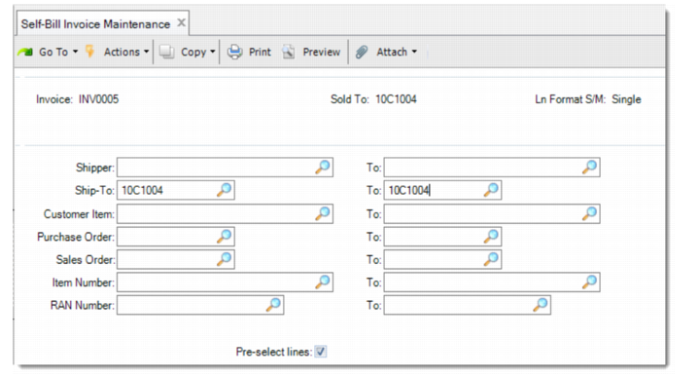
4 Enter the criteria for searching for the unmatched shippers.
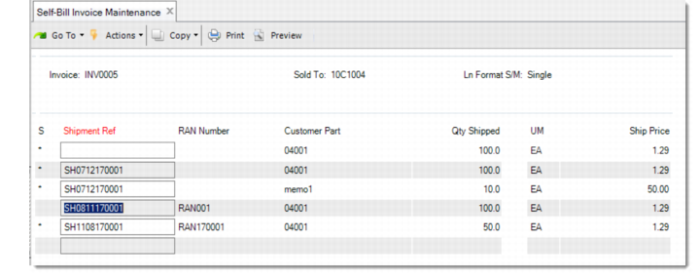
5 Select the shippers to import and click Next. Then, go to step 7.
All the selected shippers are imported into the invoice.
Note: Steps 4 and 5 are for importing lines from the unmatched shippers. If you manually enter the invoice lines, skip these steps.
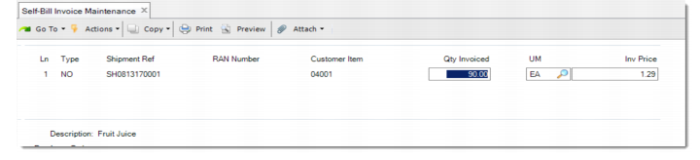
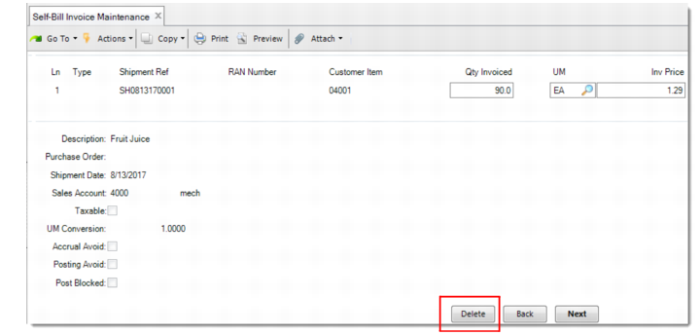
6 Enter details for the invoice line.
Ln
Enter the line number.
Type
Specify the invoice type of the line. There are four types of invoices:
• NO: Normal. This type of line is used when a shipper is used for self-billing.
• PD: Price Difference. This type of line is used for self-bill price differences.
• QD: Quantity Difference. This type of line is used for self-bill quantity differences.
• GL: Used for container or line charges and other miscellaneous charges.
Ship Ref
Enter the shipment reference of the shipper. You can get this information from the shipper. This field is used for matching the shipper and the self-bill invoice, depending on the matching method setting in Advanced Self-Billing Control.
RAN Number
Optionally enter the Release Authorization Number. This field is used for matching the shipper and the self-bill invoice, depending on the matching method setting in Advanced Self-Billing Control.
Customer Item
Enter the customer item number. This field is used for matching the shipper and the self-bill invoice, depending on the matching method setting in Advanced Self-Billing Control.
Qty Invoiced
Enter the quantity to invoice. By default, it is the shipped quantity on the shipper. You can update it with the agreed quantity to invoice.
UM
Unit of measure of the items invoiced.
Inv Price
The invoice price defaults to the price in Item Master Maintenance or any applied price list. You can change it as needed.
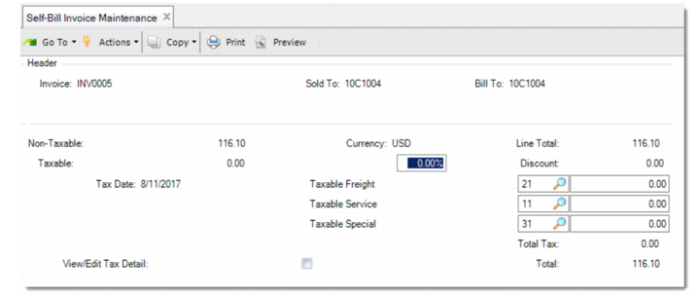
7 Update the information on the invoice trailer as needed.
Deleting an SB Invoice Before Posting
You can delete self-billing invoices and invoice lines using Self-Bill Invoice Maintenance.
Deleting a Self-Billing Invoice
1 Open Self-Bill Invoice Maintenance and enter the invoice number to delete.
2 Click Next or press Enter until you see the Delete button at the bottom left of the frame.
3 Click Delete and confirm the deletion when prompted.
The invoice is deleted.
Deleting a Self-Billing Invoice Line
1 Open Self-Bill Invoice Maintenance and enter the invoice number.
2 Click Next or press Enter until you are prompted for whether to import lines from the unmatched shippers.
3 Click No on the prompt.
You are now in the invoice lines frame.
4 In the line number field, enter the invoice line number that you want to delete and click Next.
5 Click Delete at the bottom right of the frame.
6 Confirm the deletion when prompted.
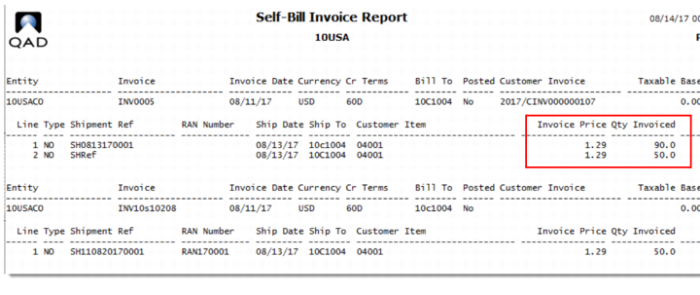
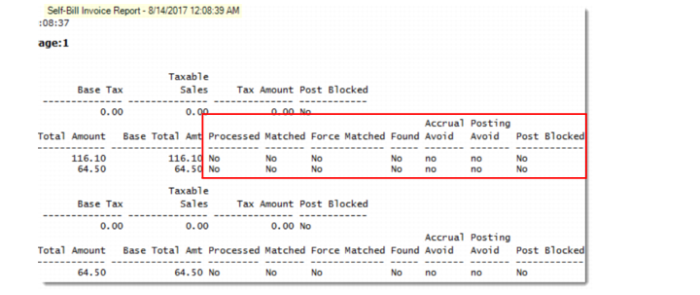
Generating SB Invoice Report
Use Self-Bill Invoice Report to generate reports for self-billing invoices. Invoice reports provide the detailed status of self-billing invoices.
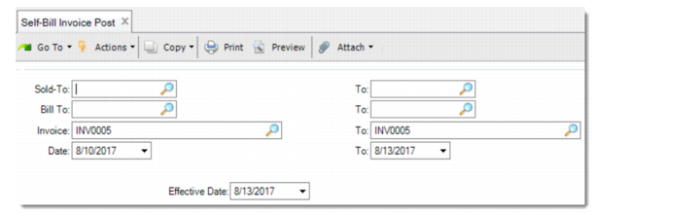
Posting SB Invoices
Use Self-Bill Invoice Post to post self-billing invoices. To specify the range of invoices to post, use the selection criteria.
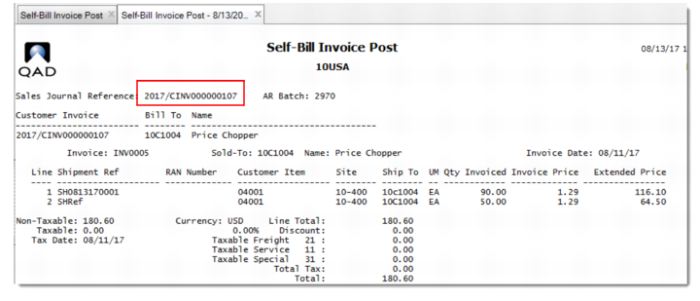
Self-Bill Invoice Post
When the invoice is posted, the invoice number is generated.
Here is an example of posted self-billing invoice.