Matching Self-Billing Invoice
After the self-billing invoice is posted, the next step is to match the invoice with the self-billing shipment. For the invoices that contain information without discrepancy from the associated shippers, you can use Self-Bill Matching Execute to match them in batch. Sometimes there are discrepancies between the invoice and the shipper. A discrepancy can be a quantity difference or a price difference. In this case, if you agree with the differences, use Self-Bill Matching Force/Reverse to force matching the invoices and the shippers.
Generating Report for Unmatched SB Shipments
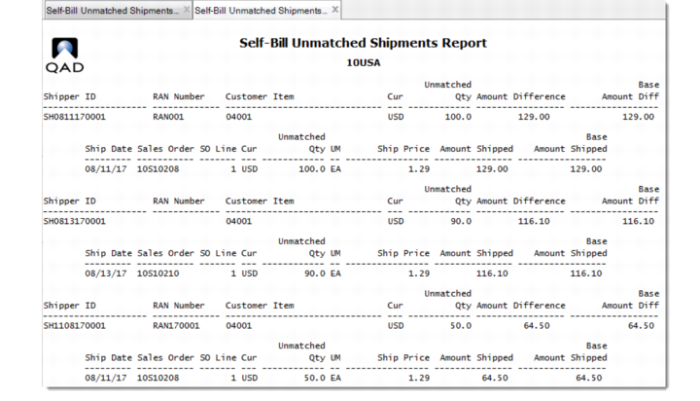
Before matching, you should know which shipments are unmatched with any invoice. Self-Bill Unmatched Shipments Report provides this information.
Self-Bill Unmatched Shipments Report
Generated Report for Unmatched Shipments
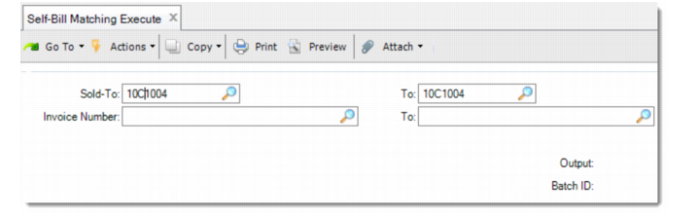
Using Self-Bill Matching Execute
The matching process can be done for customer ranges, customer invoices ranges, or for all the invoices pending to be matched. The matching is done depending on the matching method setting in Advanced Self-Billing Control. See
QAD Sales User Guide for the details on matching methods.
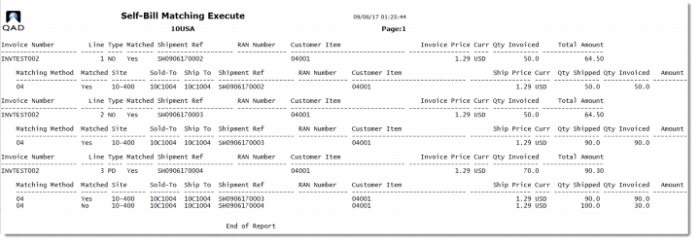
Self-Bill Matching Execute
After the matching is done, the matching result is displayed.
Matching Result
Performing Force Matching
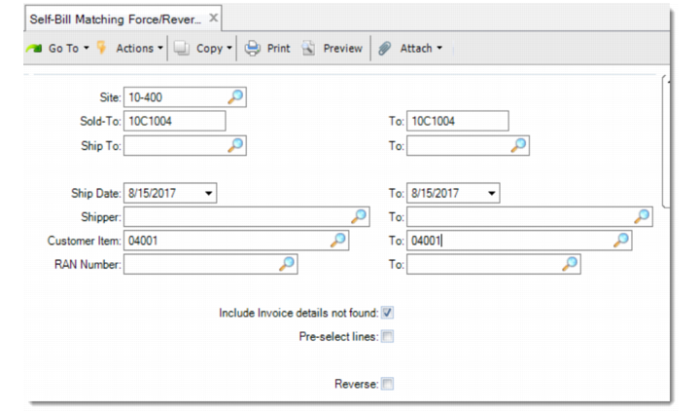
Use Self-Bill Matching Force/Reverse to process matching for the self-billing invoices that have discrepancies from the associated shipments.
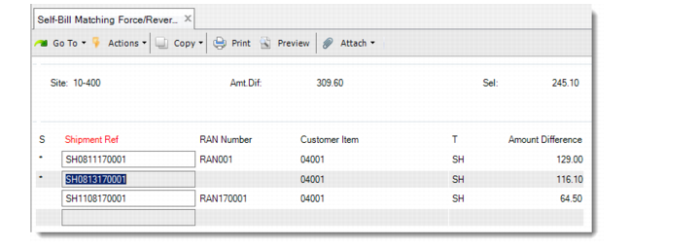
Self-Bill Matching Force/Reverse
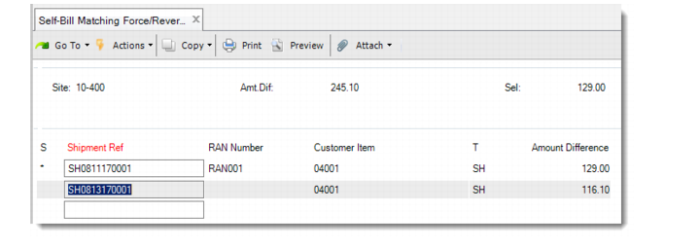
1 Use the selection criteria to define the range of records for matching. The Site field is a mandatory field. If you leave all the other fields blank, then all the unmatched records for the specified site are displayed.
Note: Do not select the Reverse check box, which is used to reverse the force-matched records.
2 Click the records in the Shipment Ref column to select them. Only the selected records will be processed.
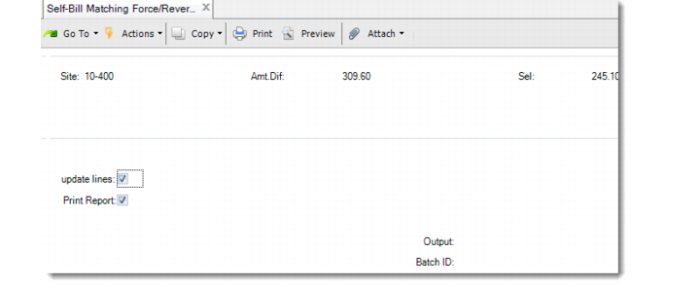
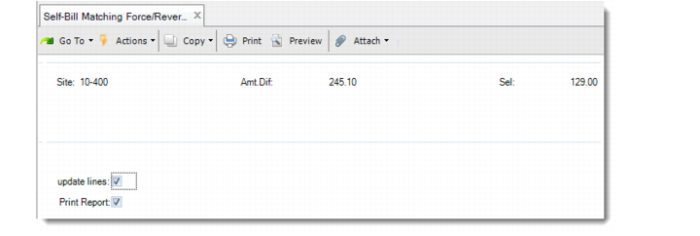
3 Select Update Lines to execute matching to the selected lines. If you want to view the reports before executing matching, leave the Update Lines field unchecked and select Print Report.
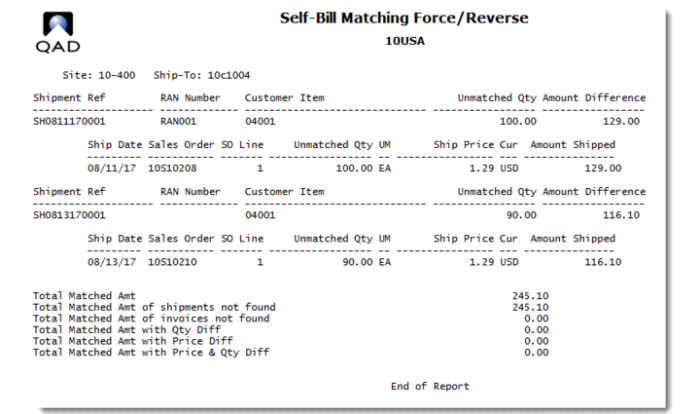
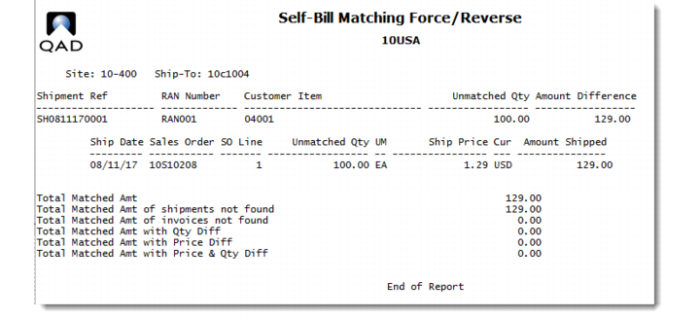
4 Click Next. The report for matched records is displayed.
Reversing Forced Matches
Use Self-Bill Matching Force/Reverse to reverse the forced matches.
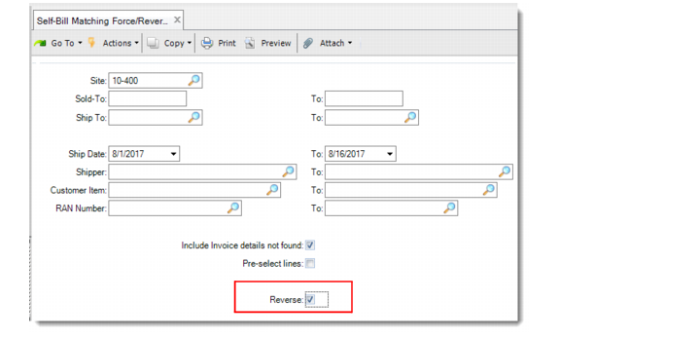
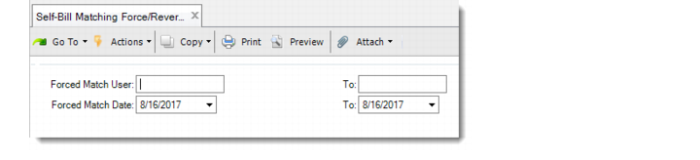
1 Use the selection criteria to define the range of records to reverse. The Site field is a mandatory field. You can leave all the other fields blank or fill them to make the selection more specific.
2 Select the Reverse check box.
3 Further specify the selection range by the user who performed the forced matches and/or by the date.
4 Click the records in the Shipment Ref column to select them. Only the selected records will be processed.
5 Select Update Lines to reverse the selected lines. If you want to view the reports before reversing the lines, leave the Update Lines field unchecked and select Print Report.
6 Click Next. The report of reversed records is displayed.