Creating and Printing the Certificate of Analysis
Certificates of analysis can be printed for a closed lot attribute order (or quality order), provided that the attributes have been properly setup using attribute profiles.
Both lot attribute orders and quality orders can be used when printing certificates of analysis. There can be multiple test results for a quality order. The system captures and records test results with the attribute values. The captured test results are supporting documentation for item and supplier certifications.
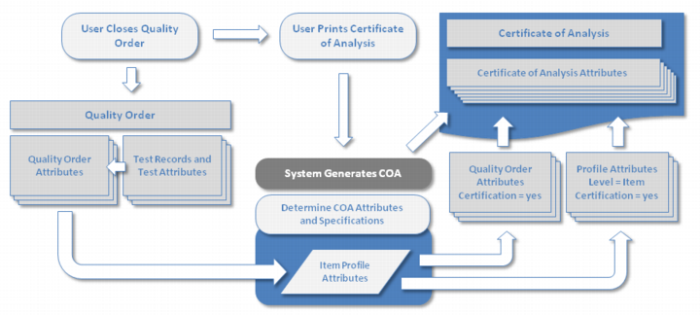
Printing a Certificate of Analysis Flowchart
In IAQ, you can print a certificate of analysis, without regard to a specific customer order, for an item lot or for a sales order line item or for an item lot. The first involves printing common certificates for a lot, not specific to a certain order. The second involves a certificate made for a specific sales order. Both print based on closed quality orders.
You can print or reprint certificates of analysis from the Reports option on the toolbar, provided that setup has been completed for the item and the attributes that should appear on a certificate of analysis, when using any of the following collections:
• Maintain Quality Order
• Maintain Quality Order for SO Line
• Maintain Lot Attribute Order
• Maintain Lot Attribute Order for SO Line
To print a simulation, set Update to No. When Update is set to Yes, the system records the certificate of analysis.
You can print a certificate of analysis for the first time by using Certificate of Analysis Print Viewer; see Figure 3.25.
Note: The certificate record is necessary to reprint a certificate of analysis at a later date or time, with the same attribute values and attribute specifications, even if the lot attribute values have changed since the time it was first printed.
Before printing the certificate of analysis, you must have a closed quality order or a closed lot attribute order. You can print through the Certificate of Analysis Print Viewer.
Follow these steps to create a certificate of analysis:
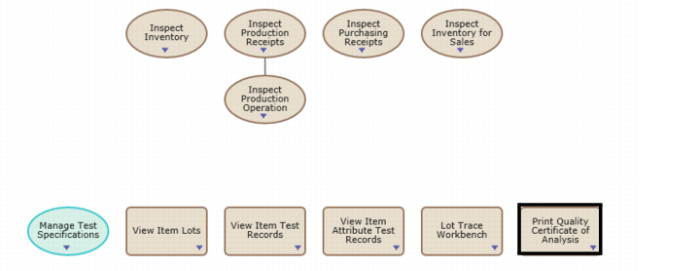
1 Select Print Quality Certificate of Analysis from the Manage Test Records and Quality Orders process map.
Manage Test Records and Quality Orders Process Map
2 The Certificate of Analysis Print Viewer opens. The COA print view allows you to set the print controls for the printed document.
Certificate of Analysis Print Viewer
The Certificate of Analysis Print Viewer contains the following print controls:
Order
Enter or select either a quality order or lot attribute order.
Sales Order
Optionally, enter a sales order.
Line
Optionally, enter a sales order line.
Print Grade
Enter Yes to print the value for grade from the quality or lot attribute order on the certificate of analysis.
Print Assay Percent
Enter Yes to print the value for assay from the quality or lot attribute order on the certificate of analysis
Print Expiration Date
Enter Yes to print the value for expiration date from the quality or lot attribute order on the certificate of analysis
Print Manufacture Date
Enter Yes to print the value for manufacture date from the quality or lot attribute order on the certificate of analysis
Effective Date
Enter the effective date for the certificate of analysis.
Reprint Last Certificate
Enter Yes to reprint the last certificate of analysis for a quality order or lot attribute order, when a certificate has already been printed for that order.
Reprint Last Certificate
Enter Yes to print the certificate of analysis in simulation mode. Enter No to print and save the certificate of analysis.
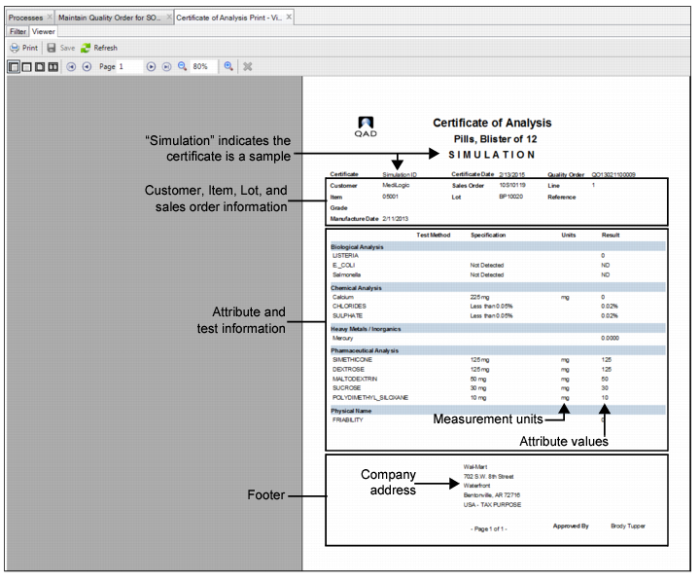
3 After setting the print controls, click Run to print the COA. The system generates a simulation of the complete certificate. Use this simulation to verify that the certificate runs with the correct attributes.
Certificate of Analysis Simulation
4 To make any changes to the document, click the Filter tab to access the COA print controls. Once you make the changes, click Run to generate another COA simulation document.
5 If the COA is good, select the Filter tab to access the COA print controls. Change the Update setting to Yes and click Run.
COA Print Viewer
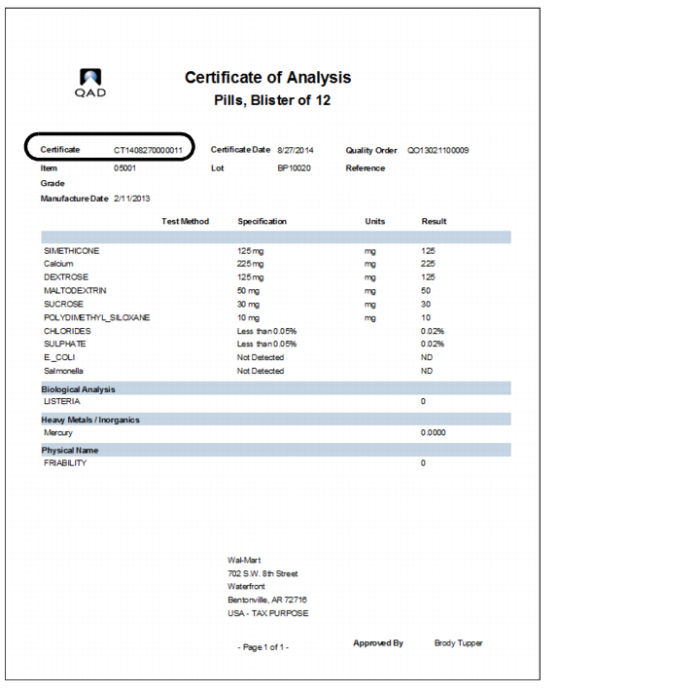
6 The certificate of analysis has been created. The system generates a COA number and adds it to the document. To print the COA, click Print.
Certificate of Analysis
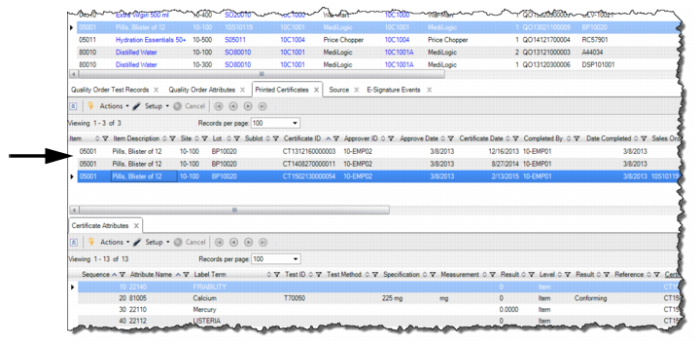
7 The Printed Certificates tab displays the COAs that have been created for the order.
Quality Order Collection - Printed Certificates Tab