Cycle Counting Procedure
Whether you select items for cycle counting or have the system select them, the basic steps are as follows:
1 Print a cycle count worksheet.
2 Count the items listed on the worksheet.
3 Enter the initial count quantity in the system.
4 Review the results and enter recount quantities if necessary.
Printing Cycle Count Worksheet
Use Cycle Count Worksheet Print (3.13.1) to print a worksheet listing items selected for cycle counting, their locations, ABC code, last count date (if applicable), and the quantity on hand. Use the worksheet to record the count quantities.
The system selects items by comparing the current date with the item’s last count date. If the elapsed time is greater than the period specified in the Cycle Count Interval field in Item Master Maintenance, the system selects the item for cycle counting. If this is the first time you are cycle counting an item, the system selects it by item number.
Entering Initial Count
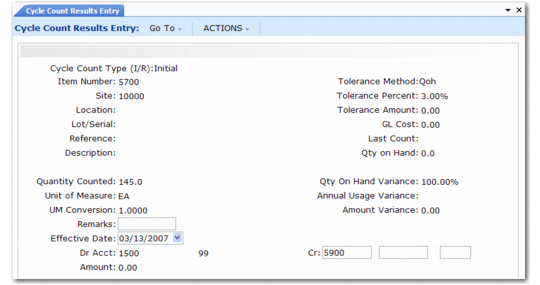
Enter the count quantity in Cycle Count Results Entry (3.13.2). When entering the initial count quantity, set Cycle Count Type to I (Initial).
If the count quantity for an item does not match the system quantity, the system checks to see if the count is within both the percent tolerance and the amount tolerance specified for the ABC class in Inventory Control (3.24). If it is, the system updates the quantity accordingly. If the count is not within tolerance, the item must be recounted.
Cycle Count Results Entry (3.13.2)
Entering a Recount
Use Cycle Count Results Entry (3.13.2) to enter recount figures. Set Cycle Count Type to R (Recount). If a recount quantity is still out of tolerance, the system alerts you to this, but nevertheless updates its figures.
Reporting Cycle Count Results
After completing the cycle count, use Cycle Count Results Report (3.13.3; 3.13.27 in the enhanced .NET UI version) to generate a count report showing:
• Items counted
• In-tolerance quantity
• In-tolerance percent
• Items recounted