Working in Design Mode
You can remove a field from the UI by clicking on the field to activate it and setting the Visible property to False.
The field is then stored in the BusinessFieldLabel pane of the design fame. To return the field to the UI, click on it and drag it from the BusinessFieldLabel pane to the screen.
You can move a field within the UI by dragging it to its new location or by modifying the position properties. You cannot drag a field from one tab to another. To reposition a field to a new tab:
1 Set the Visible property to False. The field now displays in the business field area of the Field List window.
2 Select the target tab to activate it.
3 Drag the field from the storage area to its new location.
Tab Sequence
The tab sequence of fields is automatically defined using the following rules:
• The reference point is the upper left corner of the field in pixel coordinates.
• The system tabs from left to right and from top to bottom.
Therefore, fields that seem to be on the same row can produce an unexpected tab sequence if the second field on the row is positioned a pixel higher than the first. Refer to the field properties to review and modify the field location.
Adding Tab Controls
Right-click on a blank area of the current form and select Add TabControl to add one new customizable tab control to the current form.
Add Tab Control
Adding Tabs and Text Fields
You can add new tabs to the current form. Right-click an existing tab header and select Add Tab Page.
Add Tab Page
The new tab is positioned at the end of the list of tabs and you can customize this tab as you do existing tabs.
To add a new text control to the form, right-click an open area of the screen (not an existing tab header) and select Add Text.
Add Text Control
The new text control is placed at the top left of the form and can be customized and repositioned.
Adding Grids
When you have created a custom table, you can use drag and drop to add the table to the form as a new grid.
Every business component has three available custom tables. They can be used on the UI, and also in the back-end custom code.
A custom table can be put on a screen as a grid, or columns of the table can be put on a screen as input fields, depending on the relation of the tables to the main table of the business component.
Using custom tables also requires non-intrusive customization of the business logic on the server. This step ensures that the data is validated, saved in the database, and read when the object is called again later.
If you want to add new fields to the UI, it is recommended to use User Defined Fields. These fields are available for each component, and you can add them without customizing the business logic. See
User-Defined Fields.
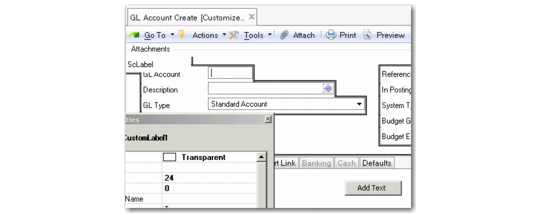
Repositioning Fields on the User Interface
You can reposition any field by selecting it on the user interface and dragging it to the correct position or by modifying the Left and Top properties of the field in the design window.
Layout Section of Field Properties
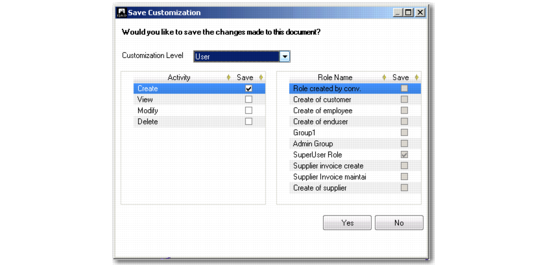
To apply save customizations to the UI, choose Tools and clear the Design Mode field.
The system prompts you to confirm the changes and lets you select other activities for the business component to which to apply the customizations.
Save Customization
Field Descriptions
Customization Level
Select the level at which the customization applies.
General. The customizations are effective for all users.
Role. In the Role Name grid, select the roles for which the customizations apply.
User. The customizations are effective for you only.
Activity
The Save Customization screen lets you apply your customizations to other screens related to the function you customized. This varies depending on the activities defined for each component, but you can typically apply your customizations to the following screen types:
Create: Select to apply your layout customizations when the screen is used to create a new record.
View: Select to apply your layout customizations when using the screen to view a record.
Modify: Select to include your layout customizations when using the screen to modify a record.
Delete: Select to include your layout customizations when using the screen to delete a record.
Role Name
Select the roles for which the customizations apply. These fields are activated when you select Role in the Customization Level field.
Click Yes to apply the changes to the selected activities. Click No to close the screen without applying the changes.