Updating Data to the Target QAD Application
When you have finished viewing and editing data in the worksheet, you can update it to the target QAD application through QXtend Inbound.
1 Under the QAD Tools tab, click Update QAD and select from one of the following options:
• Process Changes: Only submit records that have been modified.
• Process All: Submit all records in the worksheets.
2 A QAD Application Login window appears. Provide log-in information to access the target QAD Enterprise Applications.
QAD Application Log-In
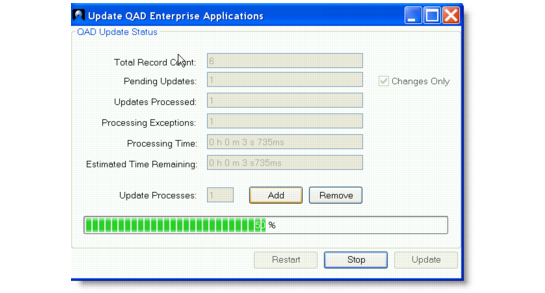
3 A QAD Update Status window appears with detailed update status information and progress bar. You can stop and restart the process as needed.
QAD Update Status
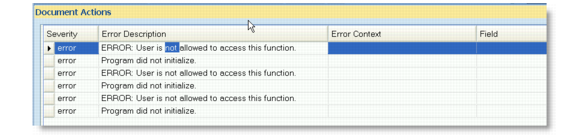
4 When the update is complete, any errors that occurred show in the Document Actions pane below the worksheets. You can switch on and off the error information using the Show/Hide Errors button under the QAD Tools tab. Double-clicking on a row in the errors panel sets the focus in the worksheet to the row with the error. You can use the Export Errors button to export errors to a text file and save it to your specified location for further investigation.
QAD Update Status