Configuring Excel Settings
Use the following to configure Excel settings. Once done, the settings are applied to all the Excel files on your machine.
1 Create a working Excel file by making a copy of the QXtendWorkbook.xlsx template file located in the My Documents\QAD\QXtendWorkbook folder. You can rename the new file as you want.
2 Open the working Excel file.
3 Show the Developer tab in Excel.
For Excel 2007:
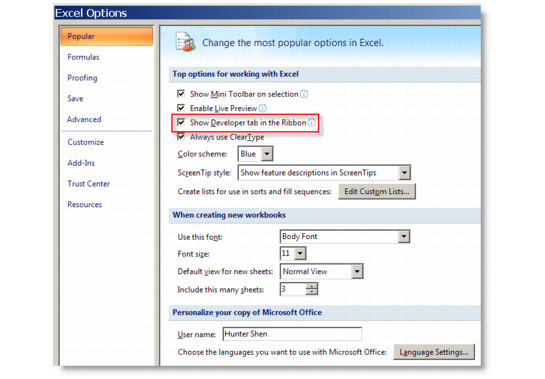
a Click the Microsoft Office Button and then click Excel Options.
b On the Popular tab, select Show Developer tab in the Ribbon under Top options for working with Excel.
The Developer tab contains configuration options for Excelerator, so you must display it to access these settings.
Excel Options—Popular (Excel 2007)
For Excel 2010, Excel 2013, and Excel 2016:
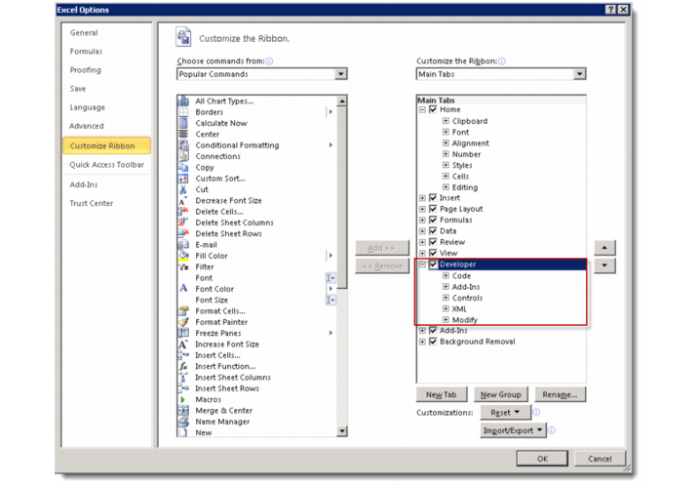
a Click the File|Options|Customize Ribbon.
b Under Customize the Ribbon, select the Developer check box.
Excel Options—Customize Ribbon (Excel 2010)
Note: Display the Developer tab only for the users who are required to access the developer functions.
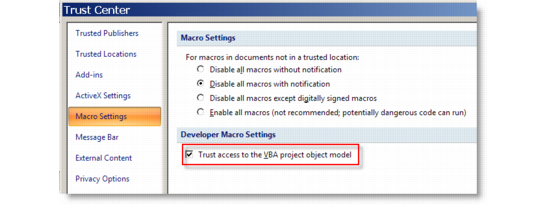
4 On the Trust Center tab, click Trust Center Settings.
5 Click Macro Settings, and then select Trust access to the VBA project object model under Developer Macro Settings.
Excel Options—Trust Center