QGen
QGen Overview
QGen is a development tool that facilitates the creation and maintenance of QXtend APIs that leverage the UI API adapter within QXI. The UI API adapter uses the character screen within the application to load data. Therefore you can only use QGen on functions that have a character version of the interface. QGen records the structure and field information from QAD EA character UI screens and saves the information to data files. Not all of the information required for each field is available from Progress, so you have to supply some specific information.
The data recorded by the mapping process is then passed into the QGen generation engine, which transforms the data in the files into the relevant QDoc XML schema, and events files, and deploy them to the custom area of QXI to make them available for processing.
QGen makes it simple for services to create a new API. QGen can handle most customizations a customer makes to their system. However, the UI cannot have any widgets that are not supported by the XML engine. If a QDoc exists for a function but the customer has modified a function by adding new fields and/or frames, the data file can be extracted from the QXtend server and loaded in the QGen datFiles directory. Then the new information can be recorded from the customized screens and a new version of the schema recorded. The new schema (and potentially, events files) must be uploaded to the QXtend server, and then the customized function is accessible from the QXtend server.
Using QGen
Using QGen is easy, though you must follow several rules to ensure that you generate the correct API definitions. The following slides describe how to create a new UI API adapter API.
QGen must run in a character OpenEdge session—you cannot run it from the QAD .Net UI or from an OpenEdge GUI session. A QGen-specific startup script is required to launch a QGen session. The startup script runs the <qxi-adapter>/tool/runProgramMapper.p program before calling the standard QAD startup routine mf.p. When a QGen session is launched, it looks and functions just like a QAD EA character session.
Once in QGen, do the following to map a program:
1 Run the function. The function you are mapping is launched from the QAD EA menu.
2 Enable the auto pop-up. The auto pop-up feature of QGen is enabled. This initializes QGen and displays a pop-up frame after each field in the UI is accessed to allow you to record specific field information required to generate the new UI API adapter artifacts.
3 Map the screen. Enter data into the application screen. As you enter the data, record the field information required by the QGen pop-up screen. QGen records the fields as you move through the screen, as well as the screen navigation to move from frame to frame. Ensure that you map all fields in the function before completing the mapping; this might need multiple passes through the application screen.
4 Save. When all information on the application screen has been recorded, save the information. This creates a file in the QXI adapter directory that contains all of the information recorded during the screen mapping.
From within QGen you can now deploy API to QXtend Inbound using the Generate Docs function. The Generate option in QGen lets you generate QDocs that use either the QDoc 1.0 or QDoc 1.1 standard. The QDoc 1.0 option is provided for backward compatibility only—you should use the QDoc 1.1 standard for all new QDocs. The artifacts generated by QGen are stored in the QXI adapter installation directory.
The QGen also provides you an option to output all the artifacts required by QXtend Inbound, then load the new API into QXI. To do this, copy the generated files from the server to the client machine, uploading them to QXI. In the QXI Configuration Manager, use the Schemas node on the tree menu to upload the files generated from QGen into QXtend as a UI API adapter interface
Mapping
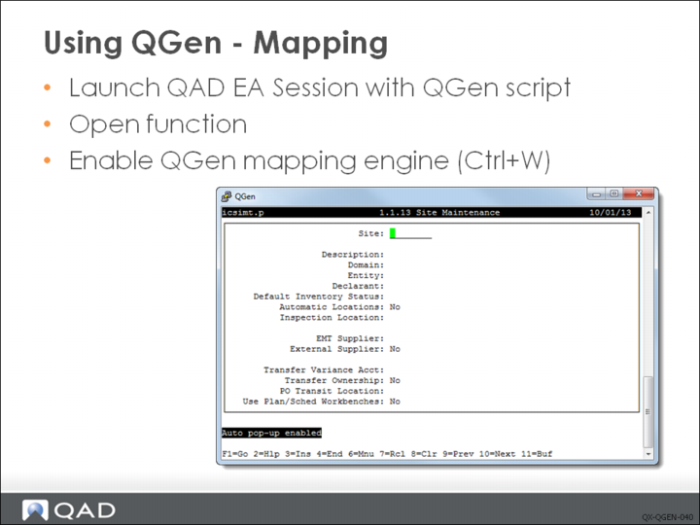
Using the QGen startup script, launch a QAD EA character session. The QGen startup script executes the tool/runProgramMapper. The tool/runProgramMapper.p program initializes QGen and sets up session triggers that drive the QGen field information pop-up screens and the QGen menu.
From the QAD EA menu, launch the function for which you want to create a UI API adapter API. This displays the normal character window that you would expect to see when using a character screen to enter data.
Before entering any application data, initialize QXtend by pressing Ctrl+W. The message “Auto pop-up enabled” displays in the bottom-left corner of the window. QGen is now enabled and will record any actions you perform in the application.
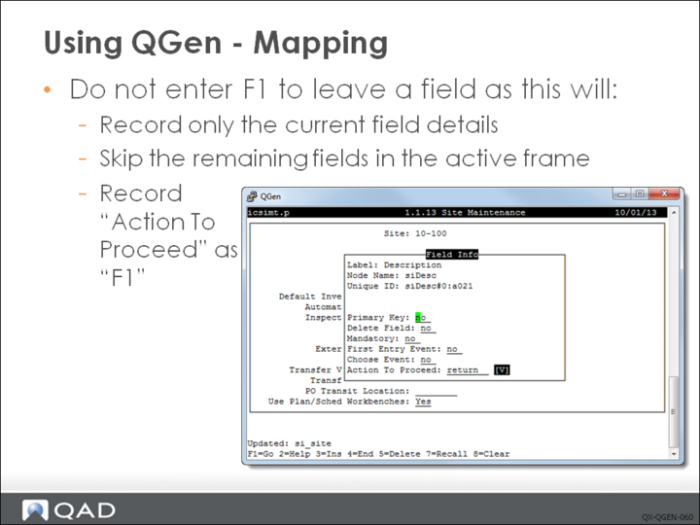
The easiest way to map a function the first time is to walk through an existing entry that has already been entered. This way you will know which specific information you will require to complete the mapping. You must walk through each field in the function. Press Enter to leave each field, not F1.
Note: If pressing Enter does not bring the Field Info pop-up, you might have to use Enter to bring that pop-up.
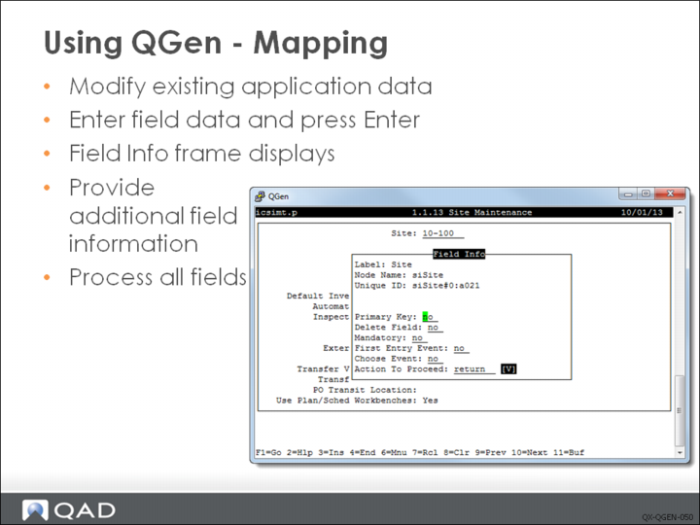
Only information from the fields you access is recorded and added to the API. After entering data into a field and pressing Enter, the QGen Field Info pop-up frame displays. This frame shows information about the field and prompts you for further details that are used to control the processing when called from QXtend. The Field Info frame prompts for the following values:
Primary Key
Logical field Enter Yes if this field is part of the primary index in the database, or if you want to include this field in the response message that is returned from QXI.
Delete Field
Logical field Enter Yes if the Delete key F5 is available on the field.
First Entry Event
Logical field Enter Yes if a special action should be performed the first time this field is encountered when processing a QDoc. The best example for this event is Sales Order Entry and the Line field. If we want to ensure that multi-line mode is always used when processing sales orders, we would send F4 – m – F1. If Yes is entered, an extra frame displays when F1 is pressed in this frame.
Action To Proceed
The key to use to navigate from this field to the next field/frame. The user must choose from a drop-down list. The default value is Enter. However, sometimes Enter is not used and special navigation is required. This field lets you define the action required to leave this field. For example, when recording transaction comments you must press F4 to continue entering application data.
When all data has been entered, press F1. You are taken either to the First Entry Event frame or to the next field.
You must walk through each of the fields in the function. Remember, leave each field by pressing Enter, not F1.
Note: When generating a custom API you might sometimes want to skip an entire frame. In this case you would press F1. However, you will not be able to load any data into the fields you have skipped.
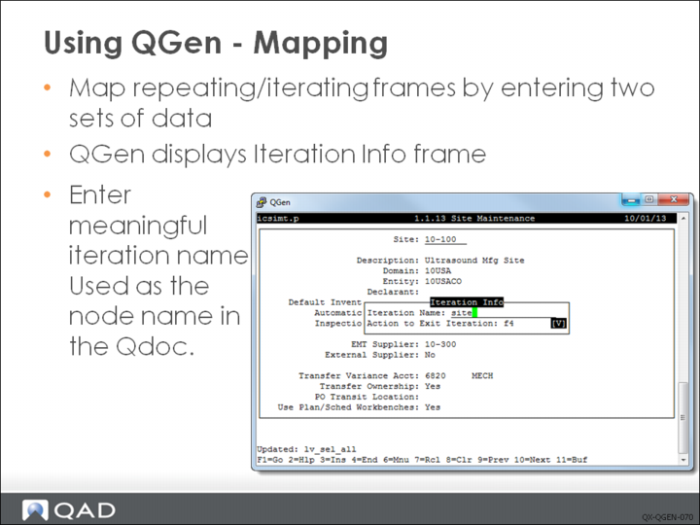
Many screens in QAD EA have repeating sections of data. These iterating sections typically represent parent-child relationships in the application, and these data iterations must be mapped correctly when generating an API for QXI. Each iteration that is mapped represents a different level of data in the generated QDoc; each iteration can occur many times in a QDoc request instance.
Ensure that on frames where it is possible to iterate through the screens that you go through at least twice; doing so ensures that you pick up the iteration name.
The second time you go through the screen, QGen recognizes that the field has been encountered before and identifies it as an iteration. When you encounter an iteration, you must specify the name to use in the QDoc to identify the iteration—for example, salesOrder, salesOrderDetail. The names given to the iteration should describe the iteration data clearly as this will affect how understandable the XML documents are.
The Action To Exit Iteration provides the navigation keys required to exit the current iteration and enter the next screen, or to exit the function. Choose a value from the drop-down list.
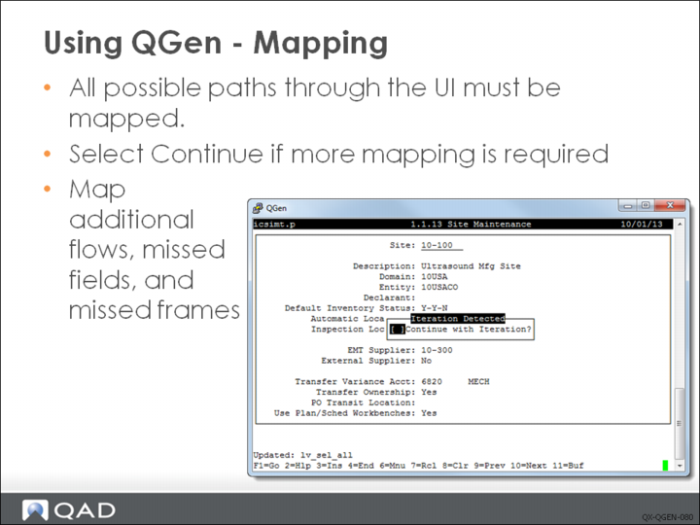
Typically, you cannot map complex functions in QAD EA in a single pass, as various control settings and data values cause extra screens and fields to display. To correctly map the entire function, you must run through the transaction several times to ensure that you map all necessary frames and fields.
Once the iteration name has been entered, the system asks if you want to continue with the current iteration. If some fields have not been mapped—or if there is another route through the screen that has not been mapped—delect the toggle button and repeat the iteration, this time choosing a different flow. The second time through the function, the system only prompts for fields and iterations not already mapped.
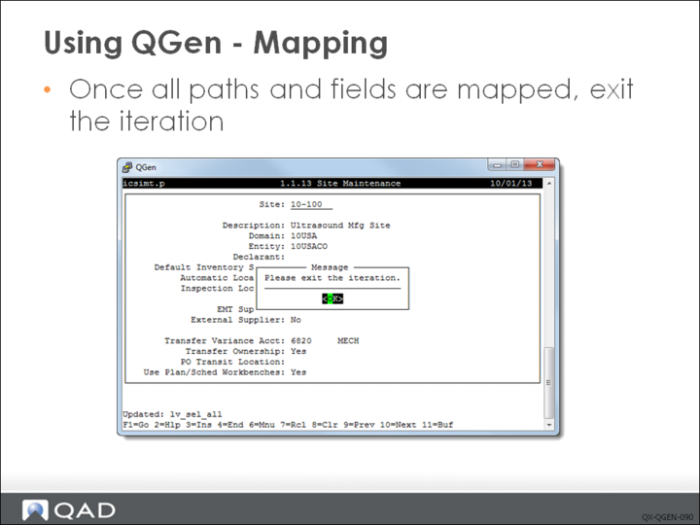
If the Continue option is not selected, a message displays instructing the user to exit the iteration. The user is returned to the iteration and should then exit.
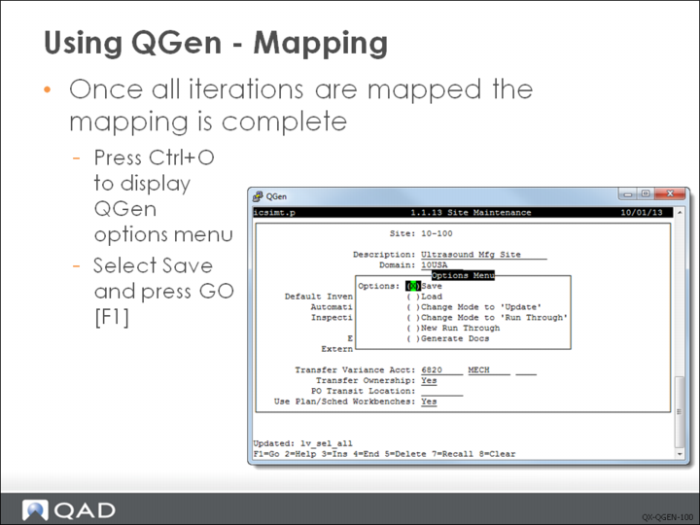
Once you have finished mapping the function, save the data that has been mapped. Press Ctrl+O to display the QGen options menu. Select Save and press Go.
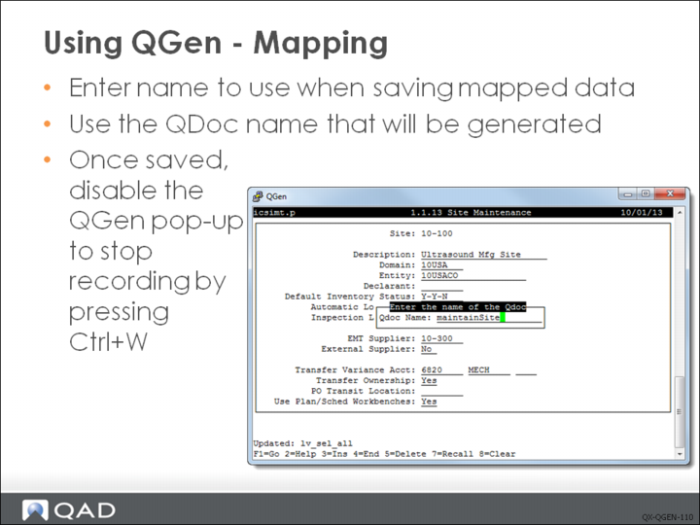
The system prompts you for a file name to save the recorded data. You should use the name of the QDoc that will be generated as this helps to identify the data file that was used to generate the QXtend artifacts for a specific QDoc.
The naming standard for QDocs is <verb><object>. The verb is the action performed by the API; for example, maintain, query, update, and so on. The object is the application component being acted on; for example, SalesOrder, PurchaseOrder, Customer, and so on.
The QDoc will be saved to $QXTEND_ADAPTER_HOME/tools/datFiles.
Once saved, disable the QGen pop-up to stop recording by pressing Ctrl+W.