Set Up Product Change Control
PCC Setup Overview
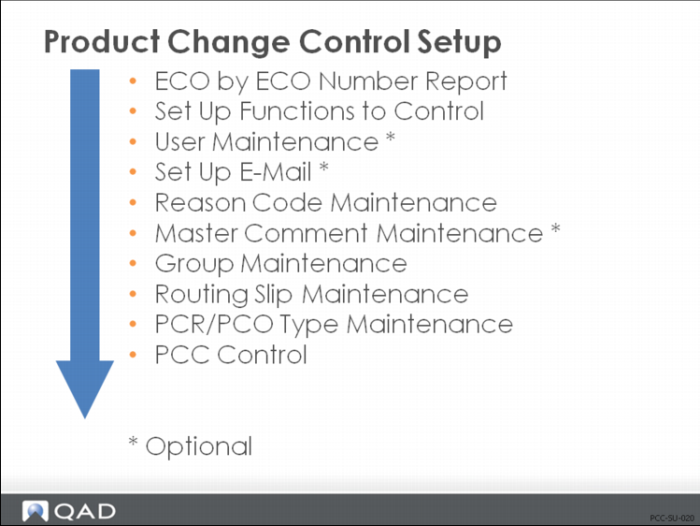
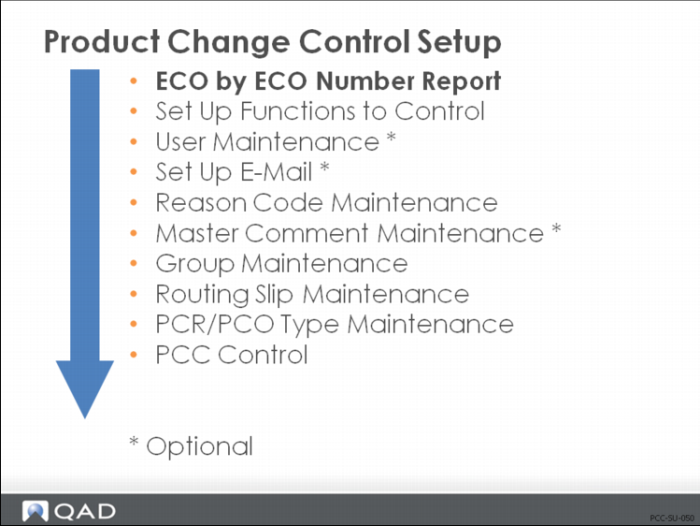
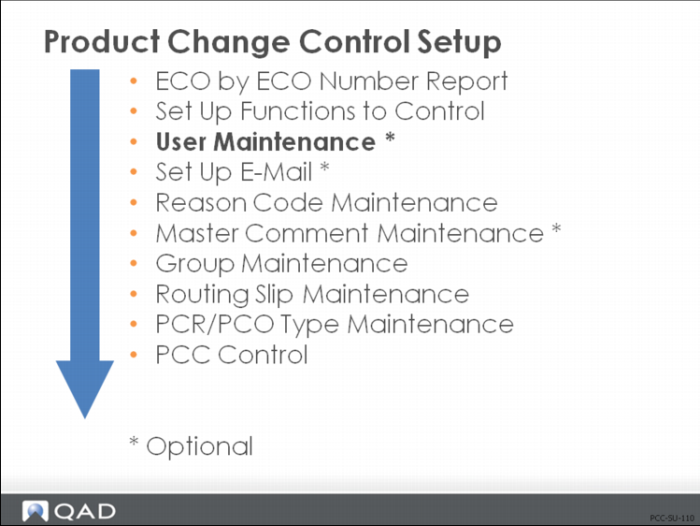
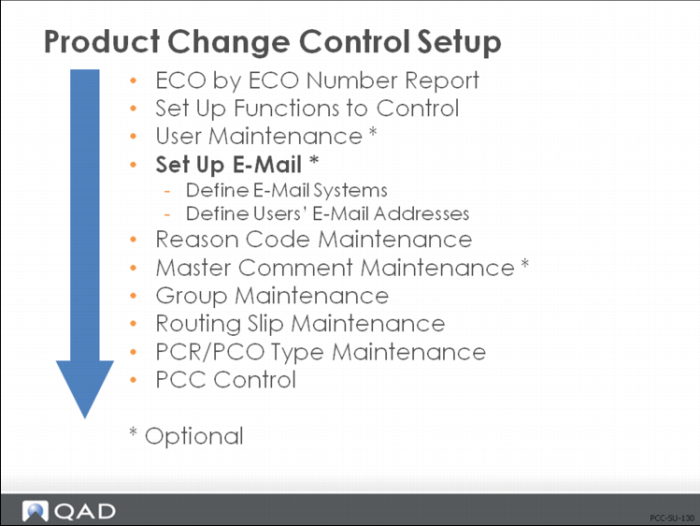
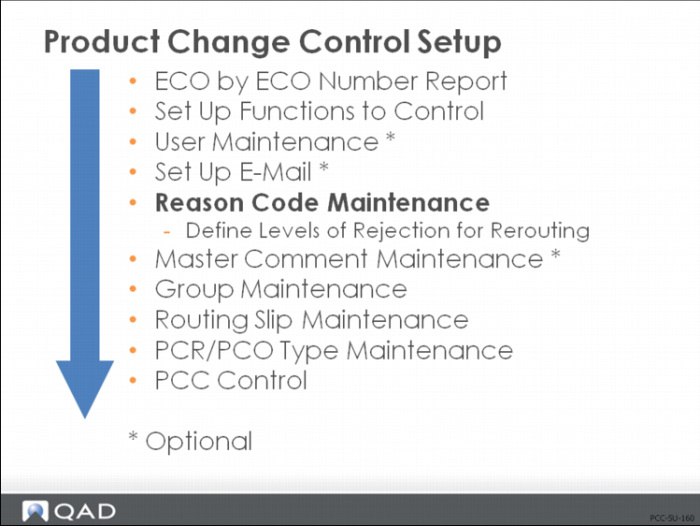
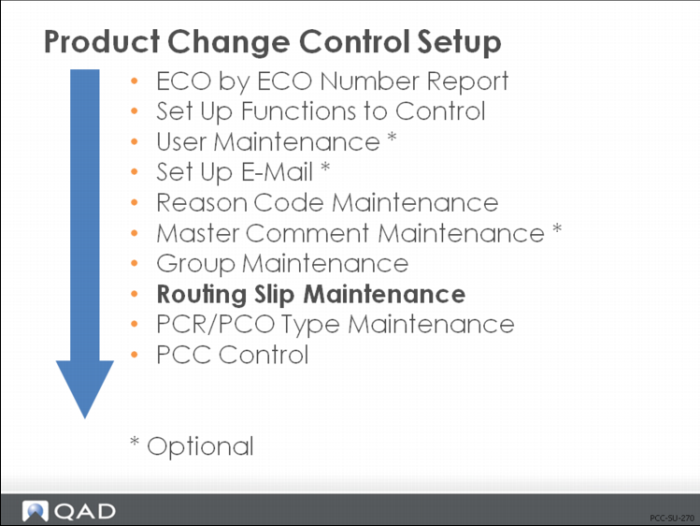
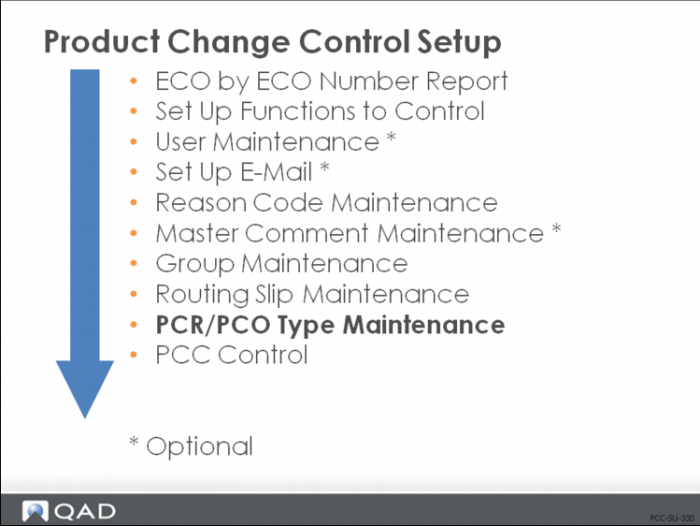
Product Change Control Setup
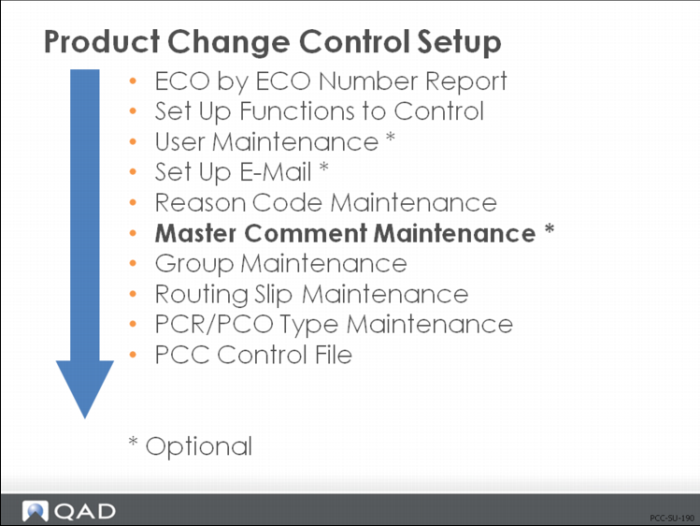
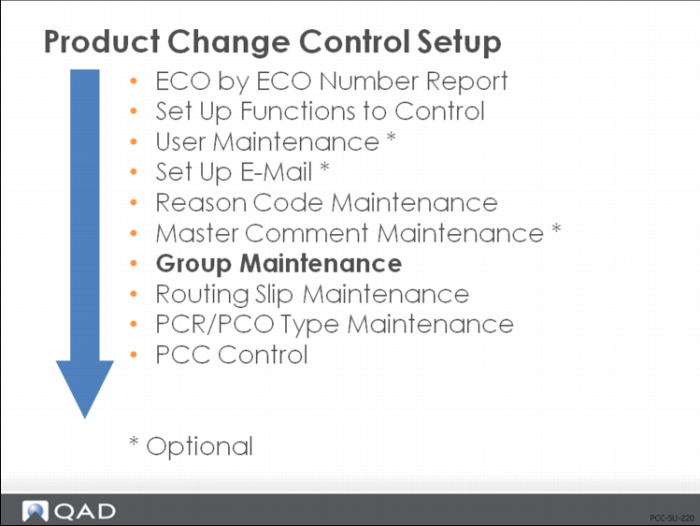
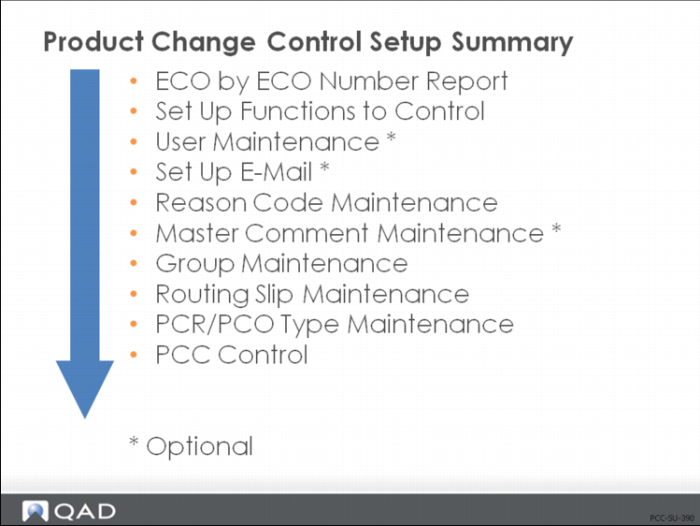
This illustration is a suggested setup sequence of master files for the Product Change Control module, which is based on information that flows from one master file to another and prerequisites that need to be accomplished before setting up a file.
The setup procedures for PCC assume general implementation of QAD SE has already been accomplished. The chapter outlines both required and optional setup procedures.
What is the procedure? | Who is responsible? |
Record ECO Data | IT and Management |
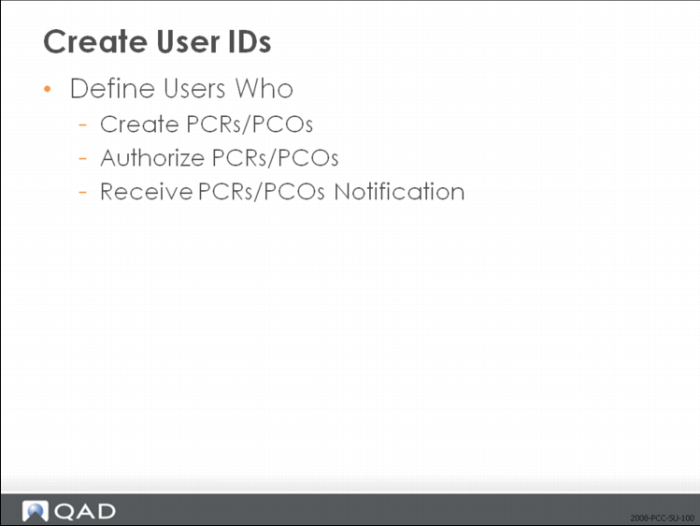
Create User IDs | IT |
Setup E-Mail | IT |
Setup Severity Codes | IT and Management |
Setup Master Comments | Cross-Functional Management Team |
Define Document Types | PCC Management |
Create Groups | PCC Management |
Design Routing Slips | PCC Management |
Set Up PCC Control | PCC Management |
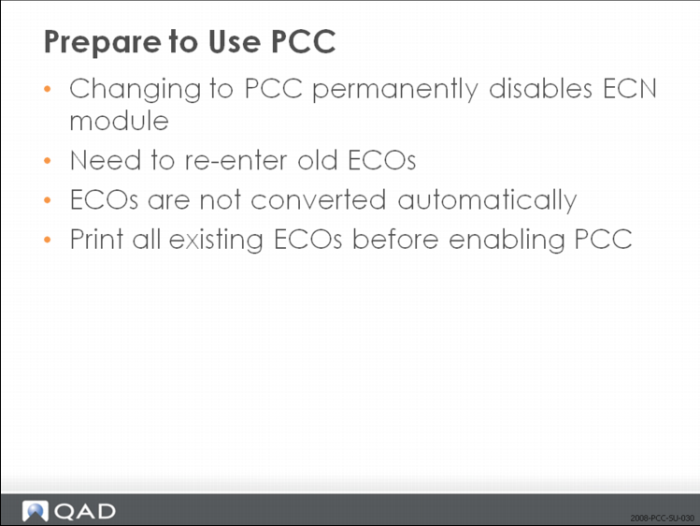
Prepare to Use PCC
1 If there are any existing Engineering Change Orders (ECOs) in the database:
Enter Engineering Change Notice (ECN) data manually into the PCC module.
2 As you prepare to use PCC, remember that the major benefit your business gains is that changes are expressed at the data level for product structures and routings, so that QAD SE can execute your instructions.
For example, a typical PCO might say, “Release new part B and obsolete old part A.”
Effective upon release of the PCO, the product structure for C has been changed from 1 EA A to 1 EA B.
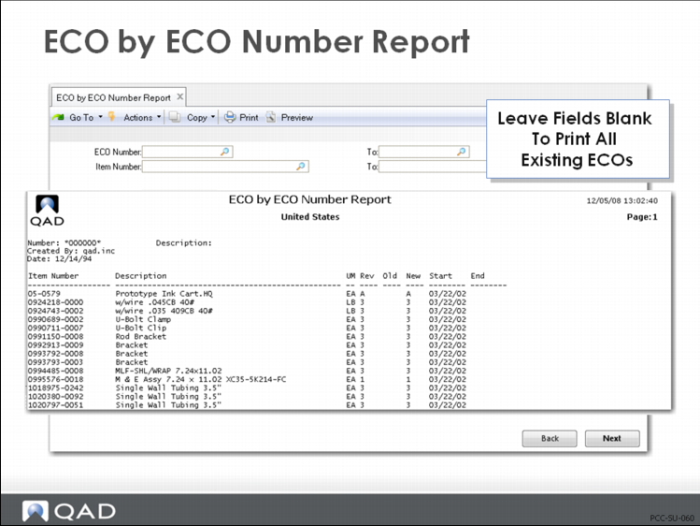
ECO by ECO Number Report (13.13.3)
• Print all existing ECOs
• Keep the report to use as the basis for keying new PCOs
Record ECO Data
• Enabling PCC is irreversible
You must print existing ECO information for manual conversion to PCRs or PCOs.
Set Up PCC Functions
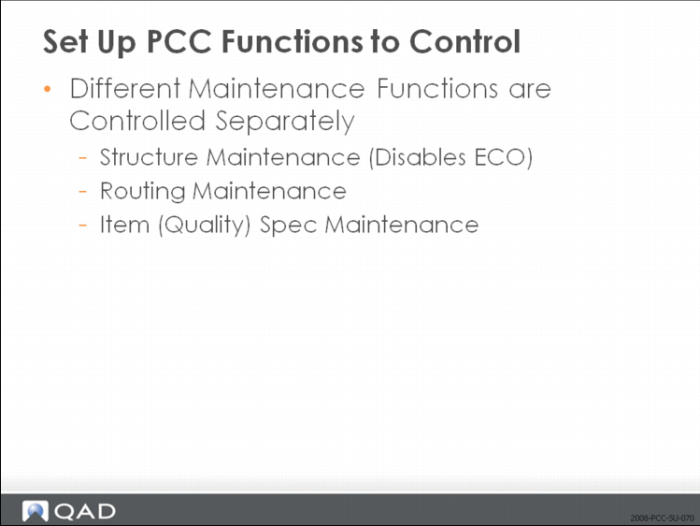
• ECO is disabled by the PCC Structure Maintenance
• Different functions can be controlled
• Each function is activated separately
First Exercise: Preliminary Setup
1 Verify Domain: From the workspace menu select Training.
a Note the domain name appears in the top window frame.
2 Verify GL Calendar Period
a Use GL Calendar Browse (25.3.5).
b Start search at current year.
c You should see a list of months for the current year.
d If you find No Records continue to step 3.
3 Use GL Calendar Maintenance (25.3.4).
a Enter the current year, then as a shortcut enter one period whose dates will cover the term of your training event.
Exercise: Set Up Addresses and Company Name
In this exercise, use Company Address Maintenance (2.12) to customize the screens and reports to show your company name.
Add the company address for Magic Boxes Inc., Company Address Code = 12.
Exercise: Print Existing ECOs
In this exercise use ECO by ECO Number Report (13.13.3) to print the existing ECOs before enabling PCC.
• In an environment where you have ECOs, print the ECO by ECO Report
• In a live database you would use this report to create new PCOs later
• For the purposes of these exercises you can print to PAGE
Set Up Functions to Control
Enable PCC Functions
We are covering three processes:
1 Structure Maintenance
2 Routing Maintenance
3 Item Spec Maintenance
Each process is activated separately.
Enabling PCC makes changes to your database that cannot be reversed.
If your manufacturing process uses Formulas, you need to activate Formula Maintenance (15.22) to create PCRs or PCOs for formula changes. Menu numbers 13.13.22, 14.22, and 19.1.22.
ECO Maintenance
Important: Once PCC has been enabled, you can no longer access ECO Maintenance.
Exercise: Set Up PCC Processes
In this exercise you ensure that PCC is enabled for several processes.
1 Use Enable PCC Product Structure Maintenance (13.13.22) to enable PCC product structure maintenance.
2 Use Enable PCC Routing Maintenance (14.22) to enable PCC routing maintenance.
3 Use Enable PCC Item Spec Maintenance (19.1.22) to enable PCC item spec maintenance.
4 Use Enable PCC Formula Maintenance (15.22) to enable both Formulas and Processes.
Note: Formula and Process changes are optional exercises. However, you must enable Formula Maintenance for PCC if you plan to do any of the optional formula or processing exercises in this training guide.
Exercise: Set Up a Cost Center
1 Use Cost Center Code Maintenance (25.3.20) to set up a Cost Center for Magic Box in the General Ledger.
Field | Data |
Cost Center | 12 |
Description | Magic Box |
Active | Yes |
From Account | 1035 |
To Account | 9510 |
Exercise: Set Up Domain/Account Control
1 Use Domain/Account Control (36.1); Uncheck Verify GL Accounts.
Exercise: Set Up Product Line Information
1 Use Product Line Maintenance (1.2.1) to set up the following product line information:
Field | Data |
Product Line | 12 |
Description | Magic Box |
Taxable | No |
Tax Class | <blank> |
Inventory Accounts
Field | Data | Cost Center |
Inventory Account | 1500 | 12 |
Inv Discrepancy Account | 5900 | 12 |
Scrap Account | 5800 | 12 |
Work in Progress Account | 1600 | 12 |
Method Variance Account | 6200 | 12 |
Cost Revalue Account | 1550 | 12 |
Sales Accounts
Field | Data | Cost Center |
Sales Account | 3000 | 12 |
Sales Discount Account | 3900 | 12 |
COGS Material Account | 5050 | 12 |
COGS Labor Account | 6860 | 12 |
COGS Burden Account | 6480 | 12 |
COGS Overhead Account | 6495 | 12 |
COGS Subcontract Account | 5070 | 12 |
Exercise: Set Up Item Status Codes
Use Item Status Code Maintenance (1.1.5) to add a new item status code.
1 Use your down arrow to display existing item status codes.
a Advance your cursor to the next frame.
b Review the restricted transactions for the item status code.
2 Add a new item status code, Exper, with a description of Experimental.
3 Add the following Restricted Transaction Codes:
• ADD-PS
• ADD-SO
• ADD-WO
• ISS-SO
• ISS-WO
4 Save your changes.
5 Use Item Status Code Maintenance (1.1.5) to add another status code to the following restricted transactions for item status code Proto:
Field | Data |
Item Status | Proto |
Description | Prototype |
Restricted Transactions | ADD-SO |
| ISS-DO |
| ISS-SO |
Exercise: Set Up Site Data
1 Use Site Maintenance (1.1.13) to enter site information for the Magic Box Plant.
Field | Data |
Site | 12 |
Description | Magic Box Plant |
Entity | T100 |
Default Inventory Status | Y-Y-N |
Automatic Locations | No |
Database | <blank> |
EMT Supplier | <blank> |
External Supplier | No |
Transfer Variance Account | 5030 12 |
Exercise: Set Up Location Data
1 Use Location Maintenance (1.1.18) to set up a Stock location at site 12.
Field | Data |
Site | 12 |
Location | Stock |
Description | Component Stock Room |
2 Set up a location for finished goods inventory at site 12.
Field | Data |
Site | 12 |
Location | FGI |
Description | Finished Goods Inventory |
Exercise: Set Up Inventory Control
1 Use the Inventory Control (3.24) to enter the following information:
Field | Data |
Summarized Journal | Yes |
Journal Reference Method | 10 |
Default Site | 12 |
Create User IDs
Each member of a group must be defined as a user in QAD Standard Edition.
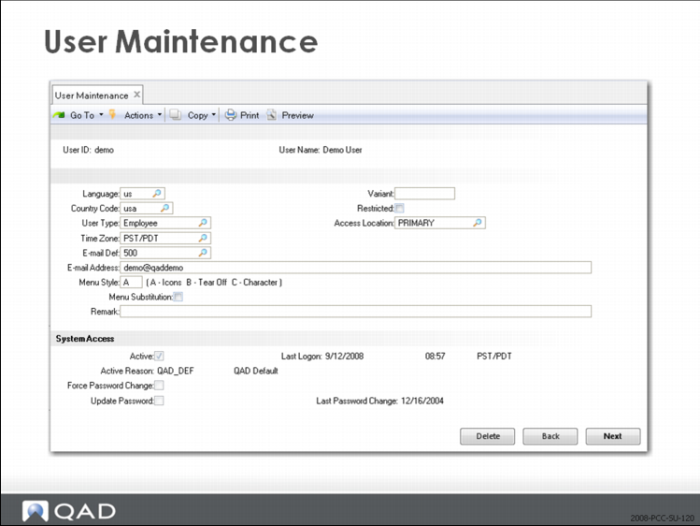
User Maintenance (36.3.1)
• Assign User ID and User Name
At this stage, validate that the user records exist and are correct. You'll add e-mail notification and assign users to groups later.
User Maintenance
• Add new users
• Make changes to existing users
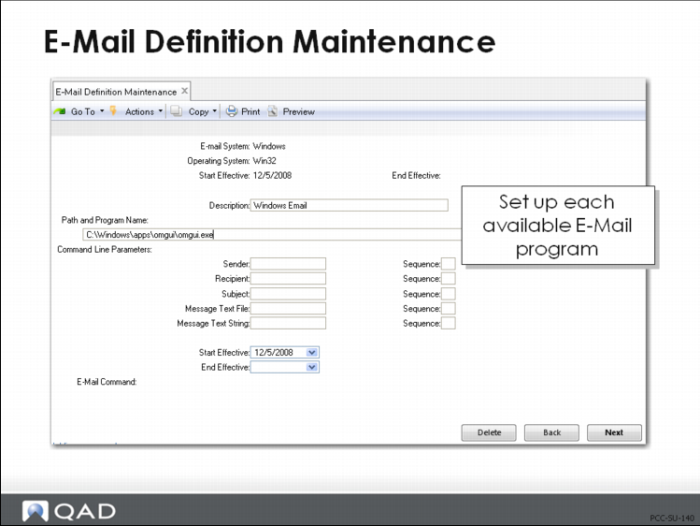
E-Mail Definition Maintenance (36.4.20)
• Use E-Mail Definition Maintenance (36.4.20) to set up each available e-mail program
• Name the system you are defining
• Choose your platform
• Assign the path and program name
• If more than one e-mail choice is available, assign additional systems
• See your System Administrator
• There are four programs responsible for e-mailed messages in the PCC module
• pcmail01.p sends “HAS BEEN SUBMITTED FOR APPROVAL” (3757)
• pcmail02.p sends “IS READY FOR YOUR APPROVAL” (3758)
• pcmail03.p sends “HAS BEEN APPROVED” (3759)
• pcmail04.p sends “HAS BEEN RELEASED AND DISTRIBUTED” (3760)
Note: The e-mail system field of E-Mail Definition Maintenance must match the e-mail Definition field of User Maintenance.
Set Up E-Mail
• Various reports in PCC can be routed via e-mail
• Very effective for PCC notification
• E-mail information is very system/implementation specific
• There are no default values for E-Mail Definition Maintenance (36.4.20)
After setting up all available e-mail systems, return to the User files to assign e-mail addresses.
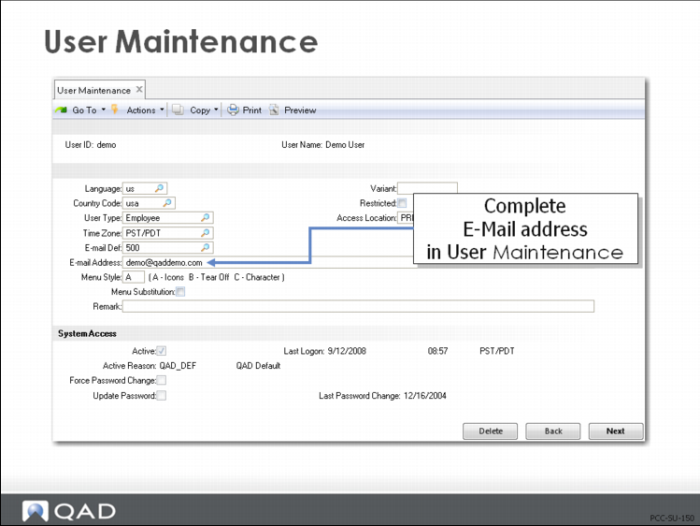
User Maintenance (36.3.1)
• Return to the User Maintenance screens to assign e-mail addresses
• Full addresses are required, including the domain name
Note: Because e-mail systems are unique and must have exact information supplied in setup, there is no corresponding exercise for this procedure.
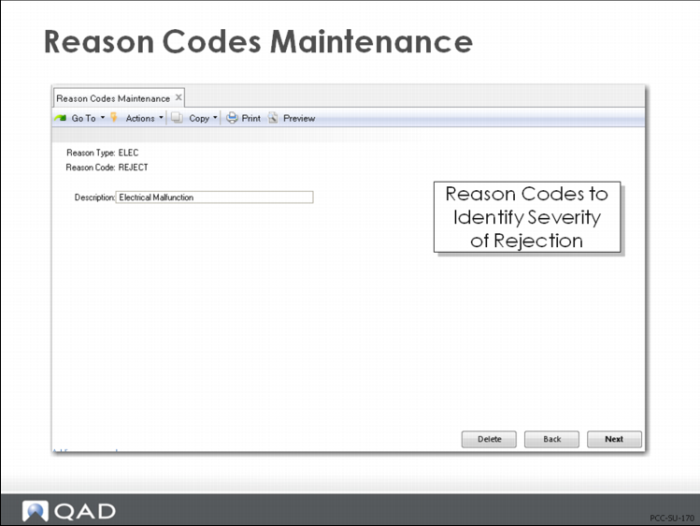
Reason Code Maintenance (36.2.17)
• Severity codes are assigned as reason codes
• If rerouting is enabled, severity codes must be numerical and hierarchical
• Rerouting logic looks for greater than or equal to numeric values
• Use numerical and hierarchal codes if you want to enable rerouting logic
• Assign the type
• Description field prints on displays and reports
Reason Code Maintenance
Set up Severity Codes
• Severity codes define levels of rejection or conditional approval
If rerouting is enabled, severity codes determine who needs to reapprove PCR/PCO.
Exercise: Set Up User IDs
Use User Maintenance (36.3.1) to set up the following user IDs:
There are many fields required for the user ID security setup. For this exercise most of the required fields will have the same value. These are the common values:
Field | Data |
Language | US |
Country | USA |
Access Location | Train |
Active Reason | OAD_DEF |
Password | <blank> |
Domain | Train |
Group Name | user (click Back) |
Authorize user for all licensed products | Yes (click Back) |
Is all information correct | Yes |
User ID | Language | User Name | Employee |
Eng1 | US | Engineer1 | Yes |
Eng2 | US | Engineer2 | Yes |
Pln1 | US | Planner1 | Yes |
Pln2 | US | Planner2 | Yes |
Mfg1 | US | Mfg. Manager1 | Yes |
Mfg2 | US | Mfg Manager2 | Yes |
QEng1 | US | Quality Engineer1 | Yes |
QEng2 | US | Quality Engineer2 | Yes |
Acct | US | Cost Accountant | Yes |
Your Login | US | Your Name | Yes |
Note: There are no default values for E-Mail Definition Maintenance (36.4.20) because e-mail systems vary widely. When implementing PCC in your business, you need to set up the system parameters before using e-mail notification.
There are no exercises for setting e-mail in this training course, because of the system-specific administration. Your e-mail system administrator needs to be involved in setting up the parameters of e-mail within QAD SE. Continue with the User ID exercise.
Exercise: Set Up Generalized Codes
Use Generalized Codes Maintenance (36.2.13) to enter the following:
Field Name: pt_rev
Value | Comment |
1 | Prototype Rev |
2 | Prototype Rev |
3 | Prototype Rev |
4 | Prototype Rev |
5 | Prototype Rev |
6 | Prototype Rev |
7 | Prototype Rev |
8 | Prototype Rev |
A | Production Release |
B | Production Release |
C | Production Release |
D | Production Release |
E | Production Release |
F | Production Release |
G | Production Release |
H | Production Release |
Use copy paste for comments.
Continue entering the following generalized codes: Field Name: ECM_ECR_DSPN
Value | Comment |
UAI | Use as is |
POO | Rework parts on order |
WIP | Rework WIP |
FGI | Revise through FGI |
FUP | Requires field upgrade |
Exercise: Set Up Reason Code Severity Levels
Use Reason Code Maintenance (36.2.17) to enter the information below in order to set up reason code severity levels.
Reason Type | Reason Code | Description |
PCO | 10 | No effect parts/process |
PCO | 20 | Rework parts on order |
PCO | 30 | Rework on order/WIP |
PCO | 40 | Rework thru WIP/scrap |
PCO | 50 | Effect thru FGI |
PCO | 60 | Rework thru FGI/scrap |
PCO | 70 | Rework thru field units |
PCO | 80 | Replace field units |
Master Comment Maintenance
• Useful for:
• Disclaimers
• Policies
• Checklists
• Surveys
• Standard Procedures
Disposition Forms
Set up Master Comments
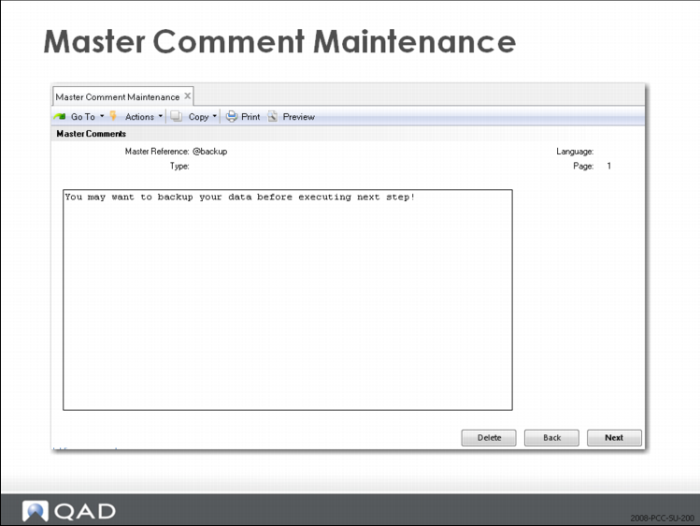
Standard comments are used to copy into the PCO body.
Master Comment Maintenance (1.12)
• Assign a reference for the comment
• Comment text can be up to 99 pages of free-form text, accessible by reference code, type, language, and page number
• Associate comments with entities by setting Master Reference equal to an item number or customer or supplier code
Comment text has no owner and therefore is not private.
Group Maintenance
• Users added to groups must be previously defined in User Maintenance (36.3.1)
• You can specify a date when user membership expires in a group
• You can also specify the number of copies of a PCR or PCO they should receive and the output device to be used
Users can also receive e-mail messages, based on the routing slip attached to a PCO or PCR.
Create Groups
• QAD SE does not distinguish different types of groups
• Type is how it is used, not how it is defined
• Group names should reflect their type
• Users can be in more than one group, and more than one type of group
Group Maintenance (1.9.1.1)
• Specify a unique group name
Give a brief description of how the group is used in PCC
Add Users
• Expire date is optional for assigning when group membership ends
• If copies is set = 0, the user receives only e-mail
• If copies is set = 1 or above, this assigns the number of printouts at the specified Output
Maintain Users in Groups (1.9.1.3)
Add Users
• Add new users
• Change user attributes
• Replace users
• Remove users
• Available groups shows PCC groups to which the user does not yet belong
Replace Users
• Works like adding users to groups
• Specify both the current user ID and the user ID of the person who will replace them
• Update the replacing user’s attributes and groups by specifying the same ID in both fields
Remove Users
• Delete users from groups
• You must remove users from group membership if you plan to delete a user ID
Exercise: Set Up PCC Groups
Help
1 Use Drill Down/Lookup Maintenance (36.20.1) to add the following information:
Drill Down/Lookup | Drill Down |
Field | ECM_ECR_DSPN |
Calling Procedure | <blank> |
Procedure to Execute | GPLU072.P |
2 Use Group Maintenance (1.9.1.1) to create PCC groups and assign members to the groups. Enter group name and click Next. Enter description and click Next. Enter user ID and click Next. Expire Date, Copies, and Output fields are not required for this exercise, leave blank. click Next, the cursor returns to the User ID field, enter the next User ID, continue until all users for this group are entered. Click the Back button to enter next group. Repeat until all user IDs are entered.
Group | Description | User IDs |
Design | PCC Design Group | Eng1 |
| | Eng2 |
| | QEng1 |
| | QEng2 |
| | Your Login |
Eng/Apv | Engineering Approval | Eng2 |
| | Your Login |
Pln/Apv | Buyer/Planner Approval | Pln1 |
| | Pln2 |
| | Your Login |
Mfg/Apv | Mfg. Manager Approval | Mfg1 |
| | Mfg2 |
| | Your Login |
Qual/Apv | Quality Eng. Approval | QEng1 |
| | QEng2 |
| | Your Login |
Dist | PCO Distribution List | Pln1 |
| | Mfg1 |
| | Acct |
| | Your Login |
3 Use Group Browse (1.9.1.2) to check your work.
Exercise: Set Up Item Master
1 Use Item Master Maintenance (1.4.1)
Field | Data |
Item Number | 12-100 |
Description | Magic Box, Packaged |
UM | EA |
Prod Line | 12 |
Design Group | Design |
Status | Proto |
Rev | 2 |
Lot/Serial | S |
Site | 12 |
Location | FGI |
Exercise: Set Up Item Data
1 Use Item Data Maintenance (1.4.3) to enter the item data information below.
Item# | Description | Prod Line | Design Grp | Status | Rev |
12-100 | Magic Box Packaged | 12 | Design | AC | A |
12-101 | Magic Box Assembly | 12 | Design | AC | A |
12-102 | PCB Assy | 12 | Design | AC | A |
12-103 | Packaging Material | 12 | Design | AC | A |
12-104 | Label | 12 | Design | AC | A |
12-105 | Switch | 12 | Design | AC | A |
12-115 | Sub-assembly | 12 | Design | AC | A |
AP12-101 | Assembly procedure for Magic Box | 12 | Design | AC | A |
AP12-100 | Assembly procedure for packaging Magic Box | 12 | Design | AC | A |
Exercise: Set Up Inventory Data
1 Use Item Inventory Data Maintenance (1.4.5) to enter the following inventory data:
Item# | Lot/Serial | Site | Location |
12-100 | S | 12 | FGI |
12-101 | L | 12 | Stock |
12-102 | S | 12 | Stock |
12-103 | | 12 | Stock |
12-104 | | 12 | Stock |
12-105 | | 12 | Stock |
12-115 | L | 12 | Stock |
Exercise: Set Up Item Planning Data
1 Use Item Planning Maintenance (1.4.7) to enter the following item planning data:
Item# | Order Qty | Pur/Mfg | Mfg LT | Pur LT |
12-100 | 10 | M | 1 | |
12-101 | 10 | M | 1 | |
12-102 | 10 | P | | 5 |
12-103 | 10 | P | | 2 |
12-104 | 10 | P | | 12 |
12-105 | 10 | P | | 5 |
12-115 | 10 | P | | 12 |
Exercise: Set Up Item Cost Data
1 Use Item Cost Maintenance (1.4.9) to enter the following item cost data:
Item# | Price | G/L Cost Material | Curr Cost Material |
12-100 | 5,000.000 | | |
12-101 | | | |
12-102 | | | 25.00 |
12-103 | | | 1.25 |
12-104 | | | 0.05 |
12-105 | 15.00 | | 1.25 |
12-115 | | | 35.00 |
Exercise: Set Up Product Structures
1 Use Product Structure Maintenance (13.5) to enter the following product structure data for parent item 12-100:
Component
Item# | Qty Per | UM | Structure Type |
12-101 | 1 | EA | -- |
12-103 | 1 | EA | -- |
12-104 | 1 | EA | -- |
AP12-100 | 1 | EA | D |
2 Enter the following for parent item 12-101:
Item# | Qty Per | UM | Structure Type |
12-102 | 1 | EA | -- |
12-105 | 1 | EA | -- |
12-115 | 1 | EA | -- |
AP12-101 | 1 | EA | D |
3 Verify the product structure data using Product Structure Inquiry (13.6).
Exercise: Set Up a Department
1 Use Department Maintenance (14.1) to set up a department for the production of the Magic Box by entering the following information:
Field | Data |
Department | Dept |
Description | Magic Box Production |
Exercise: Set Up a Work Center
1 Use Work Center Maintenance (14.5) to set up a work center for Magic Box Assembly by entering the following data:
Field | Data |
Work Center | Magic |
Description | Magic Box Assembly |
Department | Dept |
Setup Rate | 25.00 |
Labor Rate | 20.00 |
Lbr Bdn% | 100.00 |
Routing Slip Maintenance
• The same routing slip can be used for both PCOs and PCRs
• Create new routing slips in Routing Slip Maintenance (1.9.1.5)
• Copy from existing slips to a new slip in Routing Slip Copy (1.9.1.7)
Define Routing Slips
• Identifies who needs to approve and who needs notification
• Routing details are PCC specific
Provides a platform for obtaining ISO 9000 certification
Approval Routing
• Sequence indicates order of approval
• Each group must have a different sequence number
• Can Re-Route indicates whether group can reroute PCR/PCO if rejected
• Severity Level determines whether a rejected/rerouted PCR/PCO is rerouted to this group
• In our example, the Finance group assigned rerouting severity = 20
• If the Severity is greater than or equal to the Severity Level assigned to a group, the group must reapprove
• If the Severity had been 25, it would have rerouted to the Engineering group
• Rerouting is not related to approval sequence
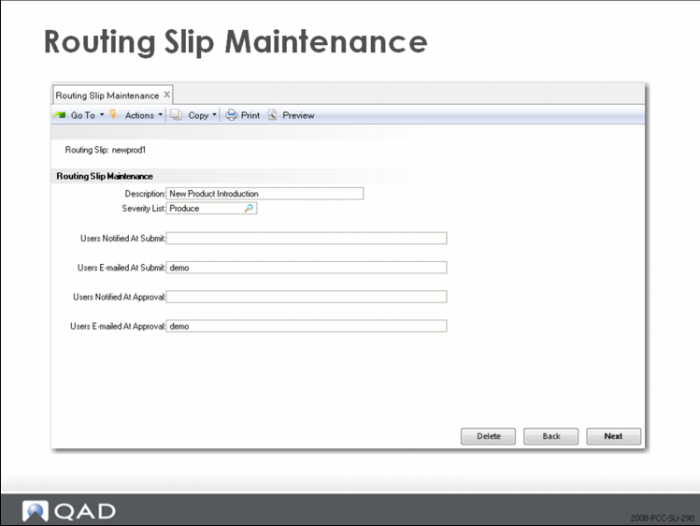
Routing Slip Maintenance (1.9.1.5)
• Specify unique routing slip name and a short description
• Identify the name of the severity list (a reason code)
• Should be numerical and hierarchical
• Assign users based on when they are involved in the process
• Users e-mailed are non-QAD SE users
• Check accuracy carefully because QAD SE cannot verify these addresses
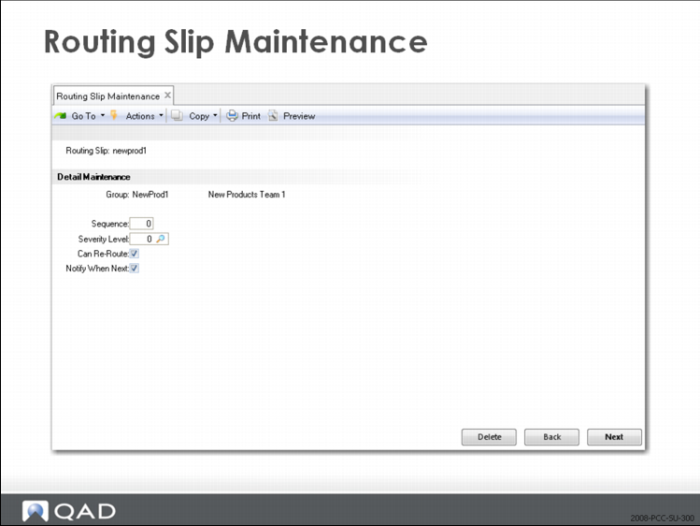
Detail Maintenance
• Sequence specifies sign-off order
• To provide for sequence additions, number 10, 20, 30, and so on.
• Severity Level indicates at which level this group provides reapproval
• The higher the value, the less likely the group will have to reapprove rejected PCRs/PCOs
• Can Re-Route streamlines reject/reroute process if set = Yes
• If set = No, each rejected document must be reapproved by every group in the routing
• Notify Next sends notification to group members when they are next in the approval process
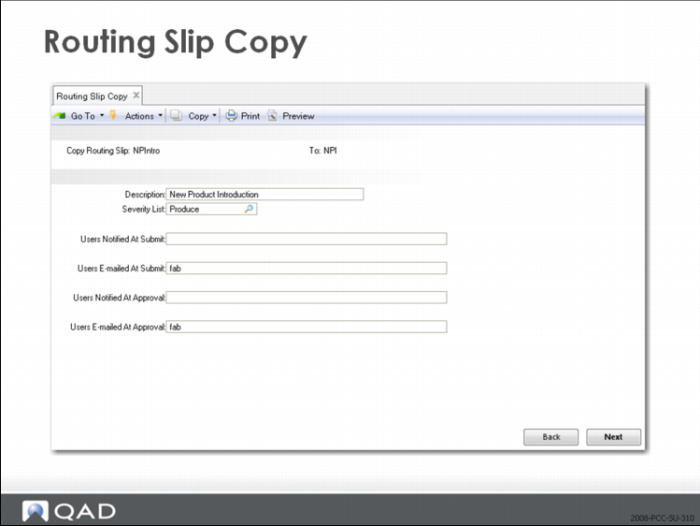
Routing Slip Copy (1.9.1.7)
• Allows you to create a new routing slip based on a previously created one
• Lists of users notified at submission and approval are copied
• Copy function will query if you want to copy routing detail
• Further editing is done in Routing Slip Maintenance (1.9.1.5)
Exercise: Set Up Routing
1 Use Routing Maintenance (14.13.1) to set up routing by entering the following data for Routing Code 12-101:
Operation | 10 | 20 |
Work Center | Magic | Magic |
Description | Assemble Magic Box | Test Magic Box |
Setup Tim | 1.0 | 0.0 |
Run Time | 0.4 | 0.1 |
2 Set up routing by entering the following data for Routing Code 12-100:
Operation 10: | 10 |
Work Center: | Magic |
Description: | Package Magic Box |
Setup Time: | 0.5 |
Run Time: | 0.1 |
Exercise: Set Up Quality Specification
1 Use Item Specification Maintenance (19.1.13) to set up a specification for the test at operation 20 of the 12-101 Magic Box assembly.
Field | Data |
Item Number | 12-101 |
Routing/Procedure | 12-101 |
Operation | 20 |
Document | AP12-101 |
Number | 1 |
Characteristic | Voltage at Term. A |
Test Method | DVM |
Specification | 9.3<=Voltage=<9.7 |
Exercise: Set Up Routing Slips
1 Use Routing Slip Maintenance (1.9.1.5) to set up a routing slip for PCOs.
Enter the following:
Field | Data |
Routing Slip | PCO-R1 |
Description | PCO Routing Slip R1 |
Severity List | PCO |
2 Click Next, enter the following in Detail Maintenance.
Group | Eng/Apv | Mfg/Apv | Pln/Apv | Qual/Apv |
Sequence: | 0 | 0 | 0 | 0 |
Severity Level: | 10 | 30 | 20 | 10 |
3 Place check marks in the following boxes for all of the groups:
Check: | Can Re-Route |
Check: | Notify When Next |
Exercise: Set Up a PCR Routing List\
Use Routing Slip Copy (1.9.1.7) to enter the following:
1 Copy Routing Slip: PCO-R1 To: PCR-R1.
2 Enter the following information in Routing Slip Maintenance (1.9.1.5):
Field | Data |
Routing Slip | PCR-R1 |
Description | PCR Routing Slip R1 |
Severity List | PCO |
3 Click Next and select Yes, to copy routing details.
4 Use Routing Slip Maintenance (1.9.1.5) to modify the PCR routing slip.
5 Select PCR-R1, advance to the Detail Maintenance frame.
6 With your cursor in the Group field, press the down arrow until Mfg/Apv appears in the field.
7 Click Enter, click Delete, (Confirm Delete).
8 Press the down arrow until Pln/Apv appears in the field.
9 Click Enter, click Delete, (Confirm Delete).
10 Use the up and down arrow keys to verify that only Eng/Apv and Qual/Apv remain. Leave all values the same.
11 Exit function.
Define Documents
Valid document types are selected when creating a new PCR/PCO.
PCR/PCO Type Maintenance
• Change types involve careful planning:
• Should document be PCR or PCO
• Type of routing slip
• Distribution group
• Prefix and number for this document
PCR/PCO Type Maintenance (1.9.1.9)
• Assign a unique type to new document
• Assign Design Group authorized to make changes to this document type
• Select whether this document is a PCR or a PCO
• Prefix is also assigned in PCC Control (1.9.24) for autonumbering
• Warning message will notify you if the prefix is not in the control program yet
• Assign an existing routing slip to use with this document
• Distribution group selected will be notified when these are Released and Distributed
PCC Control
• Numbering
• Security
• Groups
• Design groups to create/maintain PCRs/PCOs
• Approval groups to sign off on PCRs/PCOs
• Distribution groups to notify when PCO is released
• Routing slips for approvals
• Document types
Set Up PCC Control
• Security has the option to check user IDs during approval
• Autonumbering can generate document numbers for PCR/PCO documents
Manual override of these numbers is still available
PCC Control (1.9.24)
• Automatically assign prefixes and numbers to new PCR or PCO, as defined in next frame
• Select Security option to require password during PCO approval
• Specify whether groups must approve PCOs in the order shown in Routing Slip Maintenance
PCC Control (1.9.24)
Prefixes:
• Prefixes are limited to three characters
• Prefixes correspond to existing Document Types
Exercise: Set Up PCR/PCO Type Maintenance
1 Use PCR/PCO Type Maintenance (1.9.1.9) to enter the following data:
Type | PCO | PCR |
Design Group | Design | Design |
Description | PCO Document | PCR Document |
Doc Type | PCO | PCR |
Prefix | PCO | PCR |
Routing Slip | PCO-R1 | PCR-R1 |
Distribution | DIST | Design |
Exercise: Set Up PCC Control
1 Use the PCC Control (1.9.24) to enter the following data in the indicated fields:
Field | Data |
Auto Numbers | Yes |
Security | No |
Enforce PCO Approval Grp Sequence | No |
PCO | 1000 |
PCR | 8000 |
Summary