Enabling Permissions
In most organizations, many users share the same role, needing access to the same system functions. Therefore, when you set up permissions in the Web UI, the most efficient and risk-free method is to set up permissions at user group and function group level first. After permissions are working at group level, you can begin to set more granular permissions at user and option level.
By default, permissions are not enabled in the Web UI. This means that every user has access to all parts of the system. Unlike Windows UI, however, the Web UI is designed as a grant-access application. When you enable permissions for the system, the administrator must explicitly grant permissions to users and user groups.
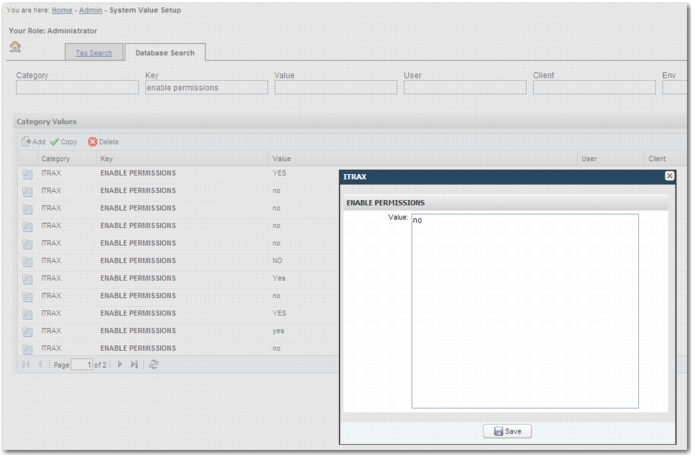
To enable permissions, open the System Values page. In the More list, choose Administration, and click the Enable Permission system value. You can enable permissions at three levels:
• Global
• Client
• User
Permission Levels
Enable permissions for the chosen level and set the value to Yes. It is good practice to have at least one admin user for whom permissions are not enabled. To do this, add a user-level system value for this user and set the value to No.
Note: Although you can set permissions at client level, you cannot set different permissions for different clients. You can only maintain one set of permissions.
You can also enable permissions in the Windows UI. Use the fast path option Y3 to access the system values screen. In the Category field, type ITRAX. The key is ENABLE PERMISSIONS.
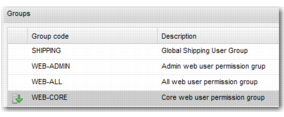
Core Role
If you enable permissions, all system users need to be able to log in and log out and run the options they have permissions for. A core role, WEB-CORE, is defined in the solution. This allows users to perform these basic tasks.
WEB-CORE