Project Groups
Projects can in turn be grouped together into Groups. A project must only appear in one Project Group. To create a Project Group use the File/New Group menu option. Project Groups can be removed by using the right mouse menu when positioned on a group name.
Adding Objects to Projects
There are several different ways to add objects to a project:
Click an object in the left pane, type Ctrl/C, click the target project (either the project folder or any object group or object within it) and type Ctrl/V
Drag the object to the required project
Right click on an object in the left pane and choose Projects/Add to Project
Highlight a number of objects in the middle pane, right click and choose Projects/Add to Project
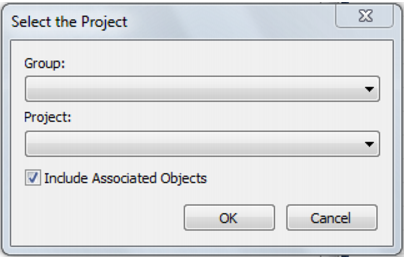
Both options above that use the right click Projects/Add to Project menu result in the following dialog box being displayed:
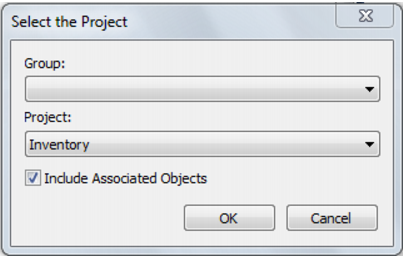
To add an object to an independent project (a project that is not in a group), choose the required project from the project drop down list and click OK:
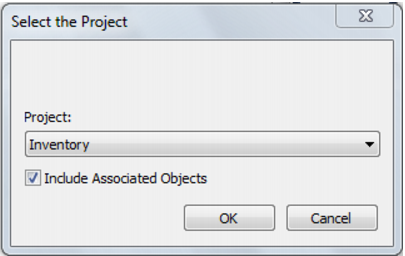
If Groups have been created, both drop down lists will be visible. If Groups have not been created, only the project drop down will be visible like this:
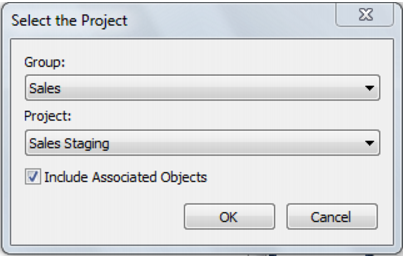
To add an object to a dependent project:
1 Choose the required group from the group drop down list
2 Choose the required project from the project drop down list
3 Click OK
Note: The Include associated objects check box on the above dialog boxes, will also add any indexes, procedures and scripts to the selected project.
Removing Objects from Projects
There are several different ways to remove objects from a project:
Drag the object to the blank area at the bottom of the pane
Drag the object into the middle pane
Drag the object to the 'All Objects' project
Right click on an object in the left pane and choose Projects/Remove from Project
Highlight a number of objects in the middle pane, right click and choose Projects/Remove from Project
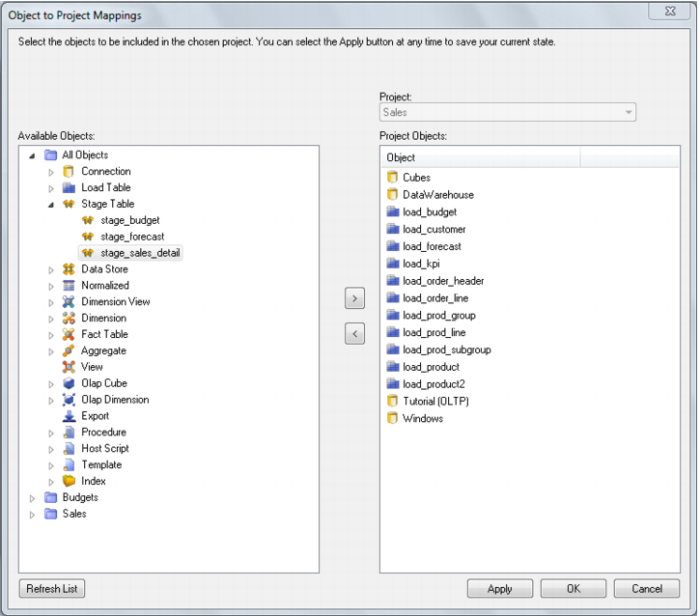
Using Project Object Maintenance
The Project Object Maintenance Facility is invoked by right clicking on a project and choosing Project Object Maintenance.
The following dialog is displayed:
To add objects to a project, move objects from the left to the right using the > button. By default, associated object (procedures, scripts and indexes) are also moved to the left. These can be manually removed if not required.
To remove objects from a project, move objects from the right to the left using the < button.
When done, click OK.
Clicking Apply will update object/project relationships without having to exit the Project Object Maintenance Facility.
Clicking Refresh will refresh the object tree in the left pane.
Adding Projects to Groups
The best way to move a project into a group is to create the project in the group in the first place. This is done by creating a new project using the right click New Project option while on the group:
The other option is to move an existing project from another group into this group. See
Moving Projects within Groups (on page
26)
Removing Projects from Groups
A project can be removed from a group by:
Dragging the project to the blank area at the bottom of the pane
Dragging the project into the middle pane
Dragging the project to the All Objects project
Removing the project using right click Remove Project from Group
Deleting the project using right click Delete Project
Note: The first four methods move the project out from the group to become an independent project. The last option removes the project from the metadata repository.
Moving Projects within Groups
Note: An object can be in any number of projects, but a project can only be in one Group.
Performing a drag from one group to another group will simply create an additional project->group mapping.
To move a project from one group to another group:
1 'Copy' the project by dragging the project from the one group to the other group.
2 Remove the project from the original group by right clicking and selecting Remove Project from Group.
Windows and Panes
QAD Data Warehouse Designer has a number of different windows that are utilized in the building and maintenance of a data warehouse. Each window may in some cases be broken into panes. There are four main windows that are used extensively in the building of a data warehouse. These are the Builder window, the Scheduler window, the Diagrammatic window and the Procedure Editor window.
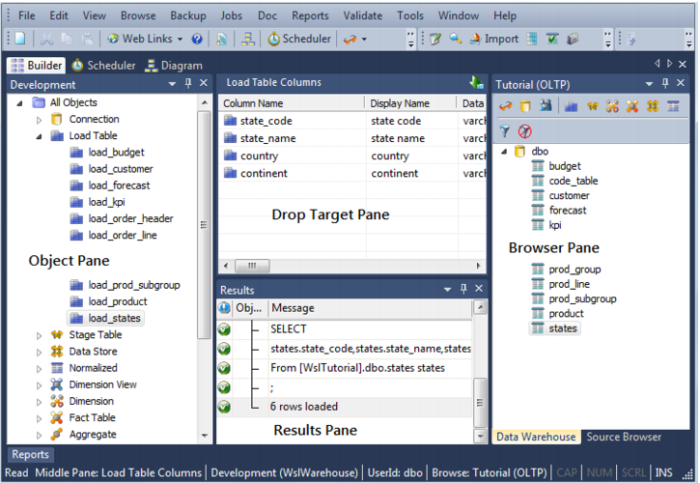
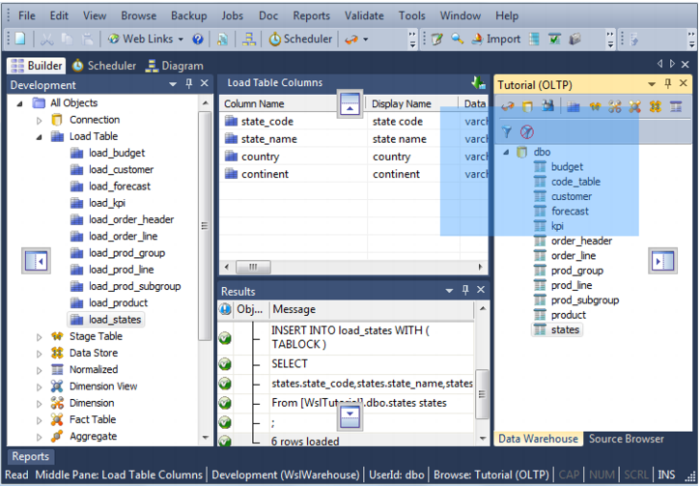
Main Builder Window
The following graphic is a snapshot of the main standard Builder Window. This window typically has three active panes.
The left, bottom and right panes can be dragged out of its docking place and docked elsewhere. Docking handles appear when a pane is dragged.
The left most pane contains all the objects within the metadata repository. These objects are stored in object groups (e.g. Dimension ). The object groups are in turn optionally stored in Projects, and the Projects are optionally stored within Project Groups.
The middle pane is used to show the results of various queries on both the metadata and the underlying source and database tables. The middle pane is also used as the drop target in drag and drop operations. The status line at the bottom of the screen displays the current contents of the middle pane.
The right pane is the browser pane and it shows source systems. There are two browser panes available at any one time. This source may be the data warehouse itself. Typically this pane is used as the source of information in the drag and drop operations. The status line at the bottom of the screen displays the connection used in this right pane.
The bottom pane is the results pane. It shows the results of any command executed in the tool. The messages are related to an object, multiple messages can show as a result of a command executed for an object. Expand the '+' sign next to an object to see a complete list of messages relating to an object. When a report is run from the main menu, the results are displayed in a separate tab in the bottom pane.
Pop-up menus are available in all four panes.
F5 or Ctrl/R can be used to refresh the left and right panes, when the cursor is positioned within these panes.