Create the table
Once the normalized table has been defined in the metadata we need to physically create the table in the database. This is achieved by using the right mouse button when positioned over the normalized table name and selecting Create (ReCreate) from the popup menu.
A results dialog box will appear to show the results of the creation.
The contents of this dialog are a message to the effect that the normalized table was created. A copy of the actual database create statement and if defined the results of any index create statements will be listed. For the initial create no indexes will be defined.
If the table was not created then ascertain and fix the problem. A common problem is 'Duplicate column' where a column has the same name in two of the source tables. The best way of finding such a column is to double click on the list heading 'Col name'. This will sort the column names into alphabetic order. Another double click on the heading will sort the columns back into their create order.
The next section covers
Generating the Update Procedure (see "
Generating the Normalized Update Procedure" on page
398).
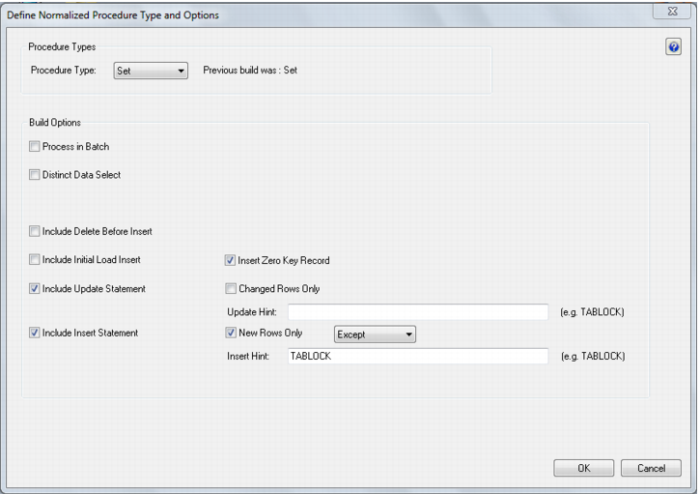
Generating the Normalized Update Procedure
Once a normalized table has been defined in the metadata and created in the database, an update procedure can be generated to handle the joining of any tables and the update of the normalized table.
Generating a Procedure
To generate a procedure use the right mouse menu when positioned on the normalized table name to edit the properties for the normalized table. Click on the Rebuild button to start the process of generating the new procedure.
A series of questions will be asked during the procedure generation based on the type of load information.
Procedure type and options
The first dialog displayed when generating a normalized table update procedure is the procedure types and options dialog:
Several different questions need to be answered on this dialog to ensure the required type of update procedure is generated. Once the required options have been selected, click OK to proceed to the next dialog.