Contacts
This chapter provides an overview of the contacts and information on setting up contacts.
Overview
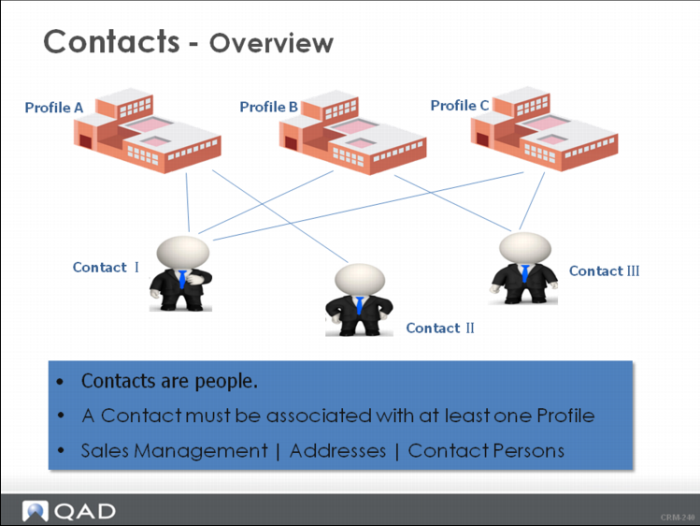
In this chapter, you gain an understanding of the Contact Record, how to manage your contacts effectively, and how the Contact and Profile Records work together. Contacts are people who work for or are associated with a Profile.
Learning Objectives
By the end of this chapter, you will be able to do the following:
• Describe the Contact Record
• List the data that is contained in a Contact Record
• Search for a Contact
• Add a Contact
• Synchronize contacts with Microsoft Exchange Server
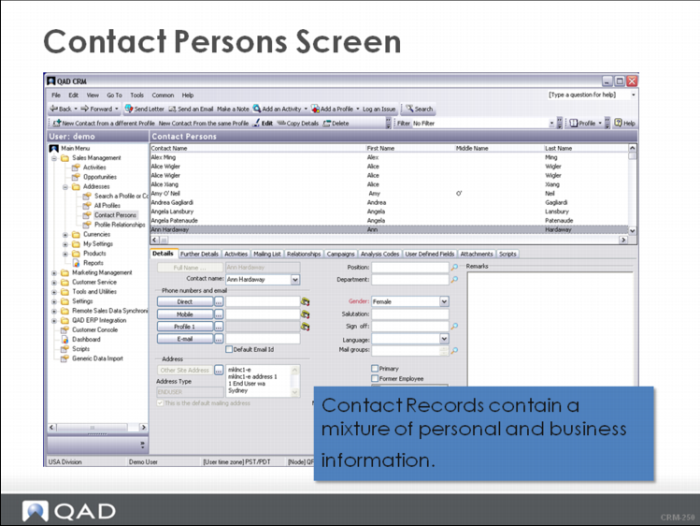
Contact Persons Screen
The Contact Persons submodule is designed for managing details of contact persons. Contact persons, or contacts, are people who work for profile organizations and with whom you communicate to conduct business-related activities. There can be more than one contact person specified for a profile organization. Also, one contact person can be associated with multiple profiles.
Pay attention to the following points on a Contact:
• A Contact is a person who is associated with one or more Profiles.
• It is important to remember that Contacts are people vs. organizations. Those business activities that need interaction with a person should be associated with a Profile and a Contact.
• Your organization maintains relationships with Profiles through Contacts.
• Internal Contacts are people who work for your organization and have an association with a Profile. Internal Contacts are added and maintained using the Internal Contact Tab on a Profile. Internal Contacts must be in the User File.
What information is contained in a Contact?
• Contact Records contain a mixture of personal and business information. Personal information includes how to best communicate with the individual as well as information that includes their hobbies and family members.
• Information is displayed on-line in the following tabs: Details, Further Details, Activities, Mailing List, Activities, Relationships, Campaigns, User-Defined Fields, Attachments, and Scripts.
Searching for a Contact
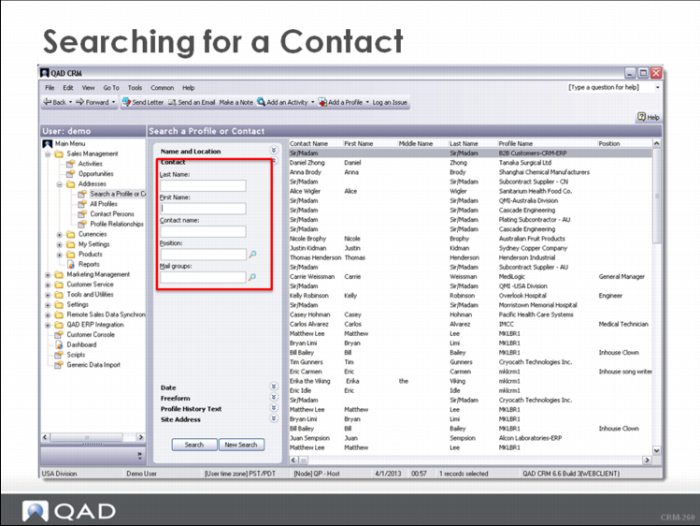
QAD CRM provides the same search facilities to help you locate specific Contact Records that you used earlier to search for Profile Records. You can search directly for the Contact Record or you can search for the Profile that the Contact is associated with. The two screens you use to locate your contacts are:
• Search a Profile or Contact Screen
• Contact Persons Screen.
You already know how to use the Search Profile or Contact Screen and the All Profiles Screen from the Profile Chapter. Navigation in the Contact Persons Screen is similar to the All Profiles Screen.
Adding a Contact
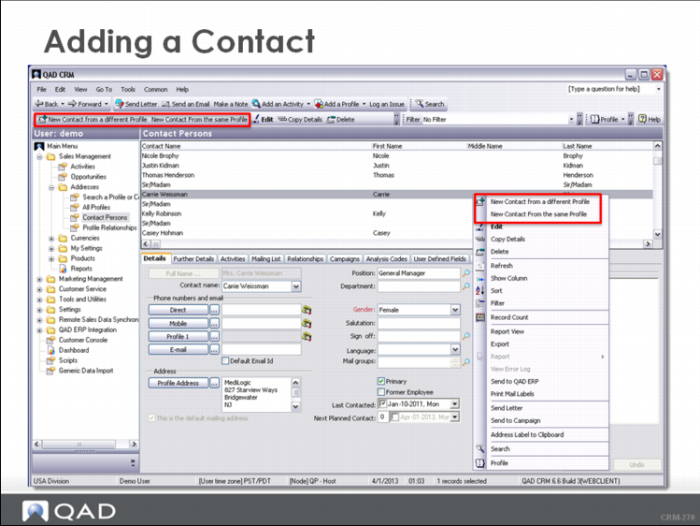
There are a number of ways to add a Contact to a Profile. Remember that a Contact is associated with a Profile. Typically, you would add a Contact at the time you add the Profile or you can update the Profile with additional Contacts later.
The slide displays adding a Contact by right-clicking in the Contact Browser from the Contact Persons Screen.
Warning
• QAD CRM allows you to add duplicate Contacts. A Contact can be associated with more than one Profile.
• For instance, a Contact can be the owner of one company and a consultant at another. Both organizations are your customers, so you want to track both contact relationships.
• Be cautious when adding duplicate Contacts, ensure that your actions make sense. Search First! - before you add Contacts.
• Be aware of your organization’s data entry standards. Make sure that the Contact fields are camera ready and can be used in letters, emails, and other public facing documents.
Copying a Contact
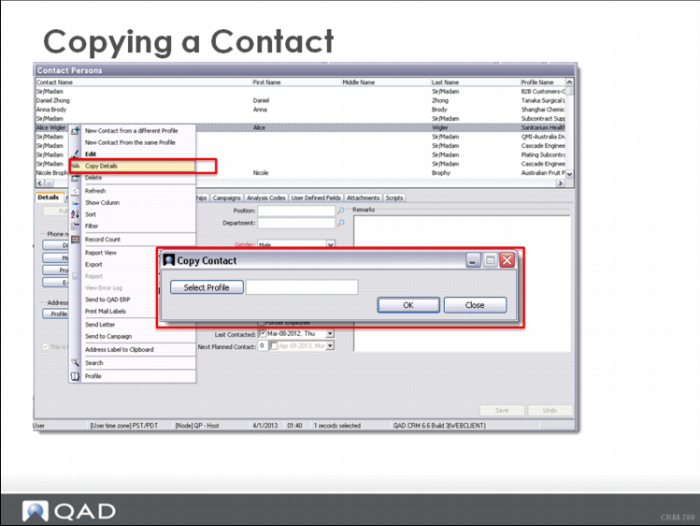
You can copy a contact record and associate it with another profile apart from the current one. This function is useful when most information for the existing contact and the new contact is the same.
1 Select the contact record and click the Copy Details button on the toolbar. Alternatively, select Copy Details from the File menu, or right-click and select Copy Details from the context menu. The Copy Contact pop-up displays.
2 Click the Select Profile button. The Find Profile/Contact window opens.
3 Search for the profile with which you want to associate the new contact record you are creating, and click OK. This operation attaches the contact record to the selected profile.
Synchronizing Contacts
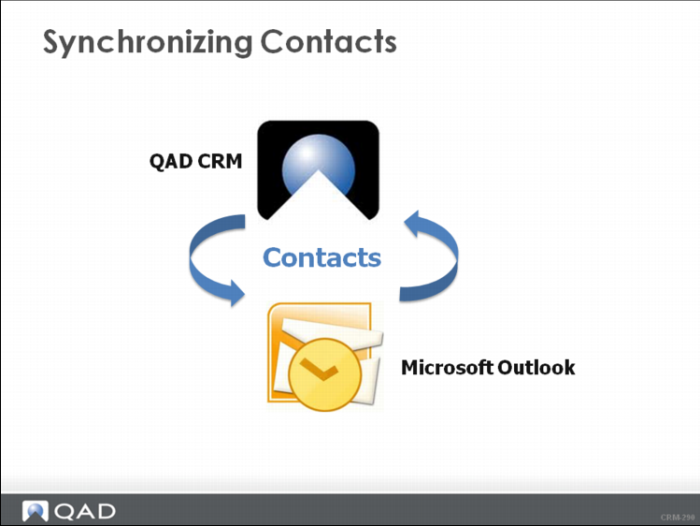
You can synchronize the contacts with Microsoft Outlook in QAD CRM if the Exchange Server settings are properly configured and you are authorized by the system administrator.
The contacts information can be synchronized in bi-directional manner either manually or automatically depending on the synchronization policies.
Synchronizing Microsoft Outlook contacts to QAD CRM
If the Transfer Mode is set to Automatic, the contacts created in QAD CRM are automatically transferred to the Microsoft Outlook contact list after synchronization. If the Transfer Mode is set to Manual, manually send the contacts to the exchange server.
To manually synchronize contacts:
1 Select the contacts to synchronize in the Contact Persons window.
Note: You can use the Contact Filter to filter out all the contact that you want to synchronize.
2 Right-click the selected contacts and choose Send to Exchange Server from the menu.
The contacts will be transferred to Microsoft Outlook until the next synchronization is performed.
Synchronizing Microsoft Outlook contacts to QAD CRM
If your system is configured to synchronize data categorized as QADCRM, create a QADCRM category first.
To synchronize contacts:
1 Create a contact or select an existing contact in Microsoft Outlook.
2 Categorize the contact as QADCRM. It depends on the system settings by the system administrator.
3 Save the contact.
The contacts will be synchronized to QAD CRM until the next synchronization is performed.
Master Questions
1 A Contact is a person that can be associated with more than one Profile (True or False?).
2 An Internal Contact is associated with and maintained from the _______________ Tab on the _____________Record.
3 An easy way to associate a Contact with another Profile is to use the Copy Details Option (True or False?).
4 List four Contact Data fields with field descriptions, and the Contact Tab where they are displayed:
Example: Field: Source, Description: Where did we hear about this Contact? Tab: Further Details
____________________________________________________________________
____________________________________________________________________
____________________________________________________________________
_____________________________________________________________________
5 Last Name, First Name, Contact Name, Position, and Mail Groups are all Search Fields on the Search for Profile or Contact Screen (True or False?).
Wrap-Up
• A Contact is a person who must be associated with a Profile.
• A Contact can be associated with more than one Profile. An example is a Contact who works for one Profile and is a consultant to another.
• There are two search screens:
• Search a Profile or Contact
• Contact Persons Screen
• Always search before adding data, such as Contact Records and Profile Records. It is important in tracking earlier relationships with a Contact.
Exercise
Task 1. Search for the contact record of Justin Kidman.
1 Navigate to the Search a Profile or Contact Screen.
2 Expand the Contact criteria.
3 Enter Kidman in the Last Name Field.
4 Click the Search Button.
The Contact Record for Justin Kidman displays.
5 To open the contact, right-click the record and choose Contact from the context menu.
The contact details for Justin Kidman are displayed.
Note: If you choose the Profile option from the context menu, the related Profile would open. You can also see the contact details by double-clicking the contact record of Justin Kidman.
Task 2. Try the following alternative to search for the contact record of Justin Kidman.
1 Open the Contact Persons Screen and ensure that there are no active filters.
2 Click the Search button on the Application Menu Bar.
A Search Bar appears on the top of the Contact Browser.
3 Select or enter the following values and click Search Now:
• Search field = Contact Name
• Condition field = begins
• Value = J
All contact records with the contact name started with J are displayed.
4 Scroll the list to find the record of Justin Kidman.
5 Select the record of Justin Kidman.
The details are displayed in edit mode.
Note: You can also use the Search button to search for data records in any browser where the button is available.
Task 3. Use the following scenario to add a contact to an existing profile.
While visiting the Heron Surgical Supply, your main contact, Donald Schneider, introduces you to the manager Mark Flynn. Add Mark as a Contact associated with the Heron Surgical Supply. There are a number of ways to do so. Let us add the new Contact from the All Profiles Screen.
1 Search first to see if Mark Flynn exists.
2 Display Heron Surgical Supply in the All Profiles Screen.
3 Right-click in the Contact Browser and choose Add Contact from the context menu.
4 The Contact Details window displays. The Profile Address field is pre-filled.
5 Add the email address and phone (use your own email address and phone number). Use the buttons next to the fields to take advantage of any field styles that can be predefined and use the look-ups to choose the correct information. Save your work.
6 Now we have enough information to indicate that Donald Schneider reports to Mark Flynn. Right-click Donald Schneider in the Contact Browser and choose Edit Contact.
7 Click the Further Details Tab and locate the Reports To field. Using the look-up icon, select Mark Flynn. Save the record.
Task 4. Copy the Mark Flynn to the profile of Boulder Industries that you created in the exercise of Profiles.
1 Go to the Contact Persons Screen and locate the record of Mark Flynn.
2 Select Mark Flynn and click Copy Details button on the Application Toolbar.
3 On the Copy Contact box, click Select Profile button.
The Find Profile/Contact screen appears.
4 Enter Boulder Industries in the Profile Name field and click Search.
5 Select Boulder Industries and click OK.
6 On the Copy Contact box, click OK.
7 Go to All Profiles screen and check if the record of Mark Flynn is associated with Boulder Industries.