Screen Editor
Navigate to System Admin|Screen Editor to use the Screen Editor to display or hide fields on tabs. If fields in the application do not apply, you can hide them. You can designate required fields and change the display order.
A Business Entity (BE) browser contains information about database linkage and field settings such as read only or group.
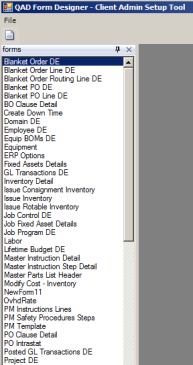
Form Designer: Business Entity Browser
The left browse provides a list of business entities. Double-click the Equipment BE.
Form Designer
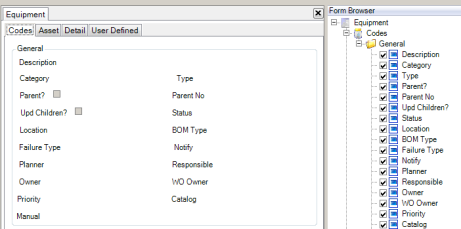
Form Designer: Business Entity Designer
The center panel displays the tabs in the Equipment BE and the fields on each tab that are currently selected for display. The right panel lists all of the possible fields and check boxes for the different Equipment Detail tabs.
Use the right panel to customize the fields and check boxes available on a tab. Clear the check boxes next to fields or check boxes you want to remove from the tab view. The view in
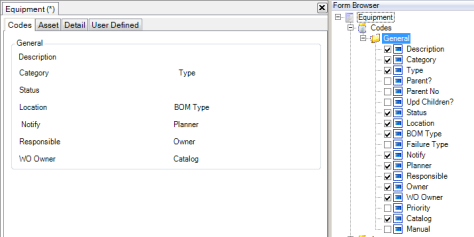
Form Designer: Tabs in the Equipment BE reflects the changes made on the Form Browse. The check boxes for Parent? and Upd Children? are not visible, as well as the fields for Parent No, Failure Type, Priority, and Manual. These changes are also reflected on the Equipment Codes tab, shown in
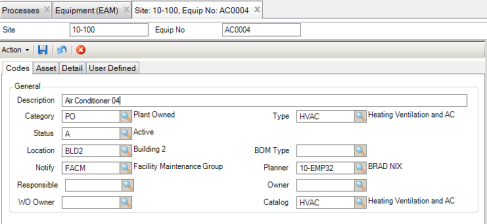
Redesigned Codes Tab in the Equipment Record.
Form Designer: Tabs in the Equipment BE
Redesigned Codes Tab in the Equipment Record
Report Designer
Navigate to System Administration|Report Designer to use the Report Designer to copy an existing report to create a report.
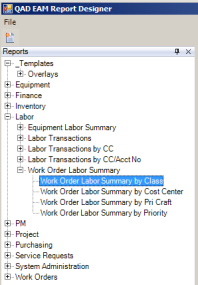
Report Designer: Reports Browser
The left browse provides a list of standard reports for each module. Expand a module folder to display the reports available in the module by clicking the + (plus box to the left of a module folder).
1 Expand the Labor folder to display the Work Order Labor Summary folder. Expand the Work Order Labor Summary folder to display the Work Order Labor Summary by Class report.
2 Double-click the Work Order Labor Summary by Class option to display the Work Order Labor Summary by Class report.
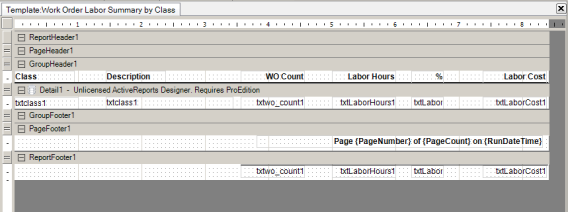
Report Template: Work Order Labor Summary by Class
The center panel displays all the details of the report header.
Report Detail: Work Order Labor Summary by Class
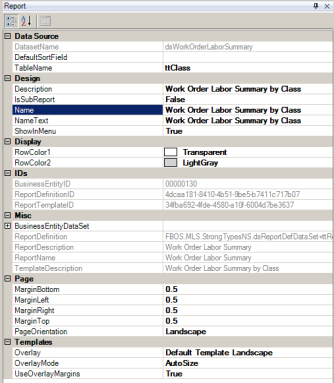
The right panel displays all the specifications of the Report - Work Order Labor Summary by Class.
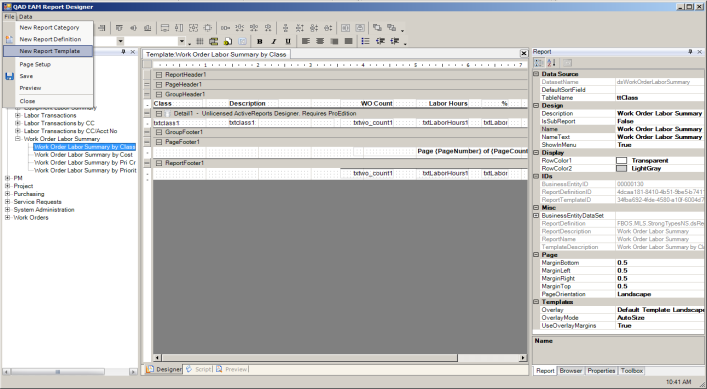
3 Add a report by copying an existing one. With the target report highlighted, click the File option on the menu bar. Select New Report Template.
Report Designer: Add New Report Template
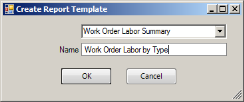
4 Give the new report template a name.
Report Designer: Create Report Template
EAM presents the new report template header and details. To ensure that your new report is available as a template in Report Xref, set the ShowInMenu option to True in the right panel under Design.
Report Designer: New Report Template
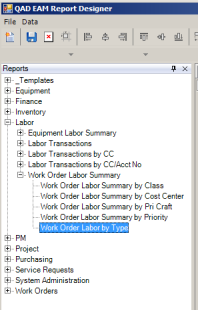
5 Save the new report template.
EAM presents the new report template in the Report Designer: Reports Browse.
Report Designer: Reports Browse
User-Defined Mail
EAM creates many system-generated mail messages throughout the Maintenance, Inventory, Purchasing, and Project modules. For each type of mail message, EAM gives the user access to the relevant module while reading the mail message. For example, when the user receives a message indicating that the status of a work order has changed, EAM provides a link to the Work Order module so that the user can go to the work order browse.
You can define which fields are displayed in the system-generated mail messages, allowing different organizations using EAM to view only the details relevant to each group.
User Defined Mail Option
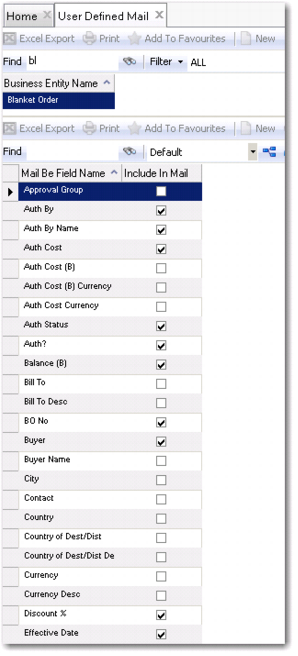
User Defined Mail Browse
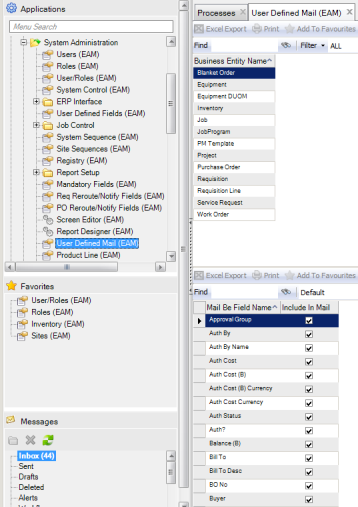
Access this browse from System Administration|User Defined Mail. Use it to organize and display records, to edit or create new records, or to export data to Excel.
User Defined Mail Upper Browse
Note: You cannot update any of the fields in the upper browse.
Columns
A list of columns available to the browse displays here. Select a column header to display it. Clear the column header to hide it.
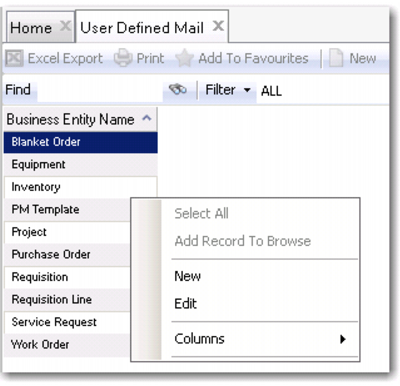
User Defined Mail Lower Browse for Blanket Order
Creating a User Defined Mail Record
The upper browse lists each module that sends e-mails.
1 Select the module from the upper browse.
The lower browse lists available fields and indicates whether they are included in the EAM e-mail message for the selected module.
2 Select the check box to add a field in the EAM e-mail message.
3 Close the browse by clicking the X on the top of the window.
Editing a User Defined Mail Record
Follow these steps to modify the fields included in EAM e-mail messages.
1 Highlight the module that you want to change in the upper browse.
The lower browse lists available fields and indicates whether they are included in the EAM e-mail message for the selected module.
2 Select the check box to add a field or clear the check box to remove a field.
3 Close the User Defined Mail browse by clicking the X on the tab.
Note: Because User Defined Mail fields are modified at the site level, any changes you make apply only to that particular site.
Product Line
Use this module to add Product Lines to each domain. Then, assign them to selected parts records on the General tab. Add or edit product line codes at System Administration|Product Line. The codes entered here are exclusively for accounting/SAF purposes, and should match the corresponding SAF data found in Product Line Maintenance in the QAD ERP.
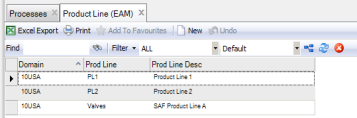
Product Line Browse
Access this browse from System Administration|Product Line. Use it to organize and display records, to access supporting functions, and to edit or create new records.
Product Line Browse
Creating a Product Line Record
1 Click New to open a blank product line record.
2 Assign a domain code to match one set up in both EAM and the QAD ERP.
3 Assign a product line code.
4 Enter product line description information.
5 Close the Product Line browse by clicking the X on the top of the browse.
Editing a Product Line Record
1 Double-click a record from the site browse or click Edit to open the product line record.
2 Enter information in relevant fields on the product line record.
3 Close the Product Line browse by clicking the X on the top of the browse.
Product Line Right-Click Menu
The right-click menu contains administrative functions.
New
Use New to open the product line browse to create a record.
Edit
Use Edit to open the product line browse to edit the selected record.
Columns
A list of columns available to the product line browse displays here. Select a column header to display it. Clear the column header to hide it.
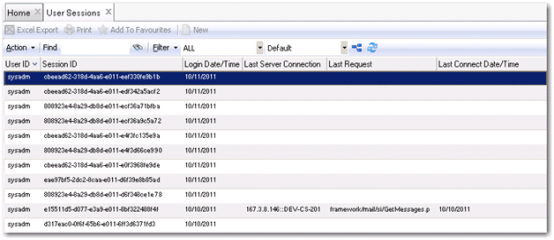
User Sessions Browse
Access this browse from System Administration|User Sessions. Use it to organize and display records. The browse displays the log information about the users, and the time and date of the requests each user made to all programs and modules.
User Sessions Browse