Pre-Shipper/Shipper Workbench
Use Pre-Shipper/Shipper Workbench (7.9.2) to:
• Modify pre-shippers that were created automatically
• Maintain the relationship between RSS requirements and individual shipper lines
• Maintain item/container records for a pre-shipper/shipper
• Create a pre-shipper/shipper without using Picklist/Pre-Shipper Automatic
• Establish a master container hierarchy
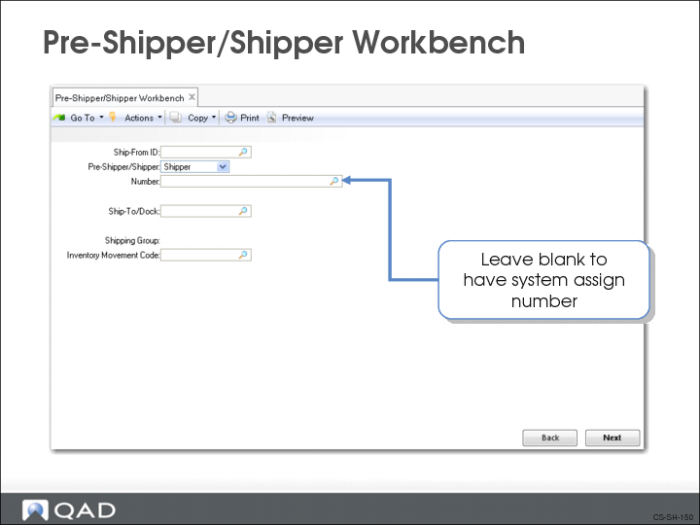
Header Frame
The header frame uniquely identifies shipper using the ship-from site, pre-shipper/shipper number, ship-to.
• If a pre-shipper exists for the entered information, the system retrieves that pre-shipper
• If a pre-shipper does not exist, the system creates a new document
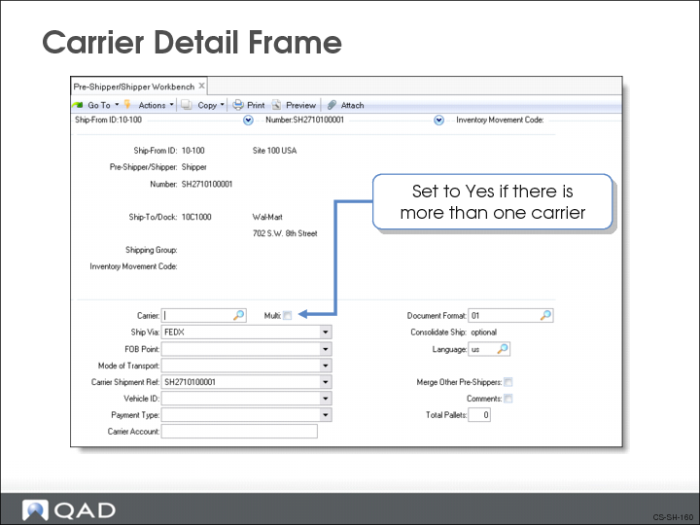
Carrier Detail Frame
Use the Carrier Detail frame to enter carrier data for this shipment (Ship Via, FOB Point, Mode of Transport).
• If the shipment uses more than one carrier, set the Multi field to Yes
• The Carriers frame displays
• If you are combining pre-shippers, set the Merge Other Pre-Shippers field to Yes
• Defaults to No
• Cannot merge shippers
• Merged pre-shippers must share the same Ship-To/Dock address
• If Yes, the system prompts you to enter the pre-shipper number you want to merge with this pre-shipper
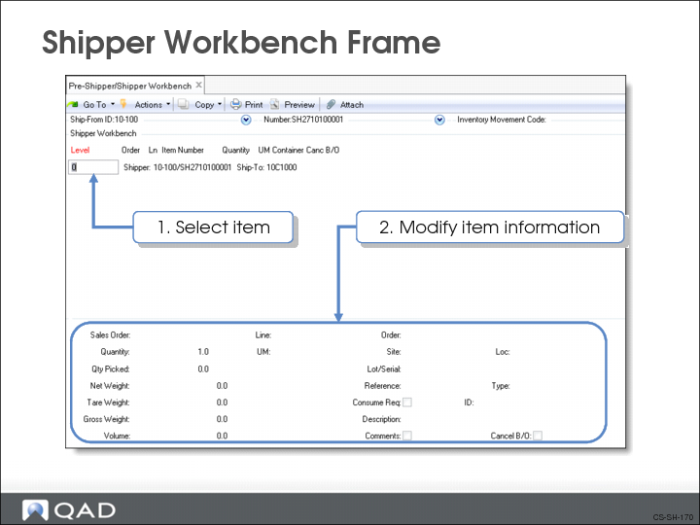
Shipper Workbench Frame
The Shipper Workbench frame shows what items and containers are included in this shipment. The lower frame shows the shipper detail for individual items or containers. Using these frames, you can:
• Add items or containers
• Delete items or containers
• Modify or remove items for the item/container records
• Maintain pegged shipper lines
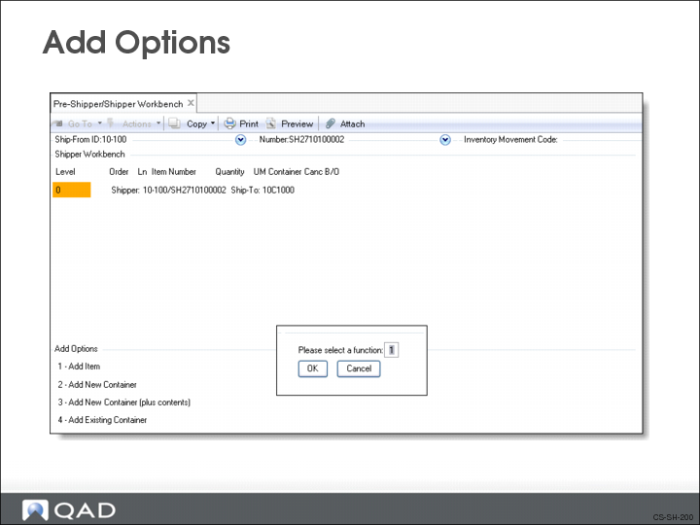
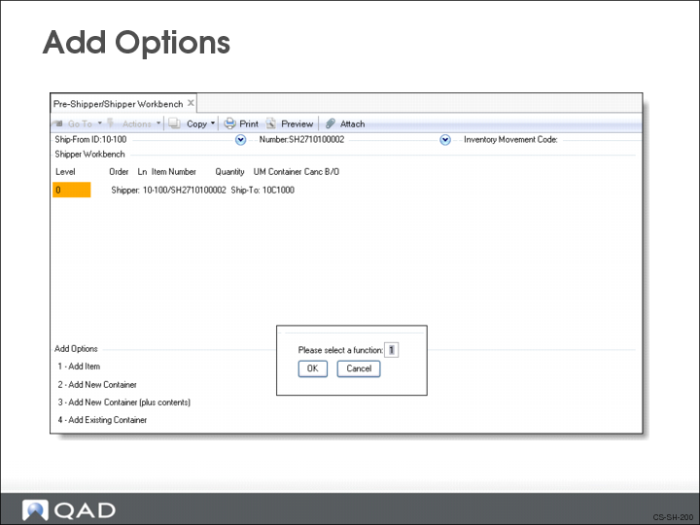
Add Options
1 In the Shipper Workbench frame, using your cursor, select a container number, pre-shipper number or shipper number.
2 From the actions menu select Insert, or right mouse click and select Insert.
The Add Options pop-up box appears.
3 Choose option 1, Add Item, click OK or press enter.
The Item Information frame appears.
4 In the Item Number field enter the item number you are adding and in the Sales Order field enter the scheduled order number.
Note: The item must be from an open scheduled order having the same ship-from and ship-to as the pre-shipper or shipper.
5 Complete the remaining item detail information.
To Add a Container
1 In the Shipper Workbench frame, using your cursor, select a container number, pre-shipper number or shipper number.
2 From the actions menu select Insert.
The Add Options pop-up box appears.
3 Choose option 2, Add Container.
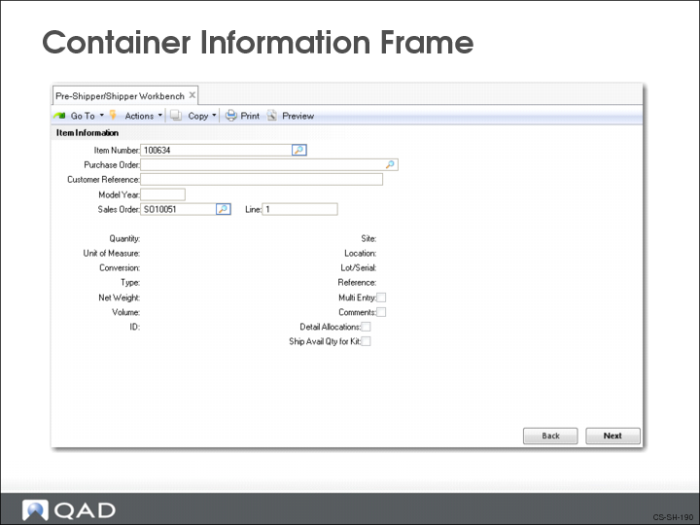
The Container Information frame appears.
Note: You can only add to a pre-shipper containers created in Container Workbench.
4 Enter the item number for the container you are adding and complete the remaining container information.
Add Options
1 In the Shipper Workbench frame, using your cursor, select a container number, pre-shipper number or shipper number.
2 From the actions menu select Insert
The Add Options pop-up box appears.
3 Choose option 3, Add Container (plus Contents).
The Container Information frame appears.
4 Enter the item number for the container you are adding and complete the remaining container information.
The Item Information frame appears
Note: You cannot add a container created in Container Workbench to a shipper.
5 In the Item Number field enter the item number you are adding and in the Sales Order field enter the scheduled order number.
Note: The item must be from an open scheduled order having the same ship-from and ship-to as the pre-shipper or shipper.
6 Complete the remaining item detail information.
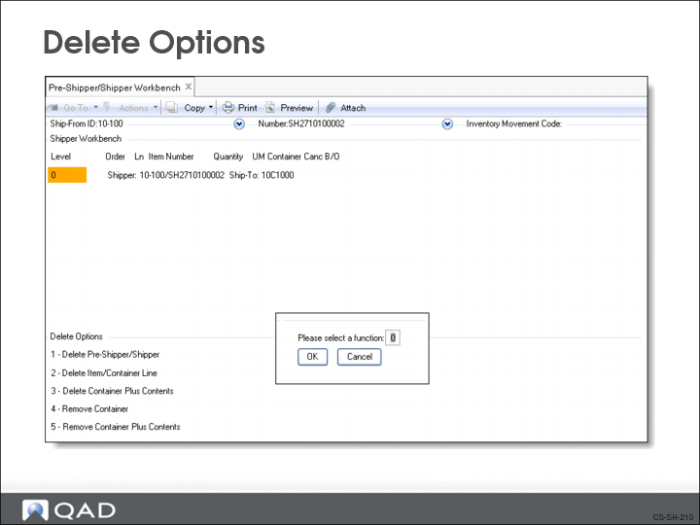
Delete Options
1 In the Shipper Workbench frame, select a container number.
2 Click the Delete button. This brings up the pop-up window with the delete options.
3 Choose one of the following options:
a Delete Pre-Shipper/Shipper: Delete the entire container from the database.
b Delete Item/Container Line: Delete a container or item line from the database. Any container or item belonging to the deleted container or item line is moved up one level. You cannot delete a container line if it results in an item that does not have a container item.
c Delete Container Plus Contents: Delete a container and all containers or items belonging to it.
d Remove Container: Remove a next level container from a container. The container can still be accessed under its own container number.
e Remove Container Plus Contents: Remove a next level container and all containers or items belonging to it from a container. The container can still be accessed under its own container number.
4 The system prompts you to confirm the deletion.
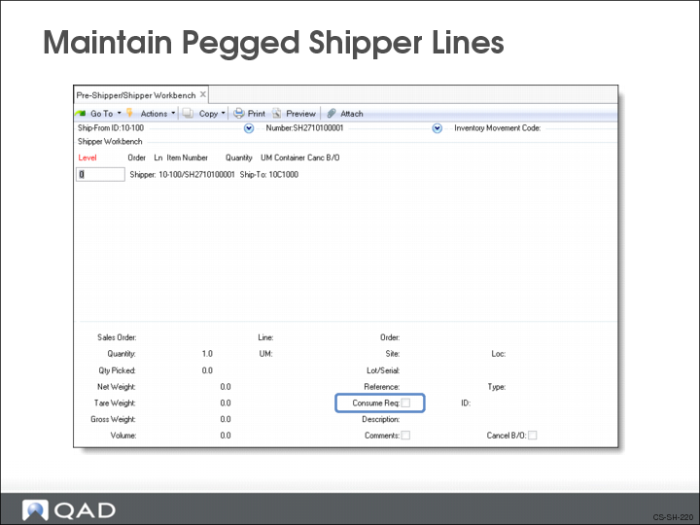
To Maintain Pegged Shipper Lines
1 In the Shipper Workbench frame, select the line you want.
2 Click Next.
3 Set the Consume Req field to Yes.
The Consume Required Ship Schedule Requirements frame displays.
Consume Required Ship Schedule Requirements Frame
Another frame displays if the Consume Req field was set to Yes. This frame shows the RSS requirements for the scheduled order line number.
You can modify the Ship Line Peg Qty. The system adjusts the Open Qty based on the pegged quantity you enter.
The system calculates the open quantity for the requirement based on:
• The Ship Complete percentage set in Scheduled Order Maintenance
• The RSS requirement quantity tied to this shipper line
• The amount pegged (the quantity entered in Ship Line Peg Qty)
• Dynamic Unpeg set in Scheduled Order Maintenance
Trailer Information Frame
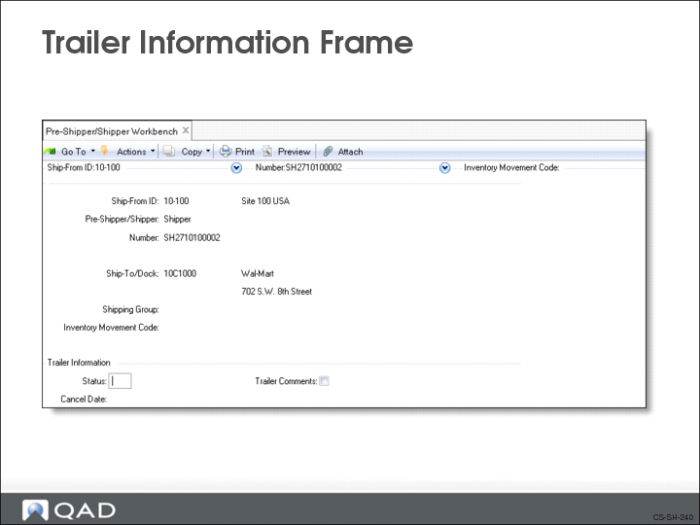
Status
Specifies if the shipper is active or cancelled.
• If blank, the shipper is active
• If X, the shipper is cancelled. You cannot cancel a confirmed shipper. Cancelled shippers are ignored by the system, except for deleting or archiving
• If C, the shipper is confirmed in Pre-Shipper/Shipper Confirmed (7.9.5)
Cancel Date
The date the shipper was cancelled.
Trailer Comments
Determines if trailer comments are added to this shipment.
• If Yes, you can enter trailer comments; a Transaction Comments screen appears
• If No, you cannot enter trailer comments
Print Shipper Frame
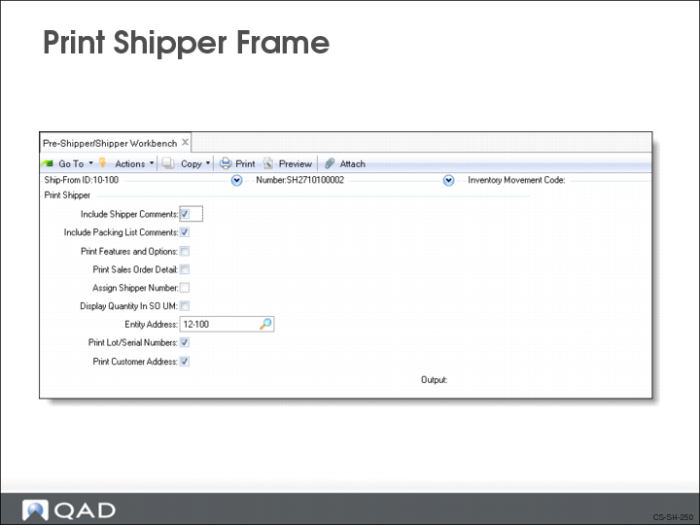
In this frame you determine how your pre-shipper/shipper will print.
Include Shipper Comments
• If Yes, shipper comments are included
• If No, shipper comments are not included
Include Packing List Comments
Determines whether to consider the size of pack list comments when calculating the maximum number of lines to be printed on the pre-shipper/shipper. Used in conjunction with the Max Lines on a Pre-Shipper field set in Customer Schedules Control (7.3.24).
• If Yes, system leaves enough room on each page of the pre-shipper/shipper to print the packing list comments
• If No, system does not allocate space for packing list comments on the pre-shipper/shipper
Print Features and Options
Determines if a list of features and options prints.
• If Yes, system prints each configured assemble to order item followed by a list of features and options for the item
• If No, system prints only the item number for the configured assemble to order item
Print Sales Order Detail
Determines whether the order number and the order line number associated with the line items on the pre-shipper/shipper will be included.
• If Yes, the order number and order line number are included
• If No, they are not
Display Quantity In SO UM
Determines which UM the system uses to display the quantity and UM for the item.
• If Yes, system displays the quantity and UM using the sales order UM
• If No, system displays the quantity and UM using the pre-shipper/shipper UM
Company Address
Determines the company address that prints at the top of the pre-shipper/shipper document.
Print Lot/Serial Numbers
Determines whether or not lot and or serial numbers are printed on the shipper.
As you select next to print the shipper document a message line appears to let you know the pre-shipper has been converted into a shipper and the shipper number.
Exercise: Add Item to the Shipper
The customer wants a shipment today. Use Pre-Shipper/Shipper Workbench (7.9.2) to add a shipment to the shipper created earlier.
Field | Data |
Ship-From: | 10-300 |
Number: | [Record the system-generated number] |
Ship-To/Dock: | LB |
Advance to the Shipper Workbench frame and ship 100 of item 03011 from site 10-300 to the customer Pacific Health Care Systems (10C1003). Provide a lot number as required.
Print the shipper and when the system prompts if all documents have printed correctly, select Yes.