Pre-Shippers and Shippers
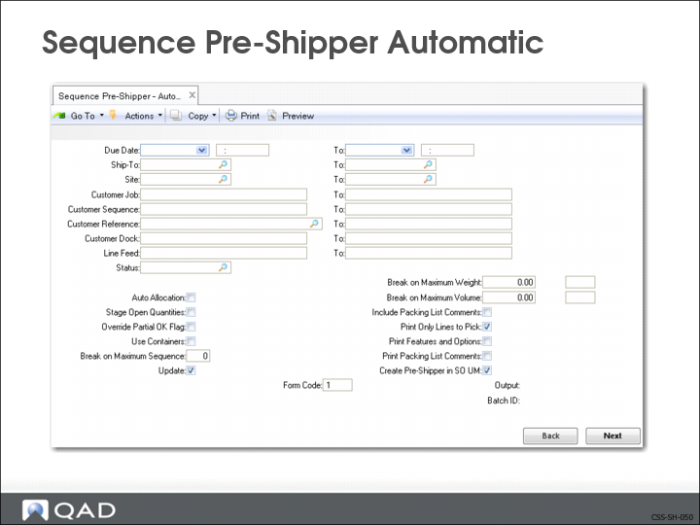
Sequence Pre-Shipper Automatic (7.5.4.10)
Use Sequence Pre-Shipper Automatic to create a pre-shipper for sequence schedules.
• Can be for one or a range of sequence schedules
• Only applies to sequence schedules
• Use Picklist/Pre-Shipper - Automatic (7.9.1) to create pre-shippers for non-sequenced and sequenced schedules
• Only selects unpicked sequences from active schedules
• Selected sequences cannot be marked as deleted, picked, or cross-referenced
• Contains sequence specific criteria
• Job
• Sequence
• Dock
• Line Feed
• Status
• Break on Max Sequence (for example, when the truck can hold so many items)
Note: You can also use Pre-Shipper/Shipper Print (7.9.4) to print the Picklist/Pre-Shipper report.
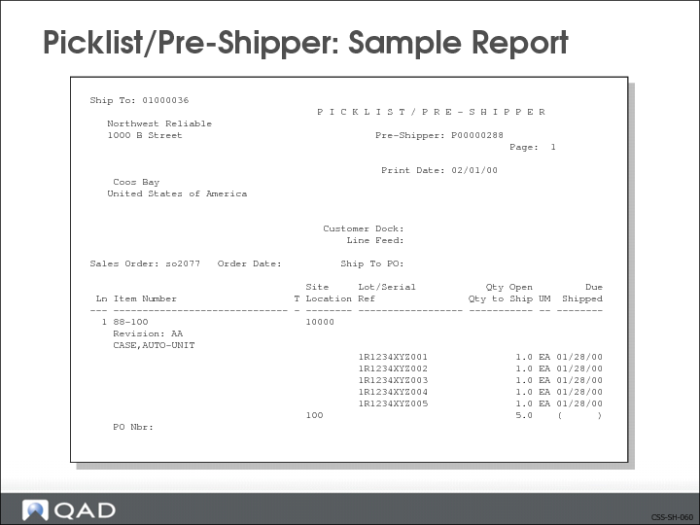
Picklist/Pre-Shipper: Sample Report
The above shows an example of the first page of the Picklist/Pre-Shipper.
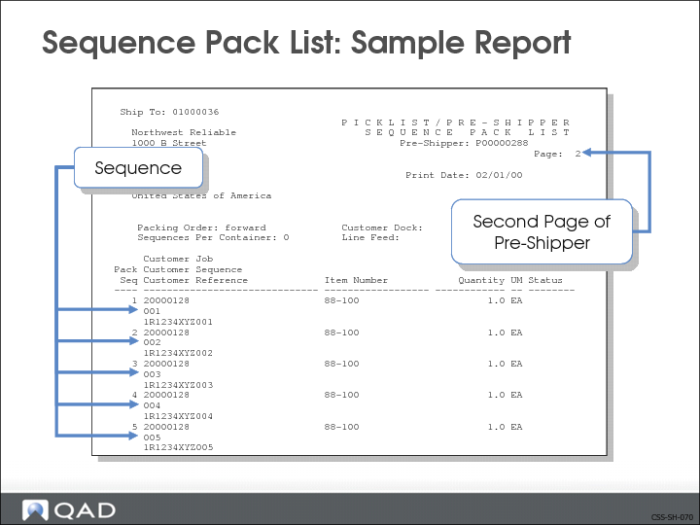
Sequence Pack List: Sample Report
If the scheduled order contains sequences, the Sequence Pack List prints after the pre-shipper. It contains:
• Instructions for dock personnel
• Sequential order of every item in the shipment
• Forward or Reverse (reverse load packing)
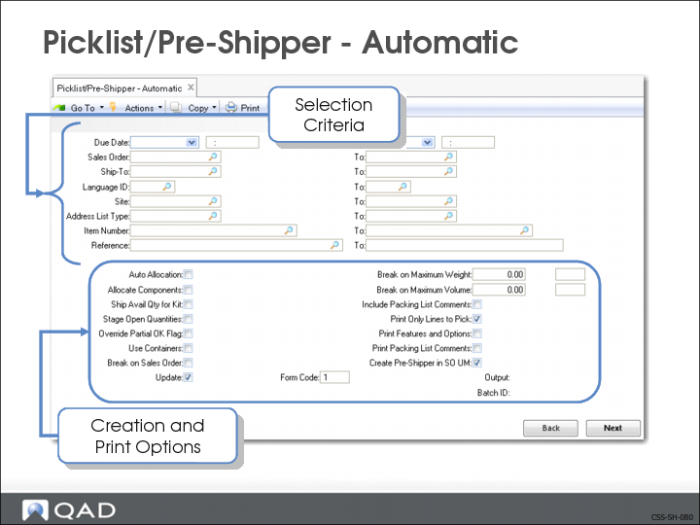
Picklist/Pre-Shipper - Automatic (7.9.1)
Use Picklist/Pre-Shipper - Automatic to generate a pre-shipper for sequenced and non-sequenced scheduled orders.
• Recognizes sequenced items
• Reads sequence schedule for the requirements
• Creates separate pre-shippers for sequence items and non-sequenced items by Ship-To
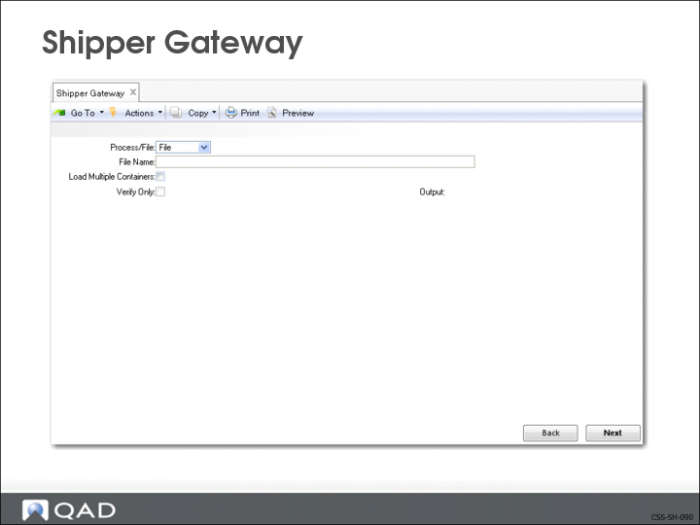
Shipper Gateway (7.9.22)
Use Shipper Gateway to build shippers containing sequences.
• Uses an external ASCII file in the designated format to create shippers
• Accepts status codes
You have the option of including sequence values (from customer) or having the system select available sequences.
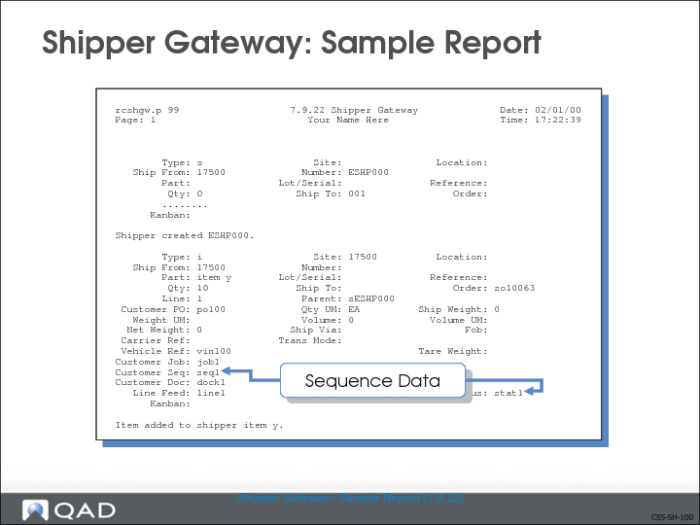
Shipper Gateway: Sample Report
The above graphic shows an example of a Shipper Gateway report containing sequence information.
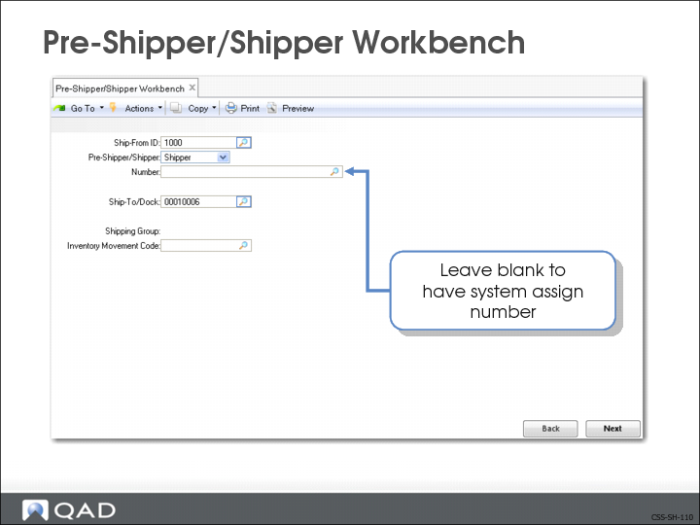
Pre-Shipper/Shipper Workbench (7.9.2)
Use Pre-Shipper/Shipper Workbench for the manual maintenance of pre-shippers or shippers.
• Add, view, or delete sequences
• Validates number of sequences on pre-shipper or shipper
Header Frame
In the header frame you identify the pre-shipper or shipper that you want to see. You do this by specifying:
• Ship-From
• Pre-shipper/shipper number, if existing
• Ship-To
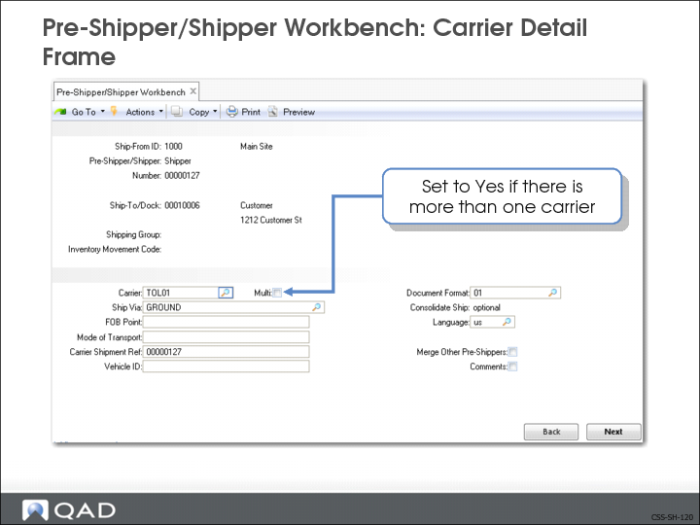
Carrier Detail Frame
Use the Carrier Detail frame to enter carrier data for this shipment (Ship Via, FOB Point, Mode of Transport).
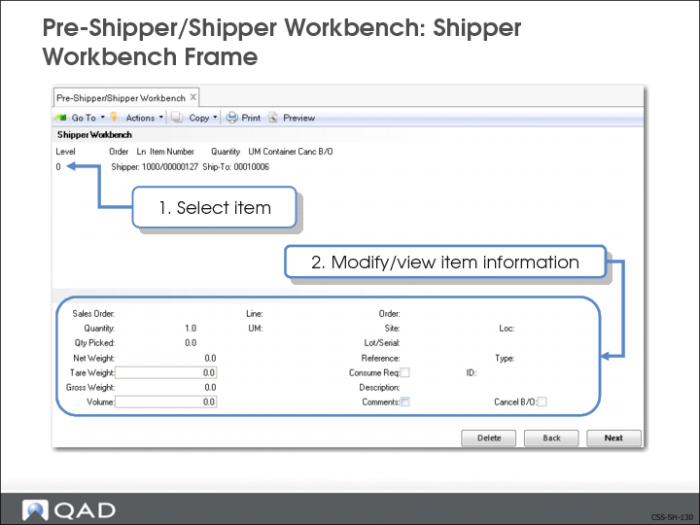
Shipper Workbench Frame
The Shipper Workbench frame shows what items and containers are included in this shipment. The lower frame shows the shipper detail for individual items or containers.
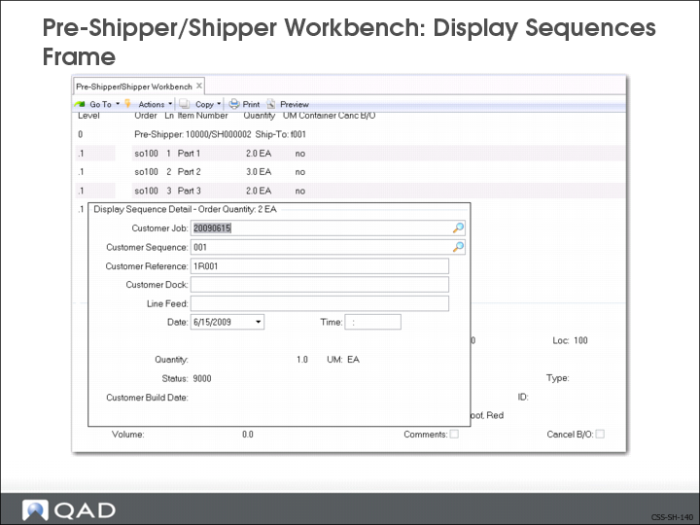
Display Sequences Frame
You can use the Display Sequences frame to:
• Track quantities on the sequence schedule
• Shows all the sequences on the pre-shipper/shipper
• Displays only if pre-shipper/shipper contains sequences
• Delete sequences
• Access the Add Sequences frame
• Access the Display Sequences frame
Deleting Sequences
The Display Sequences frame can be used to delete sequences.
• Move your cursor to the sequence you want to delete, then select Delete
• System removes the sequence from the pre-shipper/shipper and marks it as an open requirement
Note: Deleting the sequence in Pre-Shipper/Shipper Workbench does not delete the sequence from the database. It deletes/removes the sequence from the pre-shipper/shipper.
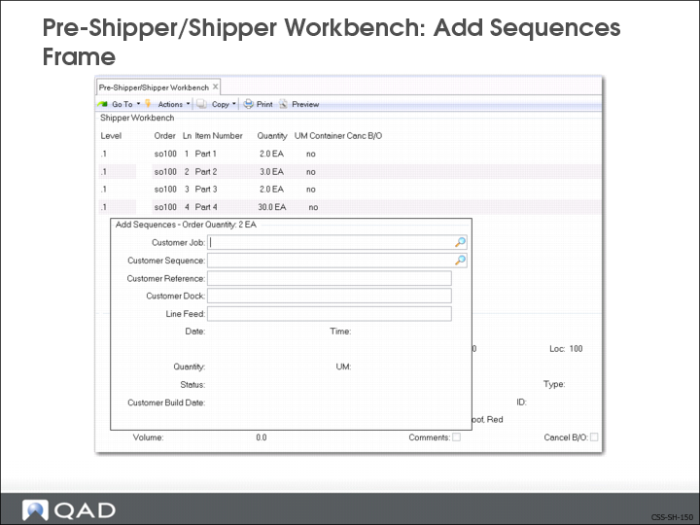
Adding Sequences
The Display Sequences frame can be used to access the Add Sequences frame.
• Press the Insert key; the Add Sequences frame displays
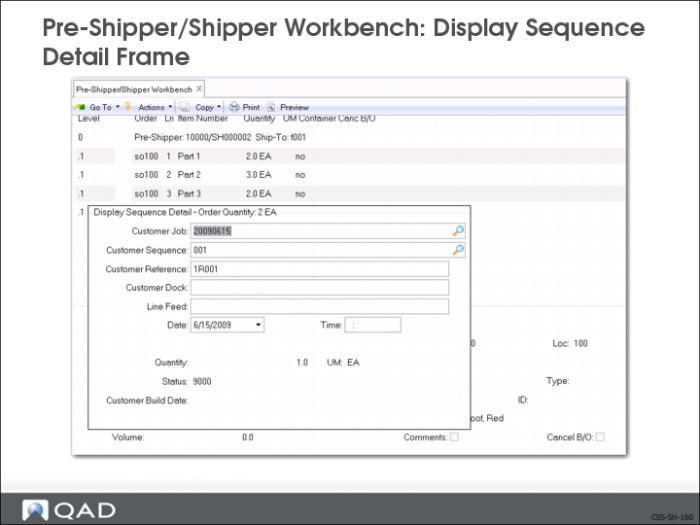
Display Sequence Detail
The Display Sequences frame can be used to display sequence detail.
• To see details for an individual sequence, move your cursor to the sequence and press Enter
• The Display Sequence Detail frame displays
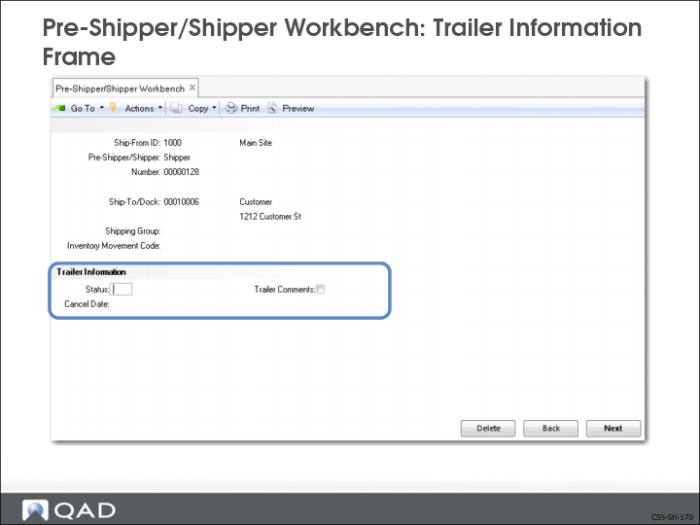
Trailer Information Frame
Status
Specifies if the shipper is active or cancelled.
• If blank, the shipper is active
• Newly created shipper
• If X, the shipper is cancelled
• You cannot cancel a confirmed shipper
• Cancelled shippers are ignored by the system, except for deleting or archiving
• If C, the shipper is confirmed
• Confirmed in Pre-Shipper/Shipper Confirm (7.9.5)
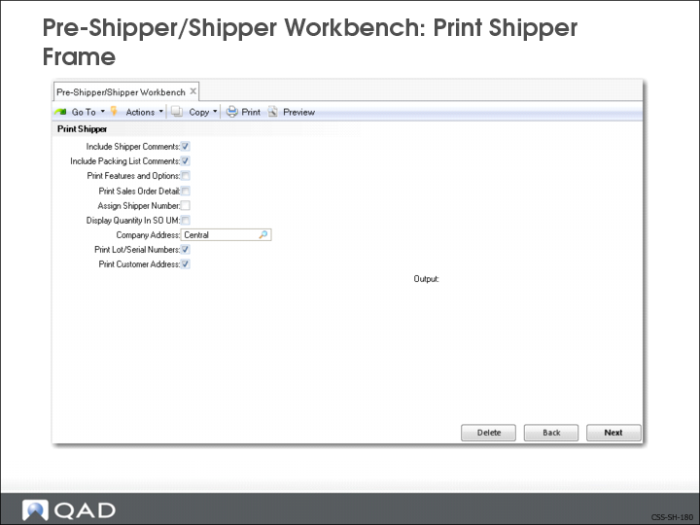
Print Shipper Frame
In this frame you determine how your pre-shipper/shipper will print.
Exercise: Create Daily Pre-Shipper
Note: The data used in these exercises may not be the same as the data shown in the screen captures in this lesson. In an exercise, if a field is not listed, you can accept the default value or leave it blank.
The pre-shipper describes the items and/or containers that need to be picked for shipment.
Use Sequence Pre-Shipper - Automatic (7.5.4.10).
1 Create pre-shipper for the day by entering:
Field | Data |
Due Date: | <next Monday> |
To: | <next Monday> |
Ship-To: | f001 |
To: | f001 |
Status: | 9000 |
Auto Allocation: | Yes |
Update: | No |
2 Verify the Pre-Shipper and Sequence Pack List.
3 Run again with Update set to Yes to generate pre-shipper.
Note: If you receive Processing Errors stating: “INVALID SEQUENCE. SEQUENCE HAS INCORRECT DATASET” refer to
Set Up Sequence Numbers to define the correct sequence numbers for pre-shippers and shippers.
4 To generate the Sequence Schedule Report enter the following:
Use Sequence Schedule Report (7.5.4.7)
Field | Data |
Ship-To: | f001 |
To: | f001 |
Details: | Yes |
5 Verify all sequences for Monday are associated with pre-shipper number.
6 To check the sequence schedule enter the following:
Use Sequence Schedule Maintenance (7.5.4.5)
Field | Data |
Ship-From: | 10-200 |
Ship-To: | f001 |
Release ID: | 1 |
7 Verify all sequences picked cannot be edited.
Exercise: Change Status to Offline
You receive notification from Namaka. Vehicle 1R004 is offline due to a bad paint-job. Please do not ship the sunroof for sequence 004 until the vehicle is back online. Namaka will notify you at that time.
Use Pre-Shipper/Shipper Workbench (7.9.2)
1 To edit the pre-shipper enter:
Field | Data |
Ship-From: | 10-200 |
Pre-Shipper/Shipper: | Pre-Shipper |
Number: | <pre-shipper #> |
Ship-To /Dock: | f001 |
2 Advance to the Shipper Workbench frame. Select part3. In the lower frame, reduce shipper line quantity (Quantity) and quantity picked (Qty Picked) by 1 for part3.
3 The system advises you the quantity has changed, and asks if you want to recalculate the weight and volume. Select Yes.
4 When the Display Sequences frame appears, remove the sequence for Customer Sequence 004.
5 Verify the Pre-Shipper and Sequence Pack List are correct by printing the Pre-Shipper.
6 Edit the sequence and mark it offline:
Use Sequence Schedule Maintenance (7.5.4.5)
Field | Data |
Ship-From: | 10-200 |
Ship-To: | f001 |
Release ID: | 001 |
7 Advance to the Sequence Detail Data frame and enter:
Field | Data |
Date: | <next Monday> |
Customer Sequence: | 003 |
Item Number: | part3 |
Customer Reference: | 1R004 |
Status: | offline |
Exercise: Change Status and Shipping Date
You receive another notification from Namaka. All of the blue vehicles have bad paint-jobs. Don’t send any blue sunroofs for Monday until Namaka notifies you.
Use Pre-Shipper/Shipper Workbench (7.9.2)
1 Delete the pre-shipper by entering:
Use Pre-Shipper/Shipper Workbench (7.9.2)
Field | Data |
Ship-From: | 10-200 |
Pre-Shipper/Shipper: | Pre-Shipper |
Number: | <pre-shipper #> |
2 Advance to the Shipper Workbench. From the Actions menu, select Delete. An options frame displays.
3 Select 1 - Delete Pre-Shipper/Shipper.
4 Edit the sequence and mark it offline by entering:
Use Sequence Schedule Maintenance (7.5.4.5)
Field | Data |
Ship-From: | 10-200 |
Ship-To: | f001 |
Release ID: | 1 |
5 Advance to the Sequence Detail Data frame and enter.
Field | Data |
Date: | <next Monday> |
Customer Sequence: | 004 |
Item Number: | part3 |
Customer Reference: | 1R008 |
Status: | offline |
6 Set the next sequence offline by entering:
Field | Data |
Customer Reference: | 1R011 |
Status: | offline |
7 Create pre-shipper for the day:
Use Sequence Pre-Shipper - Automatic (7.5.4.10).
Field | Data |
Due Date: | <next Monday> |
To: | <next Monday> |
Ship-To: | f001 |
To: | f001 |
Status: | 9000 |
Auto Allocation: | Yes |
Update: | Yes |
8 Verify the Pre-Shipper and Sequence Pack List.
9 Verify the offline sequences are NOT included.
Write pre-shipper number here:______________________________________
Exercise: Print Pre-Shipper
1 Print the pre-shipper and convert to shipper.
Use Pre-Shipper/Shipper Print (7.9.4), direct output to Page.
Field | Data |
Number: | <pre-shipper #> |
To: | <pre-shipper #> |
2 Verify the shipper contains the range of sequences.
Write shipper number here:______________________________________
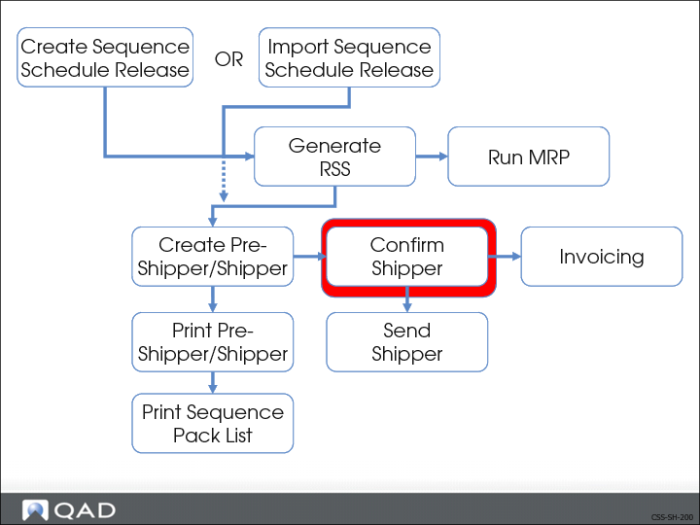
Confirm Shipper
Use Pre-Shipper/Shipper Confirm (7.9.5) to confirm the pre-shipper or shipper. During the confirmation process, the system:
• Changes the pre-shipper to a shipper
• Decreases finished goods inventory
• Uses the requirement quantity to increase the cumulative shipped quantity
• Decreases the net requirement for the order line item
• Updates general ledger (GL) accounts
• Marks sequences as shipped
• Performs the first step in invoicing, creates the invoice
• Gives you the option of posting and printing the invoice