Defining End Users
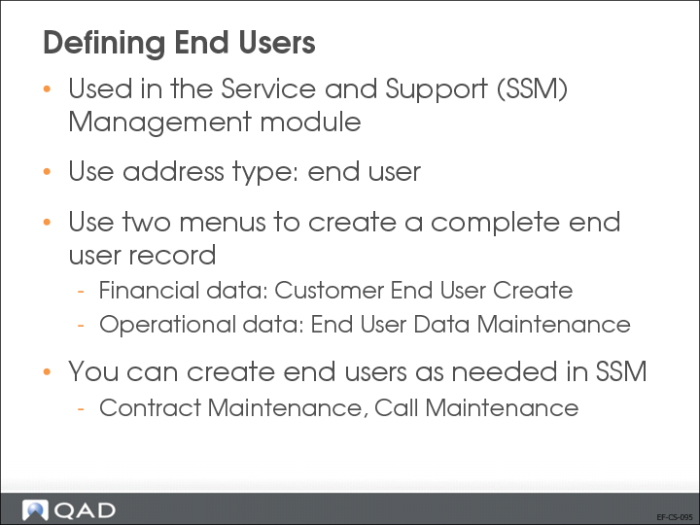
Use the Customer End User (27.20.3) activities to create, view, modify, or delete end user records. End users are used in the Service and Support Management module to identify the address that owns items requiring service. End users are specified on calls, return material authorizations, and contracts. End user addresses must be of type Enduser.
After creating end users here, specify additional SSM data in End User Data Maintenance (11.9.1). An email is automatically sent to the members of the EndUserNotify role responsible for creating this data when a new end user is created.
The system can automatically create end user records based on settings in Service Management Control (11.24) when an invoice is posted for an item being recorded in the SSM installed base. See User Guide: QAD Service and Support Management for details.
End User Creation Scenarios
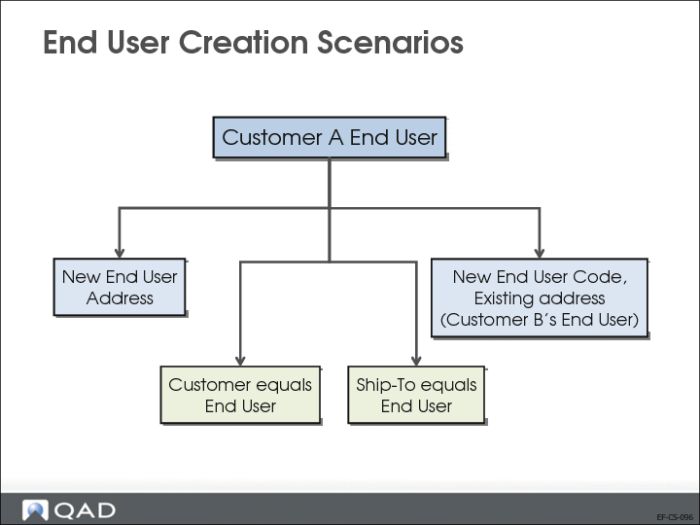
You can use End User Create (27.20.3.1) in multiple ways:
• Create an entirely new end user and specify the address, tax, and contact details in this function. To do this, clear all the link-to-address fields, and enter a code in the End User Code field (or leave blank for a system-generated number). The new address is created as an enduser address type for the customer’s business relation.
Multiple end users for the same customer can share the same address.
• Indicate that the customer is also an end user.
• Specify an existing ship-to address of a customer as an end user. In this case, the end user code is the same as the ship-to code and the address details cannot be modified here.
• Specify a new end user code and associate it with an existing address with the enduser type defined for the customer or the customer’s business relation (where two customers share the same business relation).
Example: Alverton has two associated end users, E1001 and E1002. The two end users share the same end user address. You create a third end user E1003 for customer Alverton. You can now associate the same address with E1003 by specifying Alverton as the customer code, selecting Link to End User, clicking the End User Address button, and choosing the E1001 (or E1002) address from the lookup. If you update any of the address details, you have the option to apply the changes to all end users who reference the address.
• When maintaining end user addresses in End User Modify, if you modify any of the key address fields (address lines 1 to 3, the City field, or the Zip field) to be the same as an existing address, the system displays an error message stating that you must use the Link to Address option to assign an end user to an existing address.
End User Create
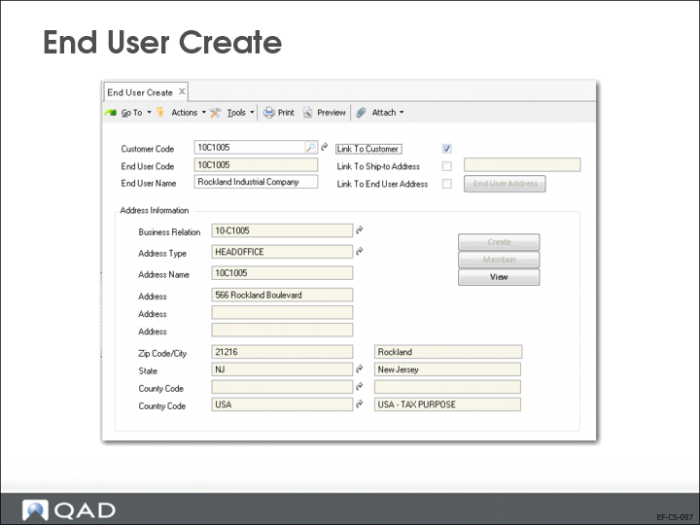
The following is a more detailed description of the fields in End User Create (27.20.3.1):
Customer Code
If you are linking to another customer or to a ship-to address, enter the code that identifies the customer this enduser record is associated with; otherwise leave blank.
End User Code.
If you are not linking to another customer or to a ship-to address, specify a new code. This code is automatically created with an address type of end user.
If you select Link to Customer or Link to Ship-To Address, the End User Code field is filled with the value you specify for the customer or ship-to These addresses will be added as end users for the customer specified in Customer Code.
End User Name
Enter a maximum of 36 characters for the end user name. The default is the business relation name for the customer to which the end user is linked. This field is optional.
Link to Customer.
Select this field if you want to define the customer entered in the first field as an end user. In this case, the end user code is set to the customer code and cannot be modified. All address details are filled in based on the headoffice address of the customer and cannot be changed.
Link to Ship-To Address.
Select this field if you want to enter a ship-to associated with the customer and define the ship-to as an end user.
Link to End User Address
Select this field if you want create a new end user code that shares address information with another existing end user address for the specified customer code. Click the End User Address button to display all end user addresses for the customer.
After you select the address you require from the lookup, the Modify and View buttons are enabled and you can modify details. All fields in the Address Information frame are read only.
Click Create to display the Customer End User Create Address Information screen, which lets you create a new address for the shipto end user. This button is active when none of the link-to check boxes is selected.
When you create a new end user address using End User Create (27.20.3.1), the customer’s business relation is updated with the new enduser address.
Creating a New End User Code and Address
1 Specify the customer code.
2 Clear the Link to Customer, Link to Ship-To Address, and Link to End User Address fields.
3 Specify the end user code in the End User Code field or leave blank for a system-generated number.
4 Click the Create button in the Address Information tab.
5 Specify the new end user address in the fields provided.
6 Click Save. The end user address is saved in the business relation for the customer.
Setting Up a Ship-To Address as an End User
1 Specify the customer code.
2 Leave End User Code field blank.
3 Clear the Link to Customer and Link to End User Address fields.
4 Select the Link to Ship-To Address field. A lookup for existing ship-tos is enabled.
5 Enter or select the ship-to. All address details come from the selected ship-to address.
6 The ship-to code displays in the End User Code field and the address details of the headoffice of the customer’s business relation display in the Address Information area. The address cannot be modified; tax and contact details can be viewed by clicking the View button.
7 Click Save.
Setting Up an Existing Address as an End User
1 Specify the customer code.
2 Specify the end user code or leave blank for a system supplied number.
3 Clear the Link to Customer and Link to Ship-To Address fields.
4 Select the Link to End User Address field.
5 Click the End User Address button. This displays all end user addresses for the business relation associated with the customer code.
6 Select the address you want to use.
Note: A business relation end user address can be linked to only one end user address for the same customer.
7 Click Maintain to update address details if necessary.
8 Click Save.
Modifying a Shared End User Address
1 Open End User Modify.
2 In the browse, locate and open the record you want to modify.
3 Click the Maintain button to display the address details.
4 Modify the details as required.
5 Save the changes in End User Modify.
If you modify address details for an end user address shared by other end users for the same customer, the system prompts you to apply the change to all end users with that address.
If you select Yes, the system checks to see if an address that matches the modified address already exists. If a matching address already exists, the system links all end users who shared the original address to that address record. If a matching address does not already exist, the system links all end users who shared the original address to the modified address record.
If you select No, the system checks to see if an address that matches the modified address already exists. If a matching address already exists, the system links the end user to that address record. If a matching address does not already exist, the system links the end user to the modified address.
Reassigning a Shared End User Address
If an end user shares the same address as other end users for the same customer and you use the End User Address option to select a different end user address, the system prompts you to apply this address change to all end users that share the original address.
If you select Yes, the system applies the change to all end users that share the original address. If you select No, the system links the current end user alone to the new address.
Managing Customer Credit
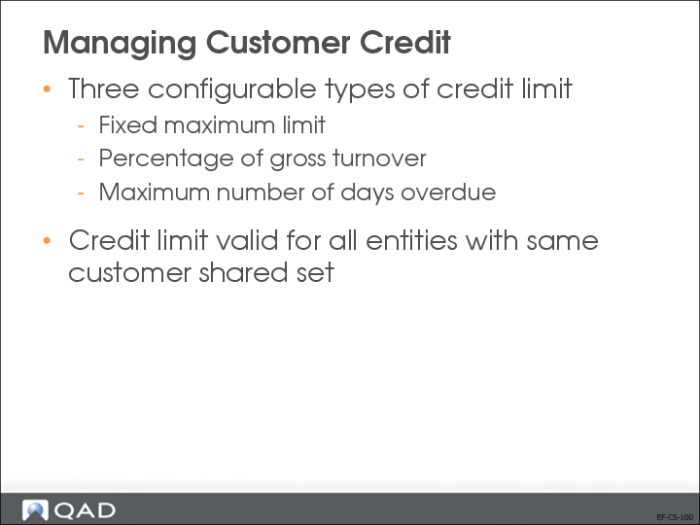
You define one or a combination of credit limits on the Credit Limit tab of the Customer screen. Once defined and saved, these credit limits are automatically applied to this customer, and enable credit checking on the customer’s transactions.
The maintenance of credit data is also available as a separate activity.
US Exercise: Payment Status
Log in to entity 10USACO.
1 Use Customer Payment Status Create (27.6.2.1) to create payment statuses for the payment instrument Draft.
Field | Status 1 | Status 2 | Status 3 |
Status | Initial | For Collection | Paid |
Bank Account Code | 1100 | 1100 | 1100 |
Daybook Code | | ARPAY | ARPAY |
GL Account | | 1380 | 1380 |
Default Value Days | 0 | 0 | 0 |
EMEA Exercise: Payment Status
Log in to entity 22UKCO.
1 Use Customer Payment Status Create (27.6.2.1) to create payment statuses for the payment instrument Draft.
Field | Status 1 | Status 2 | Status 3 |
Status | Initial | For Collection | Paid |
Bank Account Code | 1120 | 1120 | 1120 |
Daybook Code | | ARPAY | ARPAY |
GL Account | | 1380 | 1380 |
Default Value Days | 0 | 0 | 0 |
US Exercise: Customer Setup
Log in to entity 10USACO.
In this exercise, you will create a business relation record and a customer record.
1 In Business Relation Create (36.1.4.3.1), create the following business relation:
Field | Value |
Business Relation | 10-C0999 |
Name | Vons |
Search Name | Safeway Inc c/o Vons |
2 In the Address Info grid, right-click and choose Insert a New Row. Create the following address record:
Field | Value |
Address Type | Headoffice |
Address | 4750 E Indian School Rd |
Zip/City | 85038 Phoenix |
State | AZ |
Country Code | USA |
3 In Customer Create (27.20.1.1), create the following customer record:
Field | Value |
Customer Code | 10C0999 |
Business Relation | 10-C0999 |
Bill-To Customer | Blank |
4 In the Accounting tab of Customer Create, specify the following values:
Field | Value |
Control GL Profile (Invoice) | ARcontrol3rdparty |
Control GL Profile (Credit Note) | ARcontrol3rdparty |
Control GL Profile (Prepayment) | ARcontrol3rdparty |
Control GL Profile (Deduction) | ARcontrol3rdparty |
Sales Account GL Profile | Sales-Project |
Finance Charge Profile | FinCharge1 |
Sub-Account Profile | DefSubAct |
Currency Code | USD |
Customer Type | WHSL |
5 In the Payment tab of Customer Create, specify the following values:
Field | Value |
Credit Term Code | 30D |
Invoice Status Code | C-OK |
Print Reminder | Yes |
Print Statement | Yes |
Finance Charge | Yes |
Statement Cycle | MO |
6 In the Banking tab of Customer Create, right-click and choose Insert a New Row. Specify the following values:
Field | Value |
Bank Format | XX |
Customer Bank Number | AR201101 |
Own Bank Number | 55667342 |
Payment Format | CUST-CHECK |
7 In the Credit Limit tab of Customer Create, specify the following values:
Field | Value |
Apply Fixed Ceiling | Yes / 5,000,000 |
Include Sales Orders | Yes |
Include Open Items | Yes |
Calculate before Order Entry | Yes |
Calculate after Order Entry | Yes |
Credit Check Overrule Allowed | Yes |
8 In the Tax Info tab of Customer Create, specify the following values:
Field | Value |
Taxable Customer | Yes |
Tax in City | Yes |
Tax Zone | USA |
9 Save the customer record.
10 Complete the customer setup in Customer Data Maintenance (2.1.1) by specifying the following values:
Field | Value |
Customer | 10C0999 |
Salesprsn1 | 10SP01 |
Ship Via | FEDX |
Region | US-W |
Site | 10-100 |
Partial OK | Yes |
Fixed Price | Yes |
Daybook Set | 10-SALES |
Class | WHSL |
RSS Calendar Option | 1 |
Time Zone | PST/PDT |
Freight List | 10FRT |
Min Frt Wt | 1 |
Freight Terms | ADD |
EMT Type | NON-EMT |
11 In Customer Ship-to Create (27.20.2.1), create the following customer ship-to record:
Field | Value |
Customer Code | 10C0999 |
Ship-To Code | 10C0999A |
12 Click the Create button.
13 In the Address Info tab of the popup window, specify the following values:
Field | Value |
Address | 850 Linden Ave |
Zip/City | 93013 Carpinteria |
State | CA |
Country Code | USA |
14 In the Tax Information tab of the popup window, specify the following values:
Field | Value |
Taxable Address | Yes |
Tax in City | Yes |
Tax Zone | USA |
EMEA Exercise: Customer Setup
Log in to entity 22UKCO.
In this exercise, you will create a business relation record and customer record.
1 In Business Relation Create (36.1.4.3.1), create the following business relation:
Field | Value |
Business Relation | 22-C0999 |
Name | Vons |
Search Name | Safeway Inc c/o Vons |
2 In the Address Info grid, right-click and choose Insert a New Row. Create the following address record:
Field | Value |
Address Type | Headoffice |
Address | 4750 E Indian School Rd |
Search Name | Safeway Inc c/o Vons |
Zip/City | BT12 11HQ Bristol |
Country Code | GB |
3 In Customer Create (27.20.1.1), create the following customer record:
Field | Value |
Customer Code | 22C0999 |
Business Relation | 22-C0999 |
Bill-To Customer | Blank |
4 In the Accounting tab of Customer Create, specify the following values:
Field | Value |
Control GL Profile (Invoice) | ARcontrol3rdparty |
Control GL Profile (Credit Note) | ARcontrol3rdparty |
Control GL Profile (Prepayment) | ARcontrol3rdparty |
Control GL Profile (Deduction) | ARcontrol3rdparty |
Sales Account GL Profile | Sales-Project |
Finance Charge Profile | FinCharge1 |
Sub-Account Profile | DefSubAct |
Currency Code | GBP |
Customer Type | WHSL |
5 In the Payment tab of Customer Create, specify the following values:
Field | Value |
Credit Term Code | 30D |
Invoice Status Code | C-OK |
Print Reminder | Yes |
Print Statement | Yes |
Finance Charge | Yes |
Statement Cycle | MO |
6 In the Banking tab of Customer Create, right-click and choose Insert a New Row. Specify the following values:
Field | Value |
Bank Format | XX |
Customer Bank Number | AR201101 |
Own Bank Number | UK5564999 |
Payment Format | CUST-CHECK |
7 In the Credit Limit tab of Customer Create, specify the following values:
Field | Value |
Apply Fixed Ceiling | Yes / 5,000,000 |
Include Sales Orders | Yes |
Include Open Items | Yes |
Calculate before Order Entry | Yes |
Calculate after Order Entry | Yes |
Credit Check Overrule Allowed | Yes |
8 In the Tax Info tab of Customer Create, specify the following values:
Field | Value |
Taxable Customer | Yes |
Tax in City | Yes |
Tax Zone | GB |
9 Save the customer record.
10 Complete the customer setup in Customer Data Maintenance (2.1.1) by specifying the following values:
Field | Value |
Customer | 22C0999 |
Salesprsn1 | 22SP01 |
Ship Via | FEDX |
Region | EUR |
Site | 22-100 |
Partial OK | Yes |
Fixed Price | Yes |
Daybook Set | 22-SALES |
Class | WHSL |
RSS Calendar Option | 1 |
Time Zone | GMT |
Freight List | 22FRT |
Min Frt Wt | 1 |
Freight Terms | ADD |
EMT Type | NON-EMT |
11 In Customer Ship-to Create (27.20.2.1), create the following customer ship-to record:
Field | Value |
Customer Code | 22C0999 |
Ship-To Code | 22C0999A |
12 Click the Create button.
13 In the Address Info tab of the popup window, specify the following values:
Field | Value |
Address | 850 Linden Ave |
Zip/City | BT12 1HQ Bristol |
Country Code | GB |
14 In the Tax Information tab of the popup window, specify the following values:
Field | Value |
Taxable Address | Yes |
Tax in City | Yes |
Tax Zone | GB |