Required Configuration
Connection Manager Settings
All installations (default or custom) require that you configure the Connection Manager settings. This configuration is done as follows:
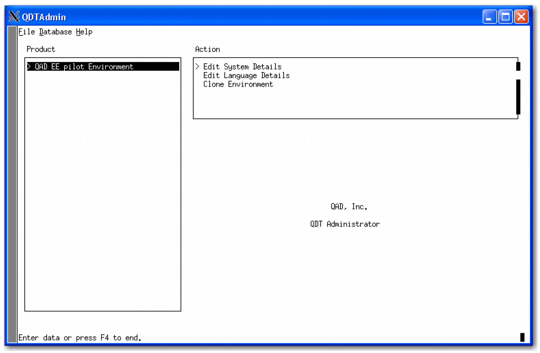
1 Return to the QDT main screen and click Admin. This action takes you to the QDT Administrator window.
2 Select QAD <environment_name> under Product.
3 If you are installing QAD Enterprise Edition on Linux or UNIX, skip to step
4.
If you are installing QAD 2011.1 Enterprise Edition or above on Windows, specify a service name or port for each database. This action is required because of a Progress Admin Server database maintenance limitation.
QDT Admin
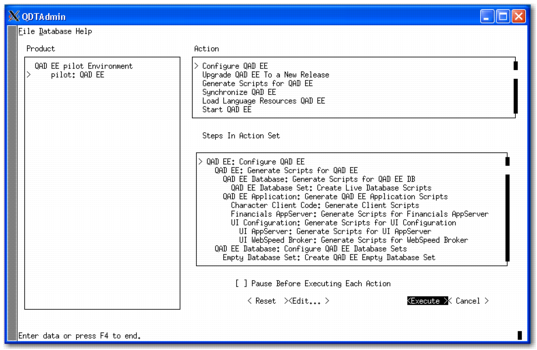
4 Select Configure QAD EE. The configuration steps appear in the Steps in Action Set pane.
Configure QAD EE Screen with Update UI Configuration Action Step
5 Scroll down and select UI Configuration: Update UI Configuration, and press Enter. The Update UI Configuration screen displays.
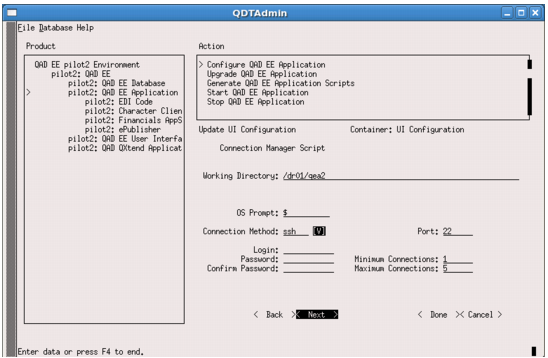
You use the UI Configuration to create the connection manager login script.
Note: The user is an operating system user with privileges to run the connmgr.<environment_name> script found under <qdt_install_directory>/envs/<environment_name>/scripts/.
Update UI Configuration Screen
6 Enter a valid login ID and password. Enter the password again to confirm it. Then select Done.
7 Select telnet or SSH for the connection method and modify or accept the default port number. Modify or accept the default values for the minimum and maximum connections for the UI Connection Manager.
Important: To proceed with the configuration process, provide a valid entry for each value on this screen.
8 Select Done to close the screen and save the values.
9 Select Execute to begin the configuration process.
10 The system prompts you to confirm execution of the configuration process. Click Yes.
11 You are prompted to clear the log. Enter yes.
12 The configuration process begins. The installation script launches. Select Close to continue. A window displays the qdtadmin.log file, which records the configuration progress.
Note: A message displays during full synchronization that says a default set of roles was not provided for the installation. Use of this capability is optional. The message is for information purposes only and does not affect the system.
13 Wait for the configuration process to finish. Then review the qdtadmin.log file for errors.
14 Correct any errors and attempt the configuration again. Otherwise, select Close to exit.