System Configuration
The QDT application allows you to modify one or more of the default QAD Enterprise Edition installation parameters to create an installation tailored to meet your requirements.
To create a QAD Enterprise Edition custom configuration, use the following procedure:
1 Return to the QDT main screen and click Admin. This action takes you to the QDT Administrator window.
You can navigate from pane to pane in this window using the Tab key and within a pane using the up- and down-arrow keys.
The screen has multiple panes that contain lists of configuration options. You can vary the level of detail presented in the lists by highlighting and selecting the options.
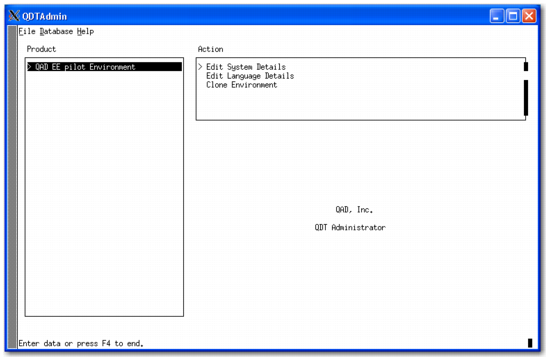
2 The Product pane lists the available environments. Select the environment to configure.
QDT Admin
Each selection in the Product pane displays a corresponding list of items in the Action pane.
In the Action pane of the QDT Administrator window, you have the following options:
• Edit System Details
With this option, you can change the overall settings for your environment, including the Host ID, Host Name, Host URL, Log Directory, and Environments Directory. You can also modify settings for your Progress AdminServer, Java Runtime Environment, Progress NameServer, and Tomcat WebServer.
See
Editing the Product Configuration for more information about these options.
• Edit Language Details
With this option, you can install and configure the languages your QAD Enterprise Edition installation uses.
Note: The default QAD Enterprise Edition language is US English. If you are using only US English in your installation, you do not need to install it. If you require languages other than US English, you must install them.
See
Editing Language Details for more information.
• Clone Environment
With this option, you can create a copy of the selected environment, including all of its settings.
See
Cloning an Environment for more information.
Make a selection in the Action pane to display the Steps In Action Set pane. It lists the tasks for the current Action pane selection.
Select an item in the Steps in Action pane, select Edit, and press Enter to display a screen that allows you to enter or modify parameters associated with the item.
You can perform a custom configuration by beginning at the top-level item in the Steps In Action list, clicking Edit, and using the Next button to step through each screen in sequence.
Select a second-level item from the list to step through all of the screens under that topic in sequence. Select a third-level indented item and you can only access that item.
Select Execute to configure the installation using the settings from all of the items in the Steps In Action Items list.