Mobile GRS App
Here is how to download and use the Mobile GRS Application (App):
Downloading the Mobile GRS App
For Apple devices, you download QAD Mobile GRS app from iTunes.
For Android devices, you download QAD Mobile GRS app from the QAD Store (http://store.qad.com).
Specifying Mobile GRS App Settings
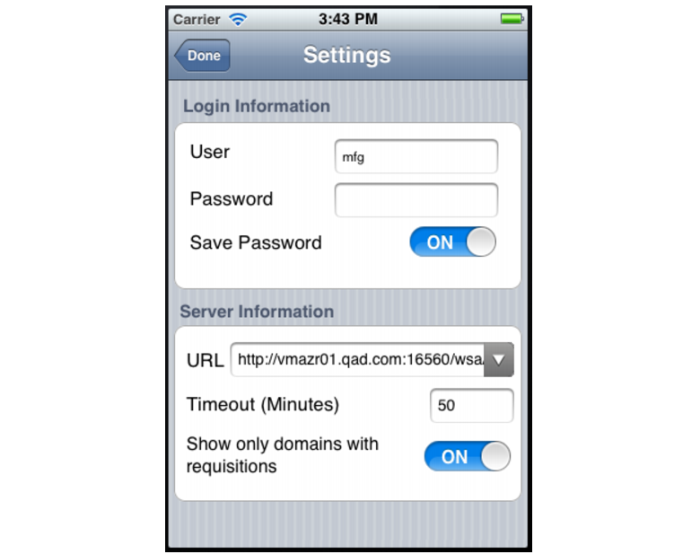
After downloading, you modify the settings by specifying the Login Information and Server Information.
When you launch the app, you can access the settings by clicking on the icon located in the bottom center of the display.
Login Information
The Login Information includes:
User
Enter your user ID on the QAD Enterprise Applications system.
Password
Enter your password on the QAD Enterprise Applications system.
Server Information
The Server Information includes:
URL
Enter the GRS Mobile Approvals Web Services Adapter URL
(for instance, http://configuration.company.com:port/wsa/wsa_env).
A QAD Enterprise Applications system administrator must install the Mobile GRS Server as described in
Mobile GRS Server.
The URL field remembers up to five previously entered URLs. You can select them from the pull-down on the field. This allows you to access different system environments quickly without having to enter previously entered URLs. Also, if you want to enter a URL that is similar to a previously entered URL, you can choose the previous URL and modify it instead of entering the entire URL.
Timeout
Enter how long you want the mobile app to stay connected to the system (in minutes). For example, entering 1440 would specify 24 hours.
Show only domains with requisitions
Specify whether to show only domains with requisitions or show all domains on the system. Typically, you will want to show only domains with requisitions, especially if you have many domains on your system and only a few of them have most of the GRS activity.
Using the Mobile GRS App
To start the app, click on the icon for it on your mobile device. Once you have specified the settings (
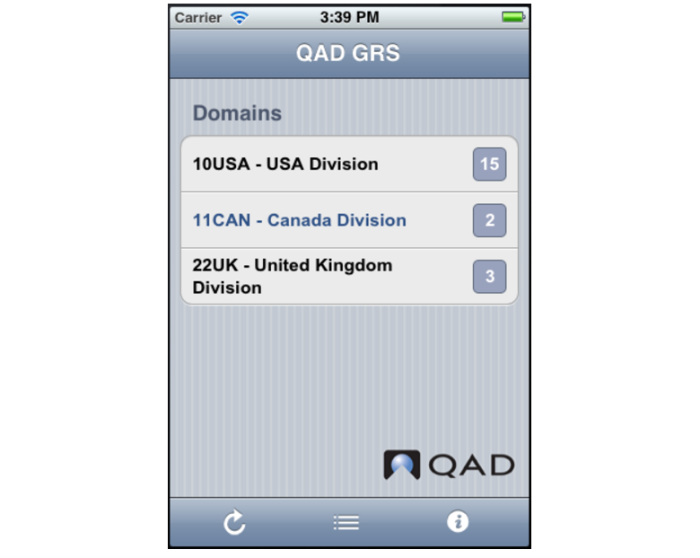
Specifying Mobile GRS App Settings), the app will automatically log you in to the system and display requisitions in an Inbox-style format, organized by the domains you have on your system.
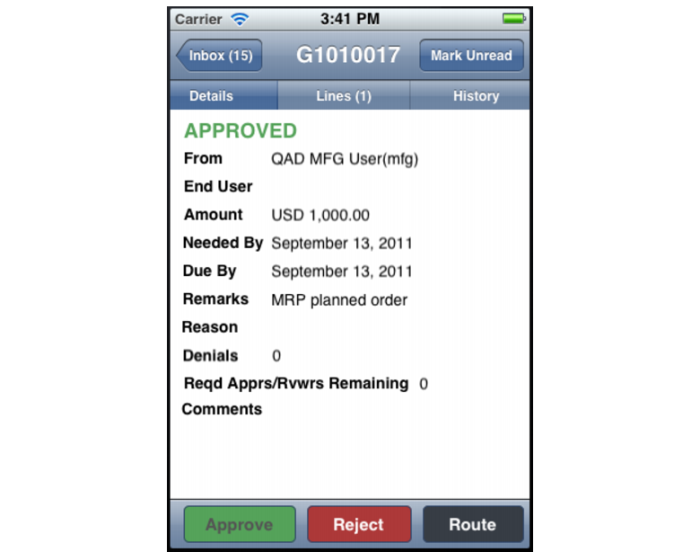
To review a requisition, click on it and you will see the requisition details, including From, End User, Amount, Needed By, Due By, Remarks, Reason, Denials, Reqd Apprs/Rvwrs Remaining, and Comments.
To approve the requisition, click the green Approve button. To reject the requisition, click the red Reject button. To route the requisition, click the black Route button. On the Route page, enter comments, choose a user from the Route lookup, and click Save.
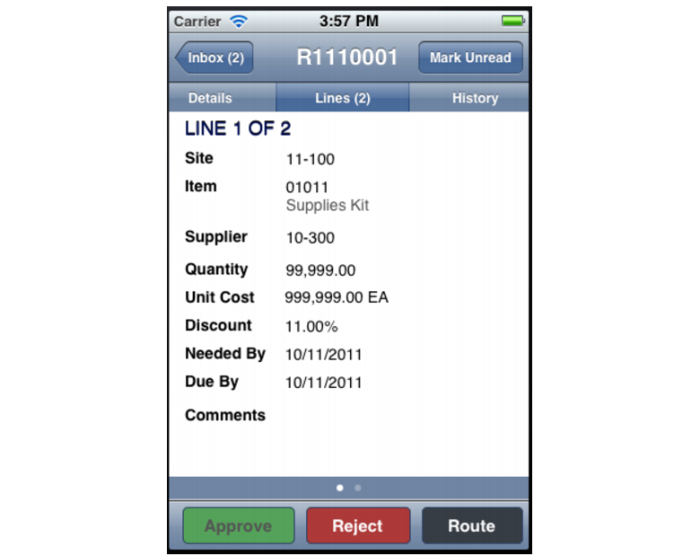
Additional tabs offer further Lines information and History information for the requisition.
The Lines tab shows requisition line fields, including Site, Item, Supplier, Quantity, Unit Cost, Discount, Needed By, Due By, and Comments.
The History tab lists the history (approvals, denials, and routing) of the requisition.
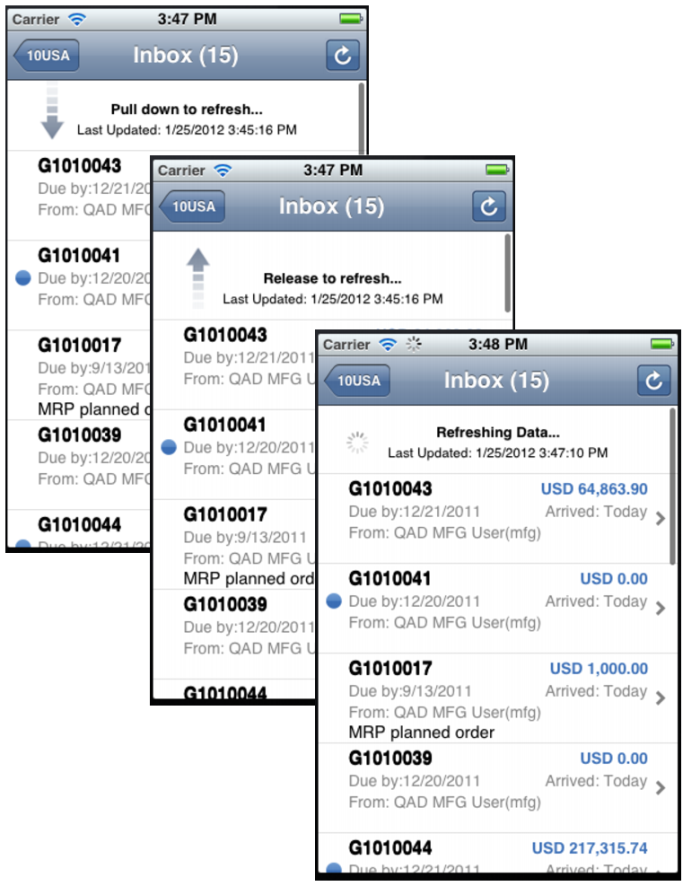
To refresh the list of requisitions in the Inbox, pull down and then release:
<meta name="project" content=1.0.0.11
<meta name="gsa_date" content=2015.06.062015.06.06
<meta name="ProductSuite" content=Add-on
<meta name="ProductModule" content=Global Requisition System
<meta name="PRODUCT_VERSION" content=1.0.0.11
<meta name="BookTitle" content=QAD Global Requisition System Release Notes
<meta name="ContentType" content=Release Notes