Group Maintenance
• Users added to groups must be previously defined in User Maintenance (36.3.1)
• You can specify a date when user membership expires in a group
• You can also specify the number of copies of a PCR or PCO they should receive and the output device to be used
Users receive e-mail messages, based on the routing slip attached to a PCO or PCR.
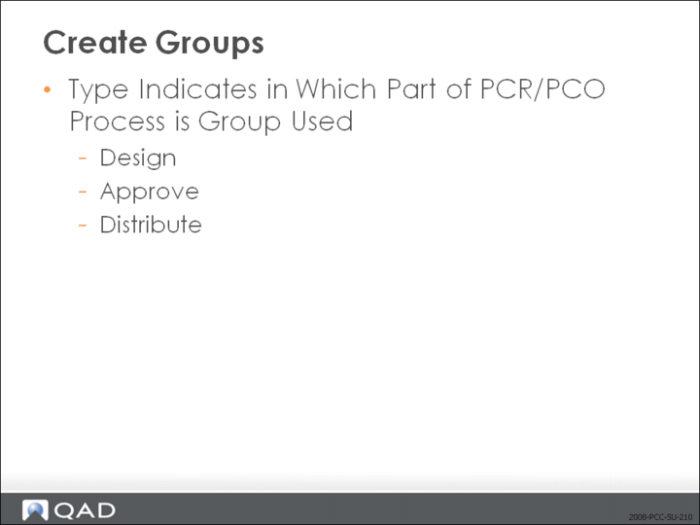
Create Groups
• QAD EE does not distinguish different types of groups
• Type is how it is used, not how it is defined
• Group names should reflect their type
• Users can be in more than one group, and more than one type of group
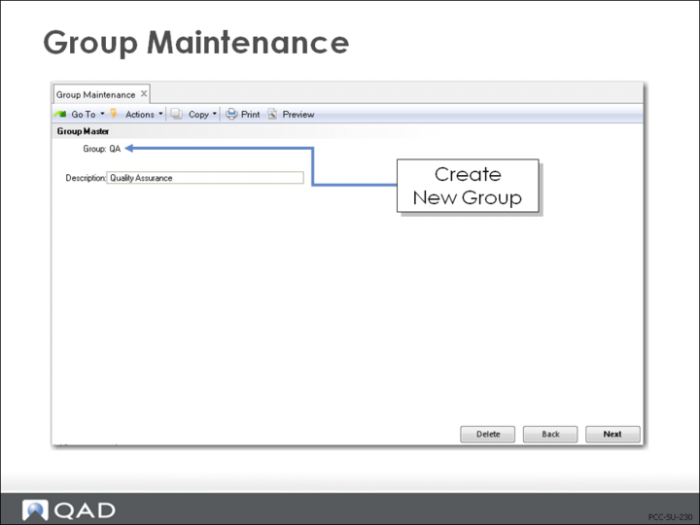
Group Maintenance (1.9.1.1)
• Specify a unique group name
• Give a brief description of how the group is used in PCC
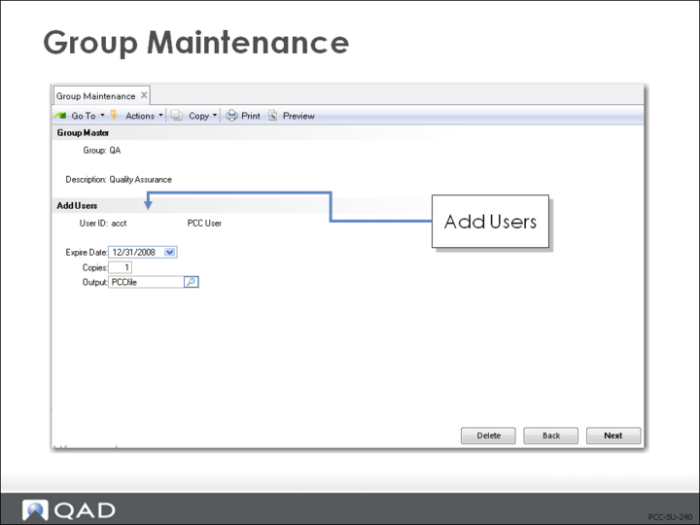
Add Users
• Expire date is optional for assigning when group membership ends
• If copies is set = 0, the user receives only e-mail
• If copies is set = 1 or above, this assigns the number of printouts at the specified Output
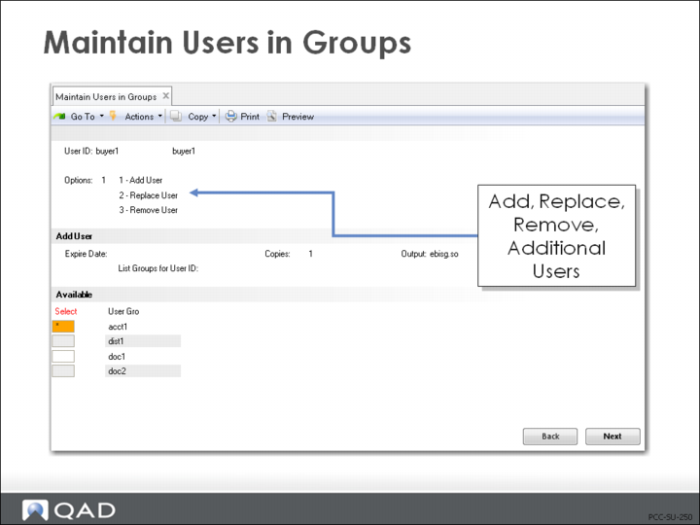
Maintain Users in Groups (1.9.1.3)
Add Users
• Add new users
• Change user attributes
• Replace users
• Remove users
• Available groups shows PCC groups to which the user does not yet belong
Replace Users
• Works like adding users to groups
• Specify both the current user ID and the user ID of the person who will replace them
• Update the replacing user’s attributes and groups by specifying the same ID in both fields
Remove Users
• Delete users from groups
• You must remove users from group membership if you plan to delete a user ID
Exercise: Set Up PCC Groups
1 Use Drill Down Lookup Maintenance (36.4.8.1) to add the following information:
Drill Down/Lookup | Drill Down |
Field | ecm_ecr_dspn |
Calling Procedure | <blank> |
Procedure to Execute | gplu072.P |
2 Use Group Maintenance (1.9.1.1) to create PCC groups and assign members to the groups. Enter group name and click Next. Enter description and click Next. Enter user ID and click Next. Expire Date, Copies, and Output fields are not required for this exercise, leave blank. click Next, the cursor returns to the User ID field, enter the next User ID, continue until all users for this group are entered. Click the Back button to enter next group. Repeat until all user IDs are entered.
Group | Description | User IDs |
Design | PCC Design Group | Eng1 |
| | Eng2 |
| | QEng1 |
| | QEng2 |
| | Your Login |
Eng/Apv | Engineering Approval | Eng2 |
| | Your Login |
Pln/Apv | Buyer/Planner Approval | Pln1 |
| | Pln2 |
| | Your Login |
Mfg/Apv | Mfg. Manager Approval | Mfg1 |
| | Mfg2 |
| | Your Login |
Qual/Apv | Quality Eng. Approval | QEng1 |
| | QEng2 |
| | Your Login |
Dist | PCO Distribution List | Pln1 |
| | Mfg1 |
| | Acct |
| | Your Login |
3 Use Group Browse (1.9.1.2) to check your work.
Exercise: Set Up Item Master
1 Use Item Master Maintenance (1.4.1)
Field | Data |
Item Number | 01010P |
Description | Medical Ultrasound Prototype |
UM | EA |
Prod Line | 11 |
Design Group | Design |
Status | Proto |
Rev | 2 |
Lot/Serial | S |
Site | 10-100 |
Location | 010 |
Click Next through all frames until Item Number field is highlighted, then Back.
Exercise: Set Up Item Data
1 Use Item Data Maintenance (1.4.3) to enter (change) the item data information below.
Item# | Description | Prod Line | Design Grp | Status | Rev |
50001 | Probe Unit - 10 Mhz | 11 | Design | Active | A |
02003 | Standard Connector | 11 | Design | Active | A |
62050 | Beryllium Copper (discrete PO) | 11 | Design | Active | A |
90031 | Packaging | 11 | Design | Active | A |
60004 | Transducer - 10 Mhz | 11 | Design | Active | A |
60001 | Durable Plastic Housing | 11 | Design | Active | A |
60002 | Display / Readout | 11 | Design | Active | A |
60003 | Keyboard | 11 | Design | Active | A |
60005 | Battery | 11 | Design | Active | A |
60006 | Monitor Cable | 11 | Design | Active | A |
60007 | Movable Cart | 11 | Design | Active | A |
60008 | Printer | 11 | Design | Active | A |
60050 | Base Unit / CPU | 11 | Design | Active | A |
90093 | Shipping Carton | 11 | Design | Active | A |
Exercise: Set Up Inventory Data
1 Use Item Inventory Data Maintenance (1.4.5) to enter (verify) the following inventory data:
Item# | Lot/Serial | Site | Location |
01010P | S | 10-100 | 010 |
50001 | S | 10-200 | 020 |
02003 | | 10-100 | 020 |
62050 | | 10-202 | 200 |
90031 | | 10-200 | 020 |
60004 | S | 10-100 | 020 |
60001 | | 10-100 | 020 |
60002 | | 10-100 | 020 |
60003 | | 10-100 | 020 |
60005 | | 10-100 | 020 |
60006 | | 10-100 | 020 |
60007 | | 10-100 | 020 |
60008 | | 10-100 | 020 |
60050 | S | 10-100 | 020 |
90093 | | 10-100 | 020 |
Exercise: Set Up Item Planning Data
1 Use Item Planning Maintenance (1.4.7) to enter the following item planning data:
Item# | Order Qty | Pur/Mfg | Mfg LT | Pur LT |
01010P | 1 | M | 1 | |
Review parts information as to P or M, and other variables.
Exercise: Set Up Item Cost Data
1 Use Item Cost Maintenance (1.4.9) to enter the following item cost data:
Item# | Price | G/L Cost Material | Curr Cost Material |
01010P | $2,500.00 | | |
Review parts information as to G/L Cost Material and Current Cost Material.
Exercise: Set Up Product Structures
1 Use Product Structure Maintenance (13.5) to enter the following product structure data for parent item 01010P.
Drag and Drop 01010P from Product Structure frame into the lower frame.
2 Drag and Drop the following components onto 01010P in the lower frame.
Component
Item# |
50001 |
60001 |
60002 |
60003 |
60005 |
60006 |
60007 |
60008 |
60050 |
90093 |
Note: Click the plus sign on 50001 to see the components needed to make 1 unit of 50001.
Important: Highlight the items in the lower frame and Click Product Structure Maintenance in the frame above to review data, such as number needed, unit of measure.
Important: Click the Save Icon at the top of the screen.
3 Verify the product structure data using Product Structure Inquiry (13.6).
Exercise: Set Up a Department
1 Use Department Maintenance (14.1) to set up a department for the production of the Medical Ultrasound Prototype by entering the following information:
Field | Data |
Department | 130 |
Description | Med Ultrasound Prototype |
Default Sub-Account | Mech |
Default Cost Center | Pro |
Click Next until back in Department field, Click Back.
Exercise: Set Up a Work Center
1 Use Work Center Maintenance (14.5) to set up a work center for Medical Ultrasound Prototype assembly by entering the following data:
Field | Data |
Work Center | 1005 |
Description | Prototype Assembly |
Department | 0400 |
Setup Rate | 25.00 |
Labor Rate | 20.00 |
Lbr Bdn% | 100.00 |
Save and Exit.