Registering QAD Enterprise Edition
You must register your QAD Enterprise Edition license the first time you log in. These steps require that you have the license code sheet included with your release media.
Note: If you chose to install Demo Data, the installer automatically included evaluation licenses. You can skip this section and go directly to
Installing the QAD .NET UI.
To register QAD Enterprise Edition, do the following:
1 Change to the directory where you installed Enterprise Edition.
cd directory
2 Launch the character client by executing:
scripts/client-lang.sh
where lang is the language for your system. For example,
scripts/client-us.sh
3 At the Login screen, enter mfg and press Enter. Leave the password field blank.
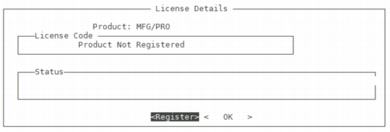
4 In the License Details screen, select Register.
License Details screen
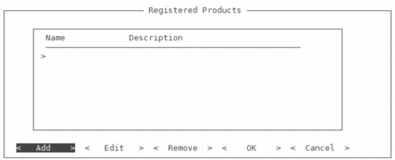
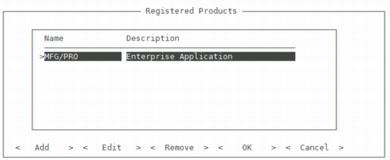
5 In the Registered Products screen, highlight Add and press enter.
Registered Products
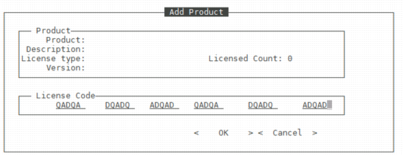
6 In the Add Product screen, complete the License Code fields by entering the codes from the license code sheet included with your release media. Select OK.
Add Product
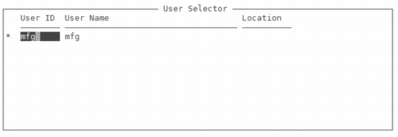
7 In the Add Authorized Users screen, enter All for User and press enter.
Add Authorized Users
8 In the User Selector screen, press the <F1> key. At the “Is all information correct” prompt, enter y for yes and press enter.
User Selector
9 The Registered Products screen reappears with a list of the license codes you have added.
Registered Products
10 Repeat
step 5 through
step 9 for additional license codes. Select OK when all codes have been entered.
11 Reload the character client as described in
step 2 to verify that license setup was successful.