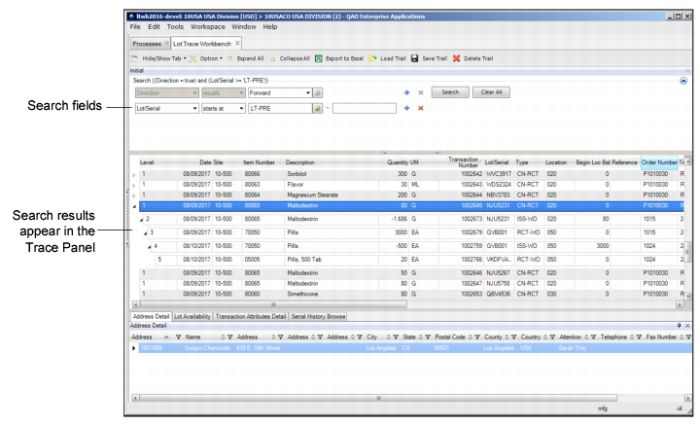
Using Lot Trace Workbench
By default, the Direction, Item Number, and Lot/Serial search fields are displayed on the startup screen for filtering. For best results include Lot/Serial when known. If desired, use the drop-down menus to change the search criteria or click the + or X icons to add or remove search fields.
Note: The Direction search field cannot be removed.
The following filter options are available:
|
• Address
|
• ID
|
• Lot/Serial
|
• Rev
|
• Transaction Number
|
|
• Batch
|
• Inventory Status
|
• Order
|
• Sales/Job
|
• Transaction Type
|
|
• Date
|
• Item Number
|
• Product Line
|
• Shipper Number
|
|
|
• Effective Date
|
• Item Type
|
• Reason
|
• Site
|
|
|
• Group
|
• Location
|
• Reference
|
• Supplier Lot
|
|
Searching for Records
Depending on the initial available information and the direction of the search, choose between a backward or forward search:
• Backward. Explore upstream processes back to the origin.
• Forward. Explore downstream processes forward to the final destination of goods.
Then add information to the search fields and click Search. The results appear in the Trace Panel.
Search Results
Expand or Collapse Records
Click on the carat to expand or collapse a level.
To expand the record to its bottom level, right-click on the record and select Expand.
To collapse the record to its top level, right-click on the record and select Collapse.
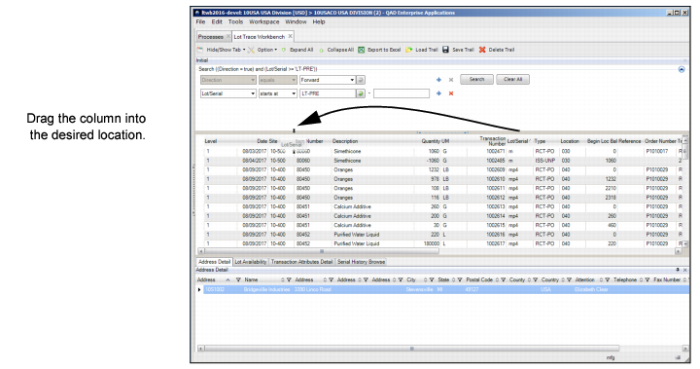
Moving Columns
To move a column, drag the column header into the desired location. Red arrows appear to indicate the new location.
Moving a Column
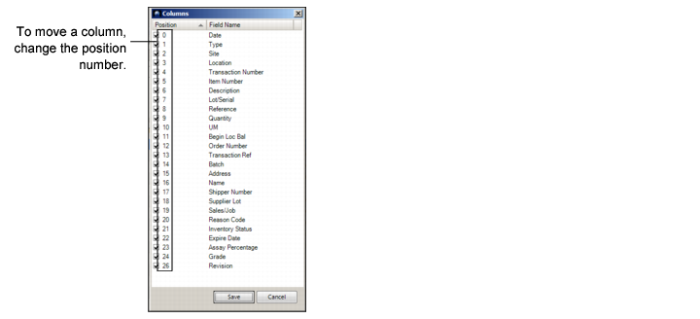
You can also move columns using the Columns window. Right-click the column, select Columns, change the position number, and then click Save.
Moving a Column
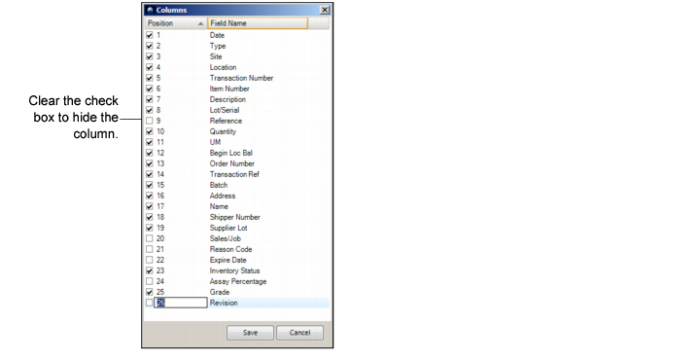
Show or Hide Columns
To hide a column, right-click the column and select Hide Column. To hide multiple columns, right-click the column, select Columns, clear the check box for the columns you want to hide, and then click Save.
To show a column, select its check box.
Showing and Hiding Columns
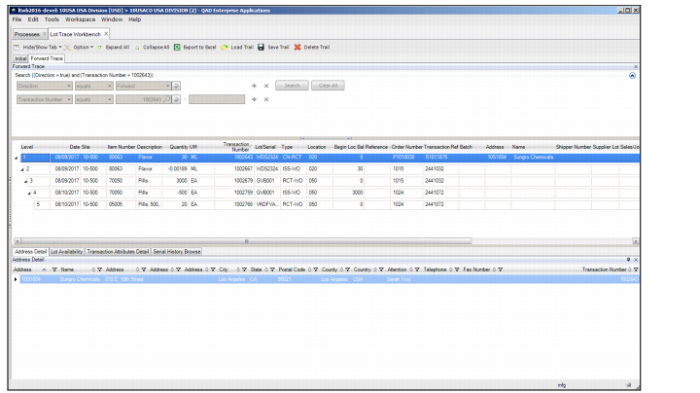
Forward Trace
To perform an additional forward trace on a record, right-click the record and select Forward Trace. The search fields for the forward trace are Item and Transaction Number.
Note: The system sets the value for the search fields based on the record that triggers the forward trace. The search criteria are not editable.
Forward Trace
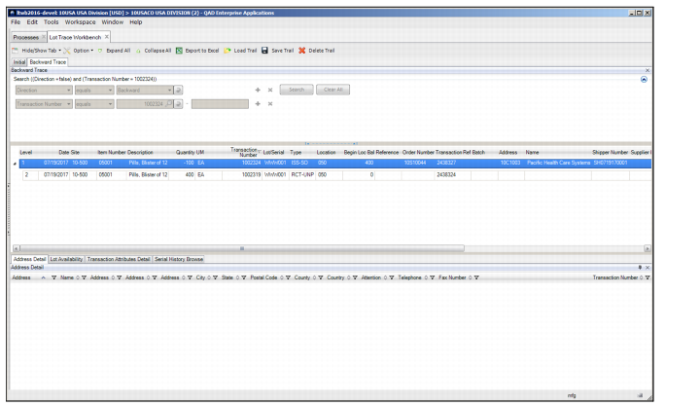
Backward Trace
To perform an additional backward trace on a record, right-click the record and select Backward Trace. The system creates a successive trace tab. The search field for the backward trace is Transaction Number.
Note: The system sets the value for the search field based on the record that triggers the backward trace. The search criteria are not editable.
Record that Triggers the Next Trace
Backward and Forward Trace Tabs
When you perform a backward or forward trace, the system creates an incremental trace tab and highlights the next record that can be triggered.
If a trace tab has a successor, another trace cannot be triggered, unless the successive trace tab is closed. In
Backward Trace Option Grayed Out, the Backward Trace tab is the successor to the Initial Trace tab. If the Backward Trace tab is open, the backward trace option is grayed out and you cannot perform a backwards trace on the Initial trace tab.
Backward Trace Option Grayed Out
When you close a trace tab that has a successor, the system prompts you to close all the successor tabs together. Click OK to close all the successor tabs together.
Closing a Trace Tab
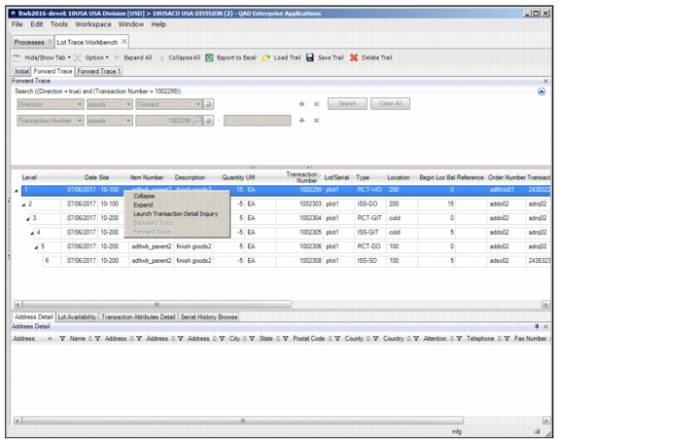
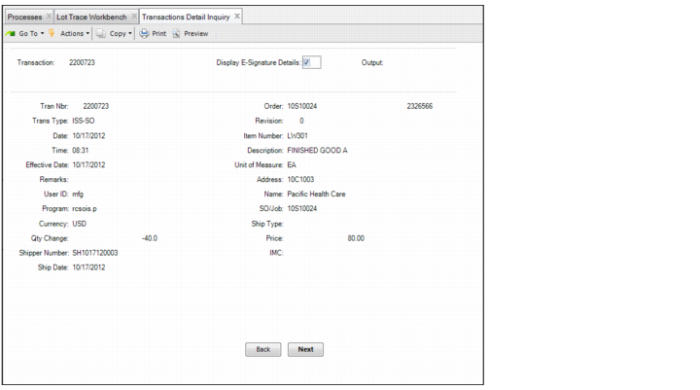
Launch Inventory Detail Inquiry
To launch the inventory detail inquiry for the selected transaction record, right-click the record and select Launch Inventory Detail Inquiry.
Launch Inventory Detail Inquiry
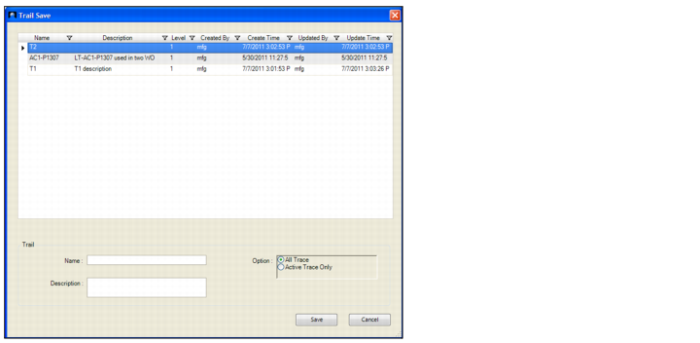
Saving a New Trail Record
Follow these steps to save a trail record:
1 On the toolbar, click Save Trail.
2 The Trail Save window, which lists all the saved trail records, opens. By default, the records are sorted by trail name.
Trail Save
3 Enter the name of the trace trail in the Name field.
4 Enter a description of the trace trail in the Description field.
5 Select a save option:
• All Traces. Saves all trace tabs in the current trail.
• Active Trace Only. Saves the active trace tab only.
6 Click Save.
Note: The Created By, Created Time, Updated By, and Updated Time columns are automatically captured.
Overwrite an Existing Trail Record
Follow these steps to overwrite an existing trail record:
1 On the toolbar, click Save Trail.
2 The Trail Save window, which lists all the saved trail records, opens. By default, the records are sorted by trail name.
3 Click the trail record that you want to overwrite or enter the name of the record in the Name field.
4 If necessary, modify the description.
5 Select a save option:
• All Traces. Saves all trace tabs in the current trail.
• Active Trace Only. Saves the active trace tab only.
6 Click Save.
7 A warning message pops up. Click OK to confirm that you want to overwrite the trail record.
Note: The Update By and Update Time are automatically captured.
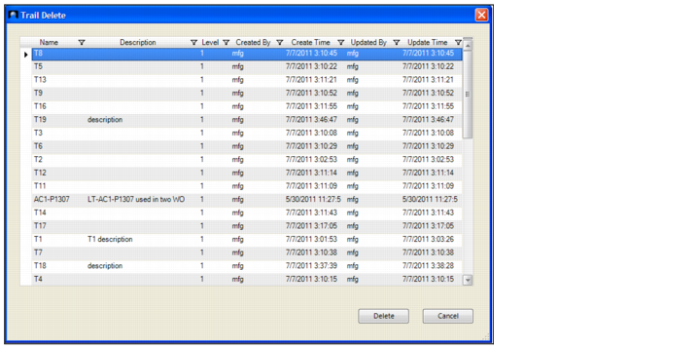
Deleting a Trail Record
Follow these steps to delete a trail record:
1 From the toolbar, Click Delete Trail.
2 The Trail Delete window pops up.
3 Select the trail record you want to delete and click Delete.
Trail Delete
Loading a Trail Record
Follow these steps to load a trail record:
1 From the tool bar, click Load Trail.
2 The Trail Load window, which lists all the saved trail records, opens. By default, the records are sorted by trail name. The following information is shown for each trail record:
• Name
• Description
• Level
• Created By
• Created Time
• Updated By
• Updated Time
Note: Every column can be used as a filter to select trail records.
Trail Load
3 Open the trail record by double-clicking the record or selecting the record and clicking Load.
4 The trail record opens in a new Lot Trace Workbench window.