Control | Name | Description |
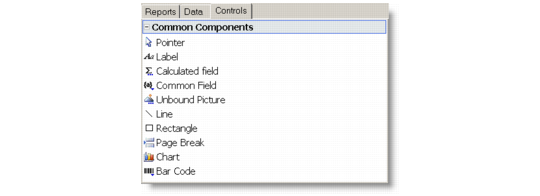
Pointer | Deselects any field on the report and releases the mouse focus. | |
Label | Creates a field for a label. Use the Properties window to specify the appearance, border, design, and layout of the label. | |
Calculated Field | Creates a calculated field. When you click this button, the code editor dialog box appears so you can enter the VBScript expression whose value you want to display. | |
Common Calculated Field | Creates a field with a commonly used expression. When you click this button, a menu appears and you can select expressions that render the date or time when the report was created or printed, the page number, page count, “page n of m,” or the report name. | |
Unbound Picture | Creates a field that displays a static picture, such as a logo. When you click this button, a dialog box appears to prompt you for a picture file to insert in the report. A copy is made of the picture you select and placed in the same directory as the report file. You must distribute this file with the application unless you embed the report file in the application. When you embed a report file in your application, any unbound picture files are embedded, too. | |
Line | Creates a line. Lines are often used as separators. | |
Rectangle | Creates a rectangle. Rectangles are often used to highlight groups of fields or to create tables and grids. | |
Page Break | Creates a field that inserts a page break. | |
Chart | Creates a field that displays a chart. Unlike most bound fields, Chart fields display multiple values. To select the data you want to display, set the Chart field’s DataX and DataY properties. To format the values along the X and Y axis, set the FormatX and FormatY properties. You can use the ChartType property to specify the type of the chart: bar, column, pie, scatter, line, or area. | |
Linear Bar Code | Creates a field that displays a linear bar code that is rendered from your designated data. To specify a bar code standard, in the Properties box, select the standard you want to use from the Bar Code’s Type list. This field supports 34 types of 1D bar codes and exposes extensive sets of parameters to fully control the bar code settings. | |
2D Bar Code | Creates a field that displays a 2D bar code that is rendered from your designated data. To specify a bar code standard, in the Properties box, select the standard you want to use from the Bar Code’s Type list. Available types include DataMatrix, PDF417, and QRCode. The Properties box includes extensive sets of parameters to fully control the bar code settings. Note that there are three Bar Code properties sections, each containing properties specific for one type of bar code. | |
Bar Code | (Superceded by the Linear Bar Code and 2D Bar Code, but supported for backwards compatibility.) Creates a field that displays a barcode that is rendered from your designated data. To specify a barcode standard, select the standard you want to use from the Barcode property list in the Properties box. You can choose from the following barcode standards: Code39, Code 93, Code128, Code2of5, Codeabar, PostNet, Ean13, Ean8, UpcA. |