Creating a CIM Input File
To create a data input file, first determine the program to be used and fields to be updated. The basic steps are as follows:
1 Run the program that is to receive the data and determine the program name. You can also run Menu System Report (36.4.4.2).
a In the character interface, use the Ctrl+F key combination to display the program context, including name.
b In the .NET UI, right-click on the option in the menus and choose Properties to display program details.
2 Determine the program’s key fields. These are typically the first fields, and always let you advance to the next field by pressing Next.
A good test is to position the cursor in a field, and click Next. Note where the cursor goes. Reposition the cursor in the field, and press Return. If the cursor moves to the same place as it did when using Next, embed Next (Carriage Return) in your CIM file. If the cursor went elsewhere, embed a Return. You could still embed Next if this new cursor position did not lead to any field you want to populate.
An input file must contain values for key fields, each on a line by itself. This allows the Next command to apply to the appropriate field.
Note which fields are validated or secured. Do this by typing any character (for example, x) and pressing Enter. If a warning displays, the field is validated or otherwise constrained. Your input file must conform to valid choices for the field. Use the lookup browse for a list of valid entries.
3 Choose non-key fields you want to populate and in what sequence. Note whether Next or Return is required after each entry.
Not all fields have labels. For example, a two-line description can consist of two separate fields. To determine which lines correspond to which fields, place the cursor in each line and press Ctrl+F to display their field names. You must populate each field with a separate entry in a CIM file.
Note: In the QAD .NET UI, field names display as field tips.
4 Record a template of the CIM input file entries for the first frame.
The following is an example template for Item Master Maintenance (1.4.1):
@@BATCHLOAD ppptmt04.p
“10-10000”
“EA” “Oasis Cooling System” “Home/Indust Model”
Remember, all CIM files start with @@BATCHLOAD <Program Name>. The Item Number (10-10000) is a key field and is required. It must be on its own line. The second line represents the next three fields in the entry group.
Follow Item Number with Next. The next line fills in the UM and Description fields. Note that Description is shown as two entries, one populating the first line, one populating the second.
Note: There are a few cases where CIM load does not work, such as costing data in Item Master Maintenance (1.4.1). In this case, costing data has to be CIM loaded through Item Element Cost Batch Load (1.4.15); see
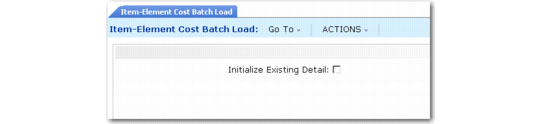
Item Element Cost Batch Load (1.4.15).
Item Element Cost Batch Load (1.4.15)
Use the following code to load this data.
@@batchload ppptmt04.p
“10-10000”
“Ea” “Oasis(TM) Cooling System” “Home/Indust Model”
“1000” “5/28/1992” “Config” “AC” “DISCRETE” “10-10000” “AB”
.
@@end
Error Handling
When the CIM load is completed, CIM Data Load Processor (36.15.2) creates a report showing the groups successfully processed and any processing errors. Groups containing an error are not processed. Troubleshoot errors using the following guidelines:
• Are the values appropriate?
• Is there a line reading: @@batchload?
• Is there a line reading: @@end?
• Are the data in the correct order?
• Are there any blank lines?
• Are there any misplaced spaces?
• Is there an end-of-line for each data set?
• Does it complete the record?
• Did the first error cause all the others?