Setting up EDI eCommerce to Use Imported Bank Formats
Before importing the bank file formats, you must define the following information in EDI eCommerce:
• The file names and number range sequences for the banking files that will be produced using this format.
• The default data input and output eCommerce directory locations.
• The number counters for both the banking files and for the eCommerce application itself.
• A cross-reference between the user’s QAD domain and the eCommerce processing domain.
Use the following procedure to complete this setup.
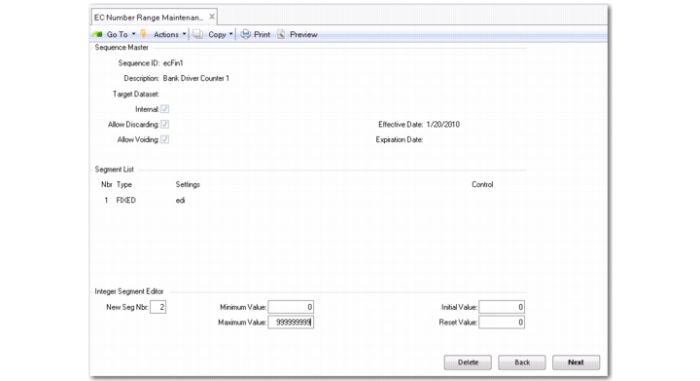
Create Number Range Sequences in EC Number Range Maintenance (35.21.1).
EC Number Range Maintenance
1 Create five number range sequences; for example, using the sequence IDs ecFin1, ecFin2, ecFin3, ecFin4, ecFin5.
2 For each sequence, ensure that the Target Dataset fields Internal, Allow Discarding, and Allow Voiding are selected.
3 Each sequence must contain two segments: a Fixed segment in which you specify the Fixed part of the format filename, and an Integer segment in which you specify the numeric part of the format filename. For example, when you specify ‘edi’ as Fixed, and a number range of 0 to 999999999, you ensure that the bank files you produce using this format will be named ‘edi00000001.*’
The file extensions for these files are defined in EC Subsystem Definition Maintenance (35.13.1).
The five sequences you create are later used to specify counters in eCommerce Control. See
Assign Number Sequences to EDI Documents.
Note: You complete these steps for the first installation of bank format files only—you do not need to complete the process the next time you install an additional bank file format or when installing an update of an existing bank format.
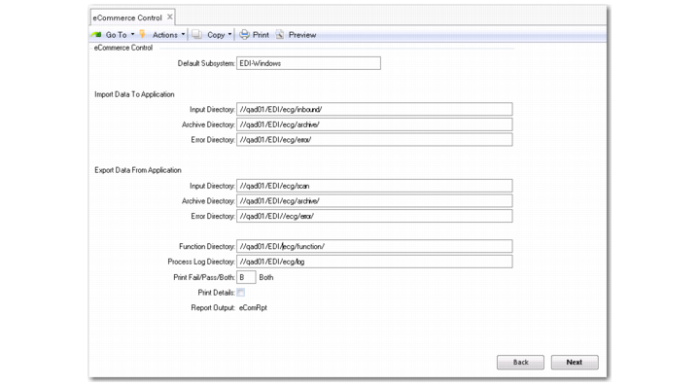
View the EDI Control File in eCommerce Control (35.13.24)
eCommerce Control, Default Directories
The EDI Control File displays the default server directories for data import and export, and for the EDI functions and process log.
You must ensure that the application users have read/write permissions for these folders, and that the server path name is displayed in full for each directory.
The Functions path name must also be included in the Appserver Propath to ensure that EDI functions execute correctly.
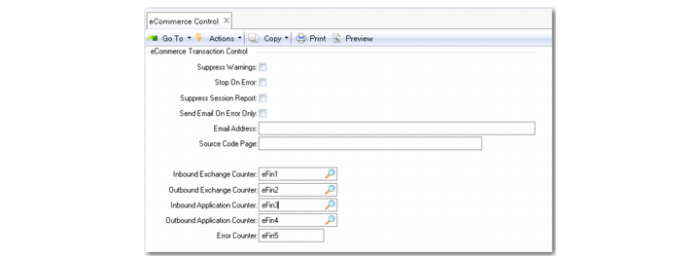
Assign Number Sequences to EDI Documents
eCommerce Control, Number Sequences
4 Click Next on the eCommerce Control screen to display the Counter fields.
5 Select the number sequences created previously for each of the five fields.
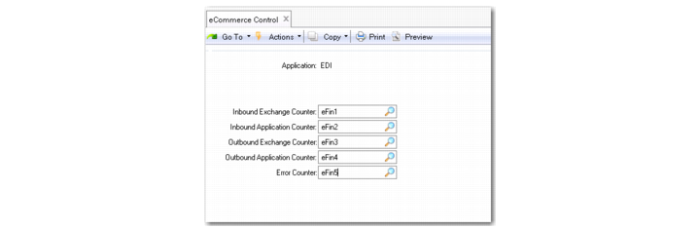
Assign Number Sequences to the EDI application
6 Click Next to display the Application frame.
eCommerce Control, Applications Frame
7 Select the EDI application in the Application lookup (the default application).
8 Select the number sequences created previously for each of the five fields.
Create a Domain Cross-Reference
9 Use Domain Cross-reference Maintain (35.11.1) to create a cross-reference between the EDI eCommerce user’s log-in domain and the domain used in eCommerce processing.
Domain Cross-Reference Maintain
By defining cross-references, you can let users log in to their usual domain, but still process EDI eCommerce imports and exports in a different domain.
A QAD eCommerce processing domain is provided by default.