Validating Your QXI Configuration
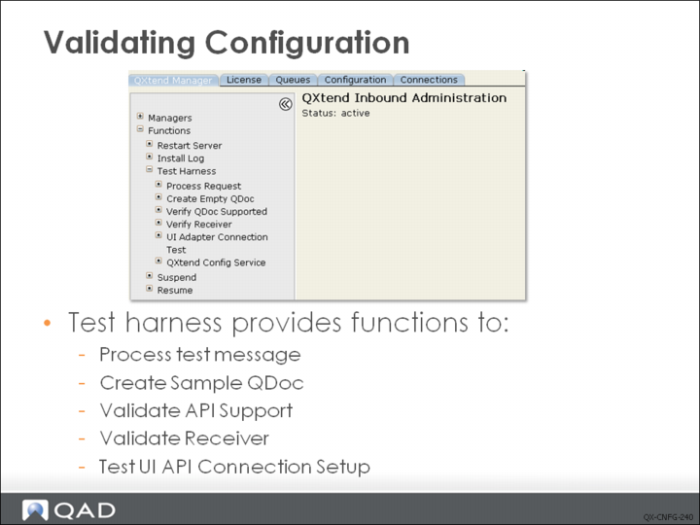
QXI has several functions you can use to verify your QXI configuration. Select the QXtend Manager tab, select Functions, then select Test Harness. The following options are available:
• Process Request: Lets you test the QXI web service call. To use this function you must have a complete, valid QDoc SOAP message that can be processed by QXtend.
a Create an XML file that contains the QDoc SOAP message.
b Copy the XML file into the directory <tomcat>/webapps/<qxi-webapp>/WEB-INF/receivers/<receiver-name>/requests on the Tomcat server that is running the QXI instance. The request is placed in a directory under a specific receiver.
c Select the “Process Request” menu option and provide the name of the xml file and the name of the receiver, click “Submit”.
d The response message displays and be analyzed for any errors.
This function has been in QXI since its inception but will be removed in future releases. Now there are user-friendly open source tools that can be used to test the product. It is recommended that you use the free product SOAP UI that can be downloaded at www.soapui.org.
The labs in this class will use SOAP UI, not the Test Harness, to process requests.
• Create Empty QDoc: Creates a sample QDoc request for the selected QXtend API. It uses the API schema and builds a sample request. The generated request will not process until the data in the QDoc is set up to meet the requirements of the target QAD application. Sample requests are generated in <tomcat>/webapps/<qxi-webapp>/test. This function also can be replaced with SOAP UI functionality.
• Verify QDoc Supported: Used to test whether or not the specified API and API version are supported against the specified receiver. This function can be used to validate the receiver configuration to determine if an API is available to be used against a receiver. This check is performed against every request that is processed by the QXtend Web service.
• Verify Receiver: Used to validate that the entered receiver is set up in the QXtend instance.
• UI Adapter Connection Test: Used to process a dummy request to ensure that the UI adapter connection is configured correctly. The UI API adapter leverages a telnet connection to load data into QAD applications. The UI Adapter Connection Test function uses the UI API connection pool set up against a receiver. When the connection pool is created, success is indicated simply by having a connection pool that has idle connections. However, this does not necessarily mean that the setup is correct. To verify the setup, run the connection test. This test should be performed every time a new UI API connection pool is created.
Enter the receiver and (if applicable) domain to test the connection, then click Submit. The response will be Success if the setup is correct.
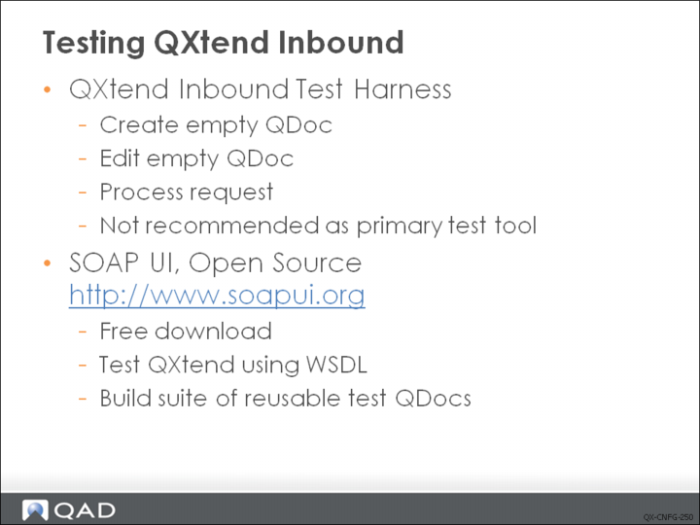
You can process test requests using QXI in several ways; the test harness is functionality that is currently built into QXtend. As the test harness does not provide a consolidated environment for testing QXtend—and because there are open source tools available that provide a better environment in which to build ad test QDocs—this functionality is not recommended as primary QXtend Inbound test tool.
The recommended testing approach for QXtend is to use SOAP UI. SOAP UI provides a Web Service testing environment that lets you build QDocs and test the QXtend Web Service easily. You can download a free version from http://www.soapui.org. All manual testing in this class will use SOAP UI.
Testing QXI Using SOAP UI
Testing the QXI Web Service using SOAP UI is not a complex task. SOAP UI allows you to save your test cases into a project and re-use them to test QXtend. Some features allow you to run test cases as a test suite.
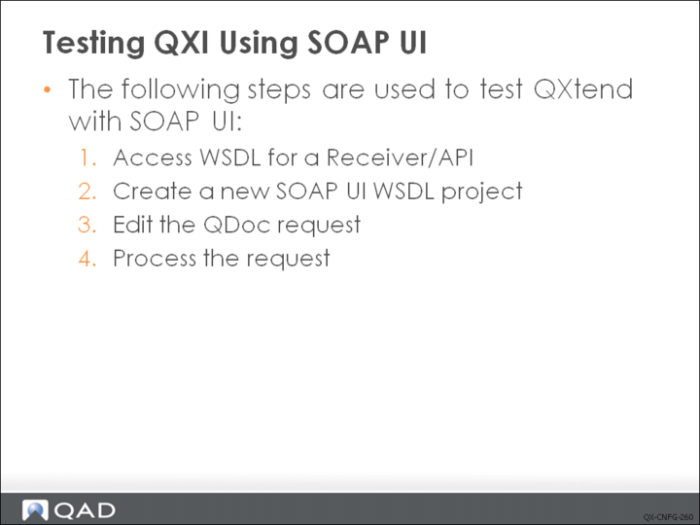
To test the QXI Web Service, do the following:
1 Access WSDL for a Receiver/API.
SOAP UI is a web service testing tool and requires a WSDL document that describes the API to be available. WSDL files describe the API Interface, they also describe where the service is and how to access the service. The API definition is split into the 3 components:
• WSDL: describes the entire API, the request and the response.
• Request Schema: describes the request data that can be sent to the API you can think of this as the data that gets entered.
• Response Schema: describes the data that is returned after a request has been processed this can include Invoice and Sales Order numbers that were created during the processing of the request.
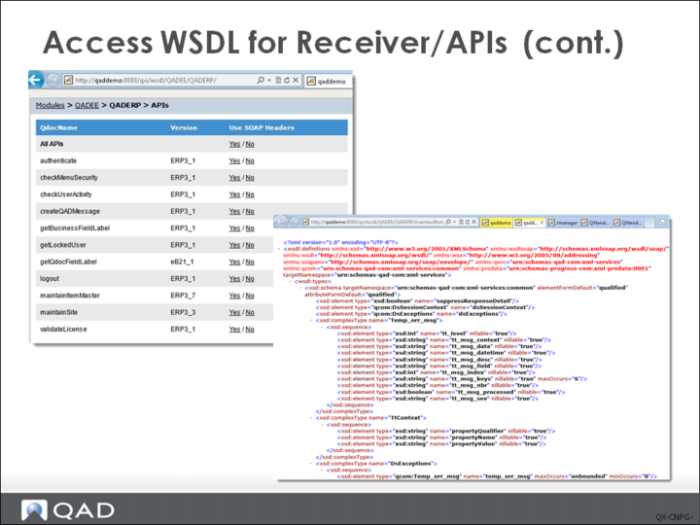
On the WSDL access page (http://<hostname>:<tomcat_port>/<QXI webapp>/wsdl), select the module and receiver, and then identify the APIs, for which you want to generate a WSDL. Click on Use SOAP Headers and select Yes or No to access the WSDL page.
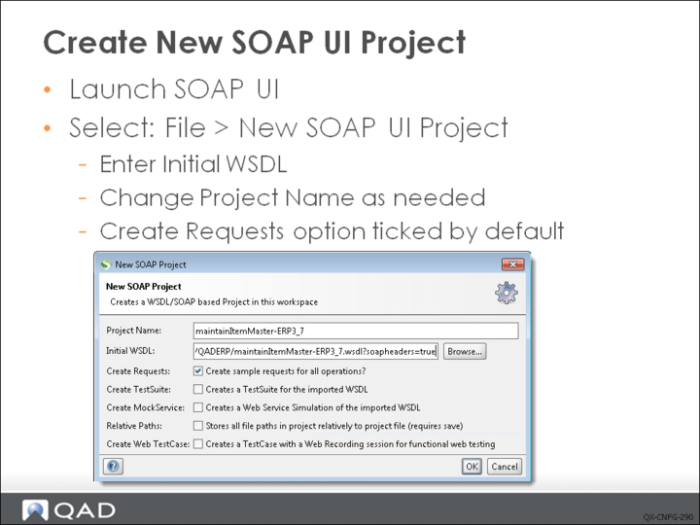
2 Create a New SOAP UI WSDL Project.
SOAP UI is a project based tool and provides an environment to build Web Service testing projects. Ensure that the “create sample requests for all operations” option is selected and this way when the project is created a sample request is automatically created.
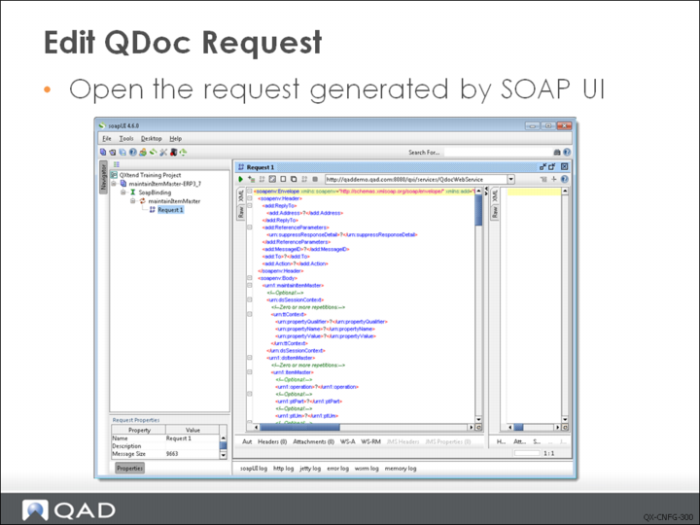
3 Edit Qdoc Request.
Once the project has been created, a sample Qdoc is generated. Because the QDoc is generated without any knowledge of QAD QXtend or the target QAD application, the QDoc does not contain any application data and needs to be edited before calling QAD QXtend.
4 Process Request.
Once the project has been created and the request is updated, the final step is to process the request. The green arrow in SOAP UI submits the request to the web service and displays the response.
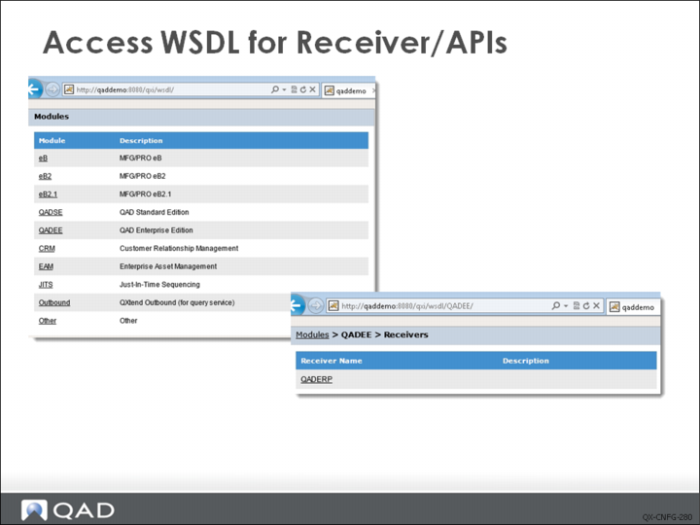
To access WSDL:
1 In the Internet Explorer address bar, add wsdl to the end of Inbound URL and then press enter.
A Modules screen displays and lists all the supported modules from which you can drill down to the Receivers screen. This is the main WSDL entry page.
2 Click the module that contains the receiver to open the receivers screen.
3 Click the receiver to open APIs screen.
4 A list displays the standard and custom APIs that the receiver currently supports. It also displays the system APIs. System APIs are usually used for integration of QAD products and you cannot see them in Inbound configuration page.
5 Select the APIs for which you want to access a WSDL. In the Use SOAP Headers column, click Yes to access WSDL file with SOAP header; click No to access WSDL file without SOAP header.
6 The WSDL is displayed in another page.
Create New SOAP UI Project
Select File|New WSDL Project to create a new project from a WSDL URL. Enter the URL of the WSDL page as Initial WSDL. Project Name will be automatically filled out with the name of the WSDL, which includes API name and version. Update the Project Name, if needed.
The Create Requests option is automatically selected so that when the project is created, SOAP UI can create a sample request.
Edit QDoc Request
The sample request that is generated by SOAP UI interprets the definition contained in the QXtend API WSDL and schema, and generates a SOAP message that includes the elements that can be included in a request to the service. The request does not contain data that is required by QXtend or the target QAD application, and the request must be edited before it can be successfully processed.
To access the sample request, expand the project in the Navigation pane, expand the SoapBinding option, expand the processQdocMessage option, then double-click the Request 1 entry. The request opens in Edit mode.
SOAP UI provides has some useful features for editing requests:
• Format XML: Right-click the request during data input and select Format XML. SOAP UI automatically formats the request.
• Validate: After entering the request data, right-click and select Validate. SOAP UI validates the data entered into the request against the QXtend API WSDL and schema, and reports any exceptions such as invalid date, number, and logical or missing mandatory data.
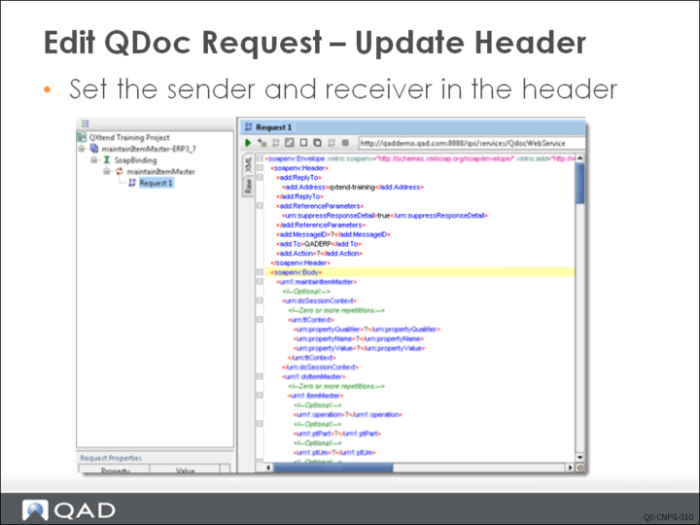
Edit QDoc Request (Update Header)
A QDoc SOAP message has three sections:
• SOAP header
• SOAP body – session context
• SOAP body – request data
Updates are required to each of these sections to ensure that QXI can successfully process the request.
The SOAP header contains information that QXI requires, such as addressing information and processing directives that control how QXtend processes the request. The 3 most important elements are:
• Sender: Used to identify the source of the request. Typically the sender is the application instance that sent the data to QXtend. QXO is a good example of a sending application. The sender is defined in the ReplyTo node of the SOAP header.
<add:ReplyTo>
<add:Address>qxtend-training</add:Address>
</add:ReplyTo>
• Receiver: Used to identify the receiver in QXI that should be used to deliver the request to the target QAD application; this element is the most important element in the SOAP header. The receiver name is the user-defined name assigned to identify an instance of a target QAD application as discussed earlier. The value defined here controls where QXI loads the request data to. The receiver is specified in the To element in the header.
<add:To>QADERP-FIN</add:To>
• Suppress Response Details: This element is optional. If it is not supplied in the request, QXtend defaults it to true. This element controls the level of detail returned to the calling application in the response message.
When true, the response message from QXI will only contain an indication of the processing result (success, error, warning). If there are any error/warning messages raised during the processing of the request, these are also returned.
When false, the response message from QXI contains more details; the processing result and any errors are returned along with the data defined in the response schema. The response schema for an API typically returns the values of the keys of the updated records, but the schema can be configured to return whatever data is required. The response schema data is returned only when suppressResponseDetails is set to false.
The setting for this is part of the ReferenceParameters node:
<add:ReferenceParameters>
<urn:suppressResponseDetail>true</urn:suppressResponseDetail>
</add:ReferenceParameters>
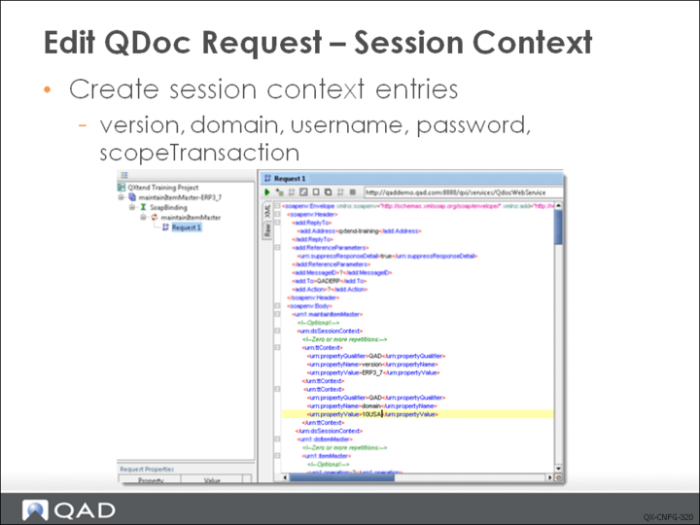
Edit QDoc Request (Session Context)
The body of the QDoc SOAP message has two sections:
• Session context
• Application data
The data in the session context section controls how the request is processed both within QXtend and in the target QAD application. Several valid parameters can be sent, some mandatory and some optional. The following parameters are supported and are represented using the following format:
<propertyQualifier>/<propertyName> – <parameter description>
• QAD/version: A mandatory parameter used to determine the version of the API to use to process the request; for example, eB2_2. The combination of the QDoc name and version determine the API adapter/connection pool used to process the request.
• QAD/domain: An optional parameter that identifies the domain the data should be loaded into in the target QAD application. This parameter is required only when the target application supports the QAD domain architecture. If this value is not supplied, the domain defined on the connection pool is used.
• QAD/scopeTransaction: An optional parameter that defaults to false if not included in the request. This parameter controls the transaction scope during the processing of a request with QXI. If set to true, the entire QDoc is treated as a single transaction; if any error messages are received the entire transaction is backed out. If set to false, the traditional transaction scoping of the underlying QAD application is used.
• QAD/mnemonicsRaw: An optional parameter that allows the user to define whether or not fields in the user interface that use language mnemonics should be entered using the universal code value or the translated string that is dependent on the setup of the user processing the request. If set to true, fields that use mnemonic values will only accept the mnemonic code, and not the value that is normally displayed on screen.
• QAD/username: An optional parameter that allows the user name to be used to process the request when the Use Requestor feature is enabled with QXtend; otherwise the user name defined on the connection pool is used. For details on Use Requestor, see User Guide: QAD QXtend.
• QAD/password: An optional parameter required when a username has been defined in the request. The password is required for the username parameter to ensure that the session can log in. The username and password are required if the Require Authentication attribute of the receiver is set to true.
• QAD/sessionID: If a valid QAD Enterprise Application session ID is provided in the QDoc, the QDoc can pass authentication without having the username and password checked. The system also caches and reuses the session ID provided in the response QDoc to further speed up authentication and improve performance. If the session ID is no longer valid, the system checks the username and password.
• QAD/action: An optional parameter only used with QAD EE, this parameter defines the action being performed by the request. This parameter must be used with functions that leverage the new infrastructure that drives the Enterprise Financials in the Enterprise Edition. The typical value when synchronizing data between instances of EE is Save.
• QAD/entity: An optional parameter only used with QAD EE, this parameter defines the entity in QAD EE that the data is to be loaded into. If a value is not supplied, the default entity for the user set up against the connection pool is used.
• QAD/email: Email address(es) of person requiring notification of the message after receiver has processed it.
• QAD/emailLevel: Email delivery level (1 or ERR - send on error, 2 or WRN - send on error or warning, 3 or MES - send all).
• QAD/decimalSeparator: Replace the decimal separator with a dot (.) before processing the Qdoc in the system that does not use a dot as decimal separator.