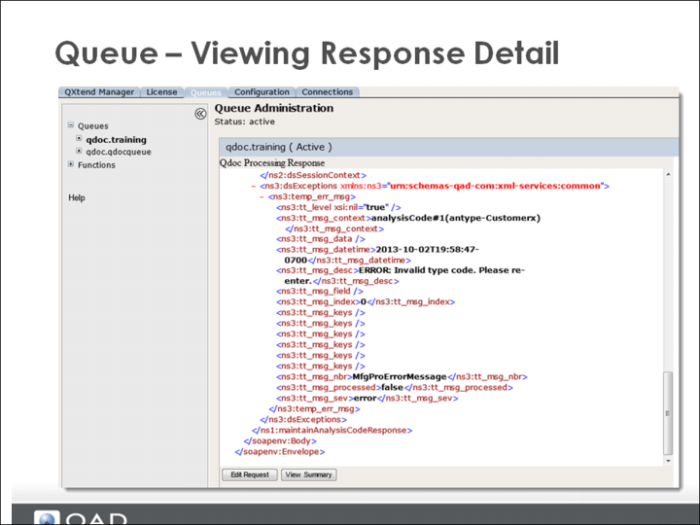
Viewing Response Details
From the response overview screen you can click View Detail to display the actual XML message that was submitted to the Queue, and subsequently to the QXI Web service. From this screen you can switch back to the detail view.
If the response message has an Error status, you can edit the request and resubmit it.
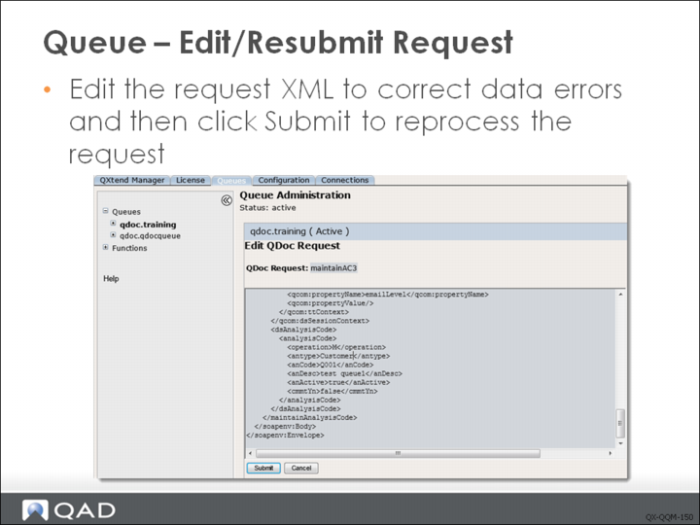
Editing/Resubmitting Requests
You can edit messages that have failed QXtend processing to correct data errors and then resubmit them for reprocessing. If no editing is required, you can just resubmit them. You cannot edit or resubmit successful/warning messages.
When editing the request make sure that the XML is not corrupted, otherwise processing will fail. The XML is not validated during the editing process or when the changes are saved.
Exercise: Queue Manager
The following list shows a number of key concepts used in the Queue Manager in QXI. In each statement below, fill in the correct term from the list.
.ok | .err |
sorted, filtered, and deleted | .req extension |
environmentmanager.xml | .wrn |
XML format | initialized |
Red | pending |
Gray | Yellow |
1 The Queue Manager is an optional interface that lets you accept QDoc request documents from external applications into a directory structure. The requests must be in ______ and be named with a ______.
2 Before using the Queue Manager, it must be ______ by editing the ______ file.
3 Once processing is complete, responses are placed in a response queue for the external application. Responses use the following extensions:
• ______: The QDoc processed correctly.
• ______: The QDoc processed but encountered warnings.
• ______: The QDoc request failed.
4 After starting the Queue Manager you can view the individual queues. Documents in the queue can be ______.
5 The queue document list in the Queue Manager is color coded:
• ___ lines are documents that returned an error.
• ___ lines are messages that processed but a warning was returned.
• Green lines are messages that are either ___ or in process.
• ___ lines are successfully processed message.
Lab: Queue Manager
QAD QXtend 1.8.4 has been installed with both QXI and QXO components. In the previous labs you performed the basic configuration that is required to enable requests to be processed by QXI & QXO. In the following lab exercises you will see how to use the Queue Manager to process requests placed into an operating system directory.
<LabHomeDirectory> = C:\QXtendTraining\Labs\07-QueueManager\
One of the components that are part of every QXI installation is the Queue manager, which allows you to monitor a directory for messages that needs to be processed and passed to QXI. The exercises in this lab describe how to enable the Queue Manager and use it to process requests to QXI.
1. Enabling Queue Manager
The Queue Manager functionality is installed as part of the standard QXI installation. However, it is not enabled and is not available until it has been manually enabled. The process of enabling the Queue Manager requires you to manually edit one of the QAD QXtend configuration files that is held on the QXI server.
To enable the Queue Manager:
1 Open Putty by using the icon on the training Windows machine Desktop:
2 Double-click the qaddemo saved session.
3 Log in as user demo-admin, password qad.
4 Change directory to
/dr01/tomcat/8080/webapps/qxi/WEB-INF/conf
5 Edit the environmentmanager.xml file:
a vi environmentmanager.xml
b Change the text below from:
<!--
<manager class="com.qad.qxtend.queue.directory.DirectoryManager"
param="/dr01/tomcat/8080/webapps/qxi/qxtendQueues"/>
-->
to:
<manager class="com.qad.qxtend.queue.directory.DirectoryManager"
param="/dr01/tomcat/8080/webapps/qxi/qxtendQueues"/>
by removing the “<!-” at the beginning and the “-->” from the section.
6 Save your changes to this file.
1.1 Restart QXI Web Application
The changes that you made in the previous step do not take effect automatically; the QXI Web application must be stopped and started:
1 Open the Tomcat home page in Internet Explorer: http://qaddemo:8080
2 Select the Tomcat Manager link.
3 Enter the User Name of admin.
4 Enter the Password of mfgpro.
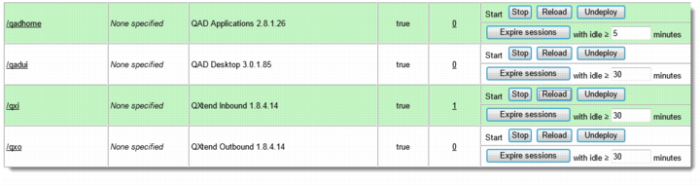
5 Find the entry for the QXI Web application:
6 Select the Reload link to stop and restart the QXI application instance.
7 Open http://qaddemo:8080/qxi.
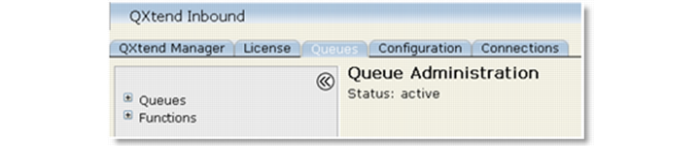
8 You will now see a Queues tab that was not available before:
The Queue Manager is now enabled.
2. Configuring Queues
Once the Queue Manager is enabled, it has a basic default configuration that includes one predefined queue. All of the queues managed by the Queue Manager share the same parent directory. The Queue Manager can manage only one queue master directory. By default the master queue directory is in <tomcat-home>/webapps/<qxi-webapp>/qxtendQueues. Any new queues created will be created under this directory.
2.1 Review Existing Queue Configuration
The Queues currently managed by the Queue Manager can easily be reviewed and modified.
1 Open the QXI page in Internet Explorer: http://qaddemo:8080/qxi
2 Select the Queues tab.
3 Select the Queues node in the menu tree. This displays a list of the queues currently being managed. There will be one queue, the default queue called qdocqueue.
4 Select qdoc.qdocqueue from the menu tree. This shows you all requests currently in the queue; initially this will be empty.
2.2 Update Queue Configuration
1 Open the QXI page in Internet Explorer: http://qaddemo:8080/qxi
2 Select the Queues tab.
3 Select the Functions node in the menu tree.
4 Select Update queues from the menu.
5 Select the check box next to qdoc.qdocqueue.
6 Click the Edit button.
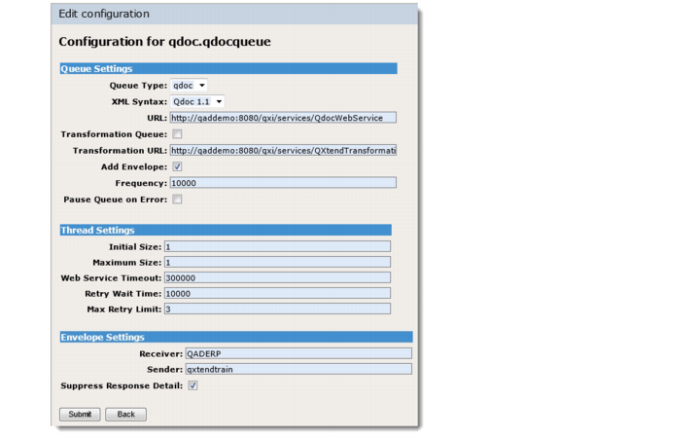
7 Set the XML Syntax to QDoc 1.1.
8 Select the Add Envelope check box (this lets you post just the body to the queue and will automatically add the SOAP envelope entries before processing the request in QXI).
9 In the Envelope Settings section set the following values:
a Receiver = QADERP
b Sender = qxtendtrain
These values will be used when creating the SOAP Envelope before invoking QXI.
10 Click the Submit button to save your changes.
2.3 Create New Queue
You also can create new queues from the QXI UI. When you do this, QAD QXtend creates the required directory structure under the directory that is being managed by the Queue Manager.
1 Open the QXI page in Internet Explorer: http://qaddemo:8080/qxi
2 Select the Queues tab.
3 Select the Functions node in the menu tree.
4 Select Update queues from the menu.
5 Click the Add button.
6 Enter the following details:
a Queue Name = Training
b Queue Type = qdoc
c URL = http://qaddemo:8080/qxi/services/QdocWebService
7 Click the Create button.
8 Set XML Syntax = QDoc 1.1.
9 Click the Submit button to commit changes.
10 Select the Queues tab.
11 Select the Functions menu.
12 Select Update queues from the menu.
You now see the new Training queue listed.
3. Process Transactions Using the Queue
The Queue Manager processes requests that are placed in the queues request directory. For a file to be processed, it must have a .req extension. If the request file does not have a .req extension, it will be ignored by the Queue Manager.
The Queue directories managed have the following structure:
• <QueueMgrDirectory>/<queuename>/requests - contains the requests that are waiting to be processed by the Queue Manager. This is where request files must be placed with the .req extension.
• <QueueMgrDirectory>/<queuename>/responses - contains request that have been processed. The request file is copied here after it has been processed. The response message from the processing is also written here.
• <QueueMgrDirectory>/<queuename>/system_failures - contains requests that were being processed when a system failure occurred. These must be reprocessed.
3.1 Process Successful Request Messages
In this first exercise we will process messages that are formatted as a valid QDoc, including a SOAP envelope.
3.1.1 Create Customer Item
1 Open the Win SCP application that is installed on the Windows image.
2 Open the stored session demo-admin@qaddemo.
3 Navigate to the Training queue requests directory on the server:
/dr01/tomcat/8080/webapps/qxi/qxtendQueues/Training/requests
4 Navigate to the location of the sample requests on the Windows client:
C:\QXtendTraining\Labs\07-QueueManager\Requests
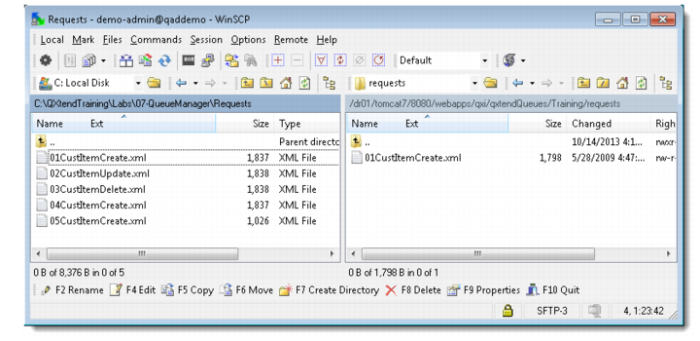
5 The above lab directory contains sample requests you will process using the queue in the following steps. The requests have a .xml extension so that when they are copied into the requests directory, they are not picked up until you change the file extension to .req.
6 Copy 01CustItemCreate.xml from the client to the requests directory.
7 Change the permissions of the file:
a Right-click the file.
b Click Properties.
c Select all of the Write boxes.
8 Using WinSCP, rename 01CustItemCreate.xml to 01CustItemCreate.req.
Check the Queue
1 Open the QXI page in Internet Explorer: http://qaddemo:8080/qxi.
2 Select the Queues tab.
3 Expand the Queues node in the menu tree.
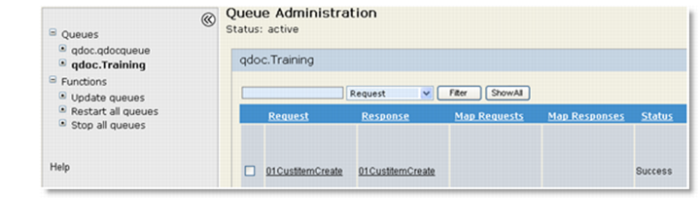
4 Select the qdoc.Training menu. After a time you will see a successful request.
5 View the request and response details by clicking the link on the request/response name.
6 Check the QAD EE application to make sure that the data has been loaded.
7 Repeat the process above for the update and delete QDocs.
3.2 Process Error Request Message
1 Open the Win SCP application that is installed on the Windows image.
2 Open the stored session demo-admin@qaddemo.
3 Navigate to the location of the Training queue requests directory on the server:
/dr01/tomcat/8080/webapps/qxi/qxtendQueues/Training/requests
4 Navigate to the location of the sample requests on the windows client:
C:\QXtendTraining\Labs\07-QueueManager\Requests
5 The above lab directory contains sample request that you are going to process using the queue in the following steps. The requests have a .xml extension so that when they get copied into the requests directory, they are not picked up until you change the file extension to .req.
6 Copy 04CustItemCreate.xml from the client to the requests directory.
7 Change the permissions of the file:
a Right-click the file.
b Click Properties.
c Select all of the Write boxes.
8 Using WinSCP, rename the 04CustItemCreate.xml file to 04CustItemCreate.req.
Check the Queue
1 Open the QXI page in Internet Explorer: http://qaddemo:8080/qxi
2 Select the Queues tab.
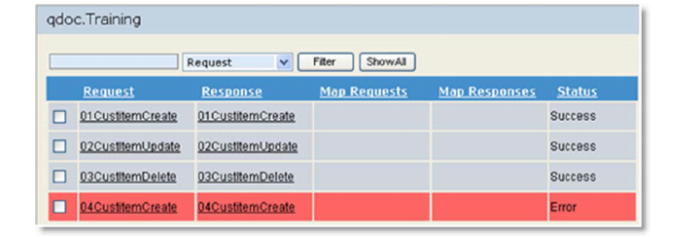
3 Select the qdoc.Training menu. An error request status displays:
4 The QDoc failed because the customer number was invalid. Open the response, look at the details, and locate the exception information.
a Click the response file name.
b Click the View Detail button and review the response XML.
c Check the error message.
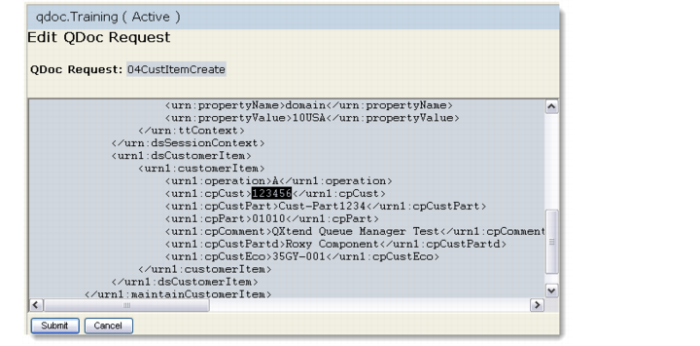
d Click the Edit Request button.
• Change the cpCust node to 30C1000.
• Click the Submit button.
The message will process successfully.
3.3 Automatically Add SOAP Envelope to Request Message
The qdoc.qdocqueue has been configured to automatically add a SOAP Envelope to any request that is placed in the queues request directory. Review the <LabHomeDirectory>/request/05CustItemCreate.xml file; it does not have a SOAP envelope.
You will now process this message using the qdocqueue.
1 Open the Win SCP application that is installed on the Windows image.
2 Open the stored session demo-admin@qaddemo.
3 Navigate to the location of the Training queue requests directory on the server:
/dr01/tomcat/8080/webapps/qxi/qxtendQueues/qdocqueue/requests
4 Navigate to the location of the sample requests on the windows client: C:\QXtendTraining\Labs\07-QueueManager\Requests
5 The above lab directory contains sample request that you will process using the queue, The requests have a .xml extension so that when they are copied into the requests directory, they do are not picked up until you change the file extension to .req.
6 Copy the 05CustItemCreate.xml from the client to the requests directory.
7 Change the permissions of the file:
a Right-click the file.
b Click Properties.
c Select all of the Write boxes.
8 Using WinSCP rename the 05CustItemCreate.xml file to 05CustItemCreate.req.
Check the Queue
1 Open the QXI page in Internet Explorer: http://qaddemo:8080/qxi
2 Select the Queues tab.
3 Select the qdoc.qdocqueue menu.
A moment later, you will see a success request status.