Category | Key | Description |
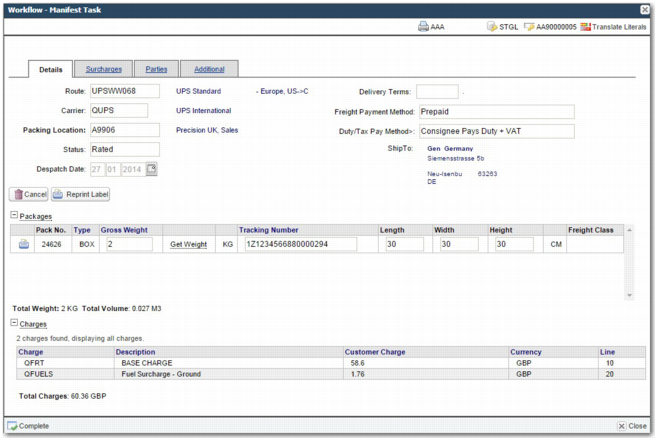
ITRAX | MANIFEST TASK SHOW DESP DATE | To remove the Despatch Date field from the Manifest task screen, set this system value to no. The default value is yes. |
ITRAX | DTS STATE CODE VALIDATION | This system value determines whether the state code on the Parties tab is required. Possible values: Optional, Mandatory. By default, this value is set to Optional. |
WORKFLOW | MANIFEST_PROCESS_ACTION | Before a shipment is rated, a Process button There are three possible actions that can appear in the Process menu button: • Process (Print Label) • Process (Don’t Print Label) • Process (Print Label and Documents) • For each menu option, there is a section within this system value that can be set to true or false: • Process (Print Label) - do_print • Process (Don’t Print Label) - no_print • Process (Print Label and Documents) - print_label_and_documents There is also a default section, which specifies which of the above three options appears on the Process menu button. Example:default:no_print,do_print:true,no_print:true,do_print_label_and_documents:false In this example, the Process (Print Label) and Process (Don’t Print Label) options appear in the Process menu. The Process (Print Label & Documents) option does not appear. Clicking the Process button activates the Process (Don’t Print Label) option. |
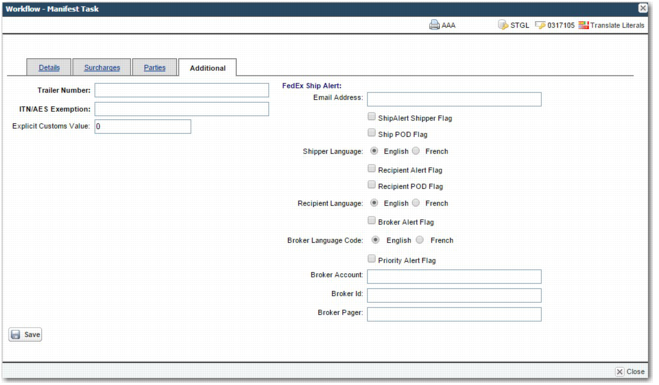
ITRAX | SHOW CUSTOM MANIFEST TASK TAB | If this system value is set to Yes, then the Additional tab is shown. This tab displays additional fields that are carrier-specific. If your company requires additional information to be recorded about the shipment when it is being rated, then contact the PRECISION Services team. This team can add fields to the Additional tab to record this information. |
ITRAX | MANIFEST TASK SHOW TRAILERID | If this system value is set to Yes, then the Trailer Number field is shown on the Additional tab. By default this field is not shown. |
ITRAX | SHOW APPLET | If this system value is set to Yes, then a Get Weight link appears next to the Gross Weight field. Clicking this link allows the user to determine the weight from a scales connected to the serial port on the client machine. This system value requires some client side setup so that the application can download and run a Java applet that performs the communication with the serial port. Navigate to the folder ‘WebClient\Get Weight and Print Applets’ in the root install folder on the server. The root install folder is usually called Precision\WebUI or Precision\WebUI<VERSION_NUMBER>. The folder contains a readme text file that describes the steps to complete. |
ITRAX | CONSOL:PACK PRORATE METHOD | This value applies to consolidated shipments. When a consolidated shipment is processed, the package and tracking information can be copied down onto the child shipments. This system value determines the type of information that the system copies to child shipments. Possible values: Pack, Tracking, None. If set to Pack, then the system copies the package information from the consolidation to the child shipments. If set to Tracking, then the system pushes the tracking number from the consolidated shipment to the child shipments. If the consolidation has more than one package and tracking number, the child shipment is assigned the tracking number related to the particular package that the child shipment is in. If set to None, then no information is transferred to child shipments. By default, this system value is set to None. |
ITRAX | DTS SHOW BASE COSTS | This value determines the charge columns that appear on the screen. Assigning a value of CUSTOMER causes the Customer Charge column to display. Assigning a value of COMPANY causes the Company Charge column to display. Assigning a value of BOTH causes the Customer Charge and Company Charge columns to display. Possible values: COMPANY, CUSTOMER, BOTH. |
ITRAX | MANIFEST TASK SHOW INSURANCE | If this value is set to Yes and the service chosen offers insurance, then the user can use the Surcharges tab to enter insurance amounts for the packages in the shipment. The type of insurance offered depends on the carrier service. This option allows the user to select insurance, but it does not guarantee that the carrier provides it. Possible values: Yes, No. Default value: No |
ITRAX | AUTO-OPEN-PDF | If this value is set to Yes, then any PDF documents produced when the user rates the shipment open automatically in the browser. The user may have to set the security settings of their browser to ensure that the PDF has the permission to open. |
ITRAX | MANIFEST TASK - DEFAULT PARTY | Use this value to set the default value of the Party field on the Parties tab. Possible values: A partner type from the table in the PI option. |
SPS | DELIVERY TERMS TO PAY METHODS | This system value is used to configure default delivery terms and payment methods in the Details tab. The system assigns these default values based on the contents of the Route and Delivery Terms fields in the Details tab. The user can leave these default values as they are, or enter other values in these fields. Format: <COMMAND1>|<COMMAND2>|...|<COMMANDN> If you do not include at least one | symbol in the command, an error occurs. Each command has the format: <SERVICE>=<SERVICE_VALUE>,<TERM>=<TERM_VALUE>,<FRT>=<FRT_VALUE>,<DUTY>=<DUTY_VALUE>,<COD>=<COD_VALUE> The parts of a shipment that can be checked are: SERVICE - The service related to the shipment, which displays in the Route field of the Details tab. The complete list of services is stored in the RT QuickPath option. TERM - The delivery term related to the shipment, which displays in the Delivery Terms field of the Details tab. The complete list of services is stored in the DE QuickPath option. The SERVICE is checked first, and then the TERM. If there is no service, then the TERM is checked. The fields that can be assigned a value are: FRT - The Freight Payment Method field of the Details tab. DUTY - The Duty/Tax Payment Method field of the Details tab. COD - The COD Payment Method field of the Details tab. For a list of possible values for these fields, see the Message_Field_Lookups tab of Appendix A on the QAD Document Library in QAD Transportation Management|v2012 R00|Admin Guides|Appendices. Example: TERM=EXW,FRT=COLLECT,DUTY=CONSIGNEEPAYSDUTY| TERM=DDP,FRT=DELIVERYDUTYPAID,DUTY=CONSIGNEEPAYSDUTY| SERVICE=FDXGND,TERM=DDP,FRT=PREPAIDADD,DUTY=THIRDPARTYDUTYVAT| SERVICE=UPSUS001,TERM=CPT,FRT=CODSHIPCOST,COD=CASHIERSCHECKMONEYORDER In this example, SERVICE is checked first, and then TERM. These values are compared with the contents of the Route and Delivery Terms fields on the Details tab of the Manifest task. If the Route field is not filled in, or if it does not correspond to any of the values in the commands, then TERM is checked. The first section of the example checks if the Delivery Terms field (TERM) is set to ex works (EXW). If it is, then the system sets the Freight Payment Method to Collect and the Duty field to Consignee. If none of the conditions are true, the fields in the Details tab are not changed. Regardless of the effect of this system value, the user can manually change the values of the fields in the Details tab. |
WORKLOAD | ADDRESS TASK - READONLY ROLES | To make a particular partner role address read-only in the Parties tab, enter the number that corresponds to the partner role. Enter a comma-separated list of roles, for example 14,TP. The partner codes are accessible from the PI Quickpath option. When this system value is not set, some addresses are still read-only, as it is not always appropriate to edit them. This system value controls edits to addresses in the Address task of the Manifest task also. |