Configuring Desktop Shipping Steps
Origin/Destination Step
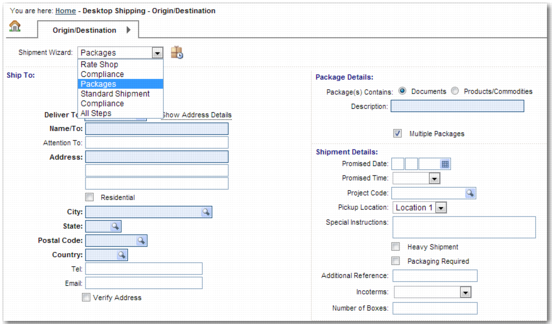
The Origin/Destination step is mandatory for all wizards. On this step, the user selects the Shipment Wizard to use from a drop-down menu.
Shipment Wizard Selection on the Origin/Destination Step
Configuring a Mailing List
On the Origin/Destination screen, the user specifies a mailing list in the Ship To address. This facility is useful if the same shipment is being sent to multiple recipients. You can create mailing lists using the QuickPath option ML to access the Mailing List screen.
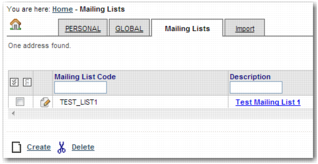
Mailing Lists Screen displays the Mailing Lists Screen.
Mailing Lists Screen
To delete an existing mailing list, select the mailing list from the table and click Delete.
To modify an existing mailing list, click the description of the mailing list.
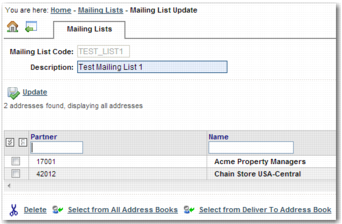
Mailing List Update Screen
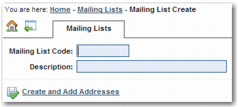
To create a mailing list, click Create.
Mailing List Create Screen
Complete the fields on this screen with details of the new mailing list.
Mailing List Code
Enter a name for your mailing list. The Mailing List code field takes a maximum of ten characters.
Description
Enter a description of the mailing list.
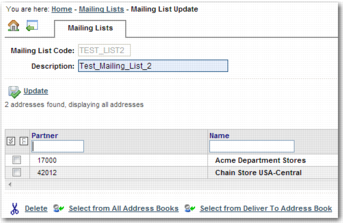
To add addresses to the mailing list, click Create and Add Addresses. The Mailing List Update Screen displays, as in
Mailing List Update Screen.
To see the Add Address window, click Select from All Address Books or Select from Deliver To Address Book.
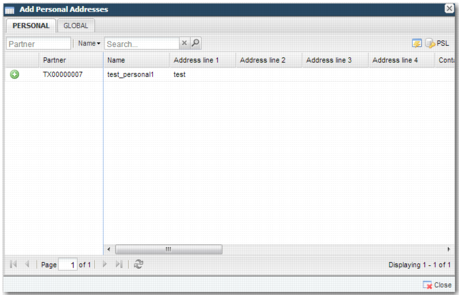
Add Address Window
The Add Address window contains a tab for each address book. To search a particular address book, click the associated tab. To add a particular address to the mailing list, click the green plus icon. To remove the address from the mailing list, click the minus sign. To save your changes to the mailing list, click Update.
Mailing List Update Screen with Added Addresses
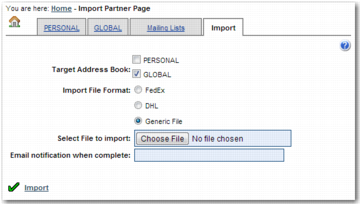
You can add partners to your address books by typing NR in the QuickPath option and clicking the PERSONAL or GLOBAL tab to access the specific address book. The Import tab on this screen enables you to import partners. You can then add these partners to your address book. Click the Help icon on the top left of this screen to view details of the file formats that you can import on this page.
Import Mailing List
Any partners added to a mailing list must have the associated In Use flag set to true to be considered by desktop shipping. If a partner is not associated with a consignee role, then it is not considered by desktop shipping, even when the partner is added to the mailing list. There is a limitation on the number of partners that can be added to a mailing list. The process is an interactive one, and the more partners on the mailing list, the longer it takes Desktop Shipping to move from one step to the next.
The user selects the Mailing List field in the Ship To section of the Origin/Destination step. The user then uses the lookup icon in the Deliver To field to select a mailing list.
Address Validation
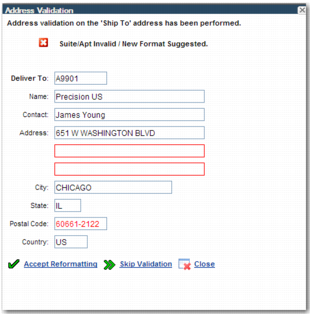
To enable address validation of US and Canadian Ship To addresses, set the DTS SHIPTO VERIFY ALLOWED system value in the ITRAX category to yes. The Verify Address field then appears below the Ship To address. When the user selects this field, the system checks if the Ship To address is valid. If the user enters an invalid Ship To address, a pop-up window appears suggesting another format. The user can choose to accept the new address format or to skip address validation.
Address Validation Pop-up Window
Note: You must configure the address validation plug-in before the address validation feature works. This address validation setup depends on the vendor that your company is using. The Services team configures this validation.