Retrofitting
QAD Data Warehouse Designer includes an advanced retrofit capability that can be used to:
1 Migrate an existing data warehouse from one relational database to another (known as fork-lifting).
2 Load a data model from a modeling tool.
Retrofitting is achieved using the Retro Copy object type in QAD Data Warehouse Designer and the Retrofit tables wizard.
Migrating the Data Warehouse Database Platform
QAD Data Warehouse Designer has an advanced retrofitting wizard for migrating an existing data warehouse from one relational database to another.
The steps to use this wizard are:
1 Create a connection object for the old data warehouse database, populating the following fields:
Connection Name
Connection Type => ODBC
ODBC Source
Work Directory
Extract user name
Extract password
Note: The extract user must be able to select from all tables to be migrated.
2 Ensure all naming standards in Tools/Options are set to match the objects being retrofitted. This saves work later.
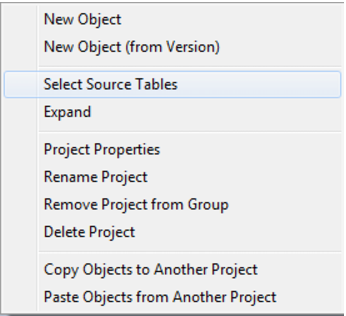
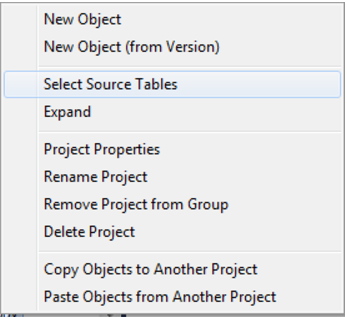
3 Right click on the Retro Copy object group in the object tree in the left pane and choose Select source tables:
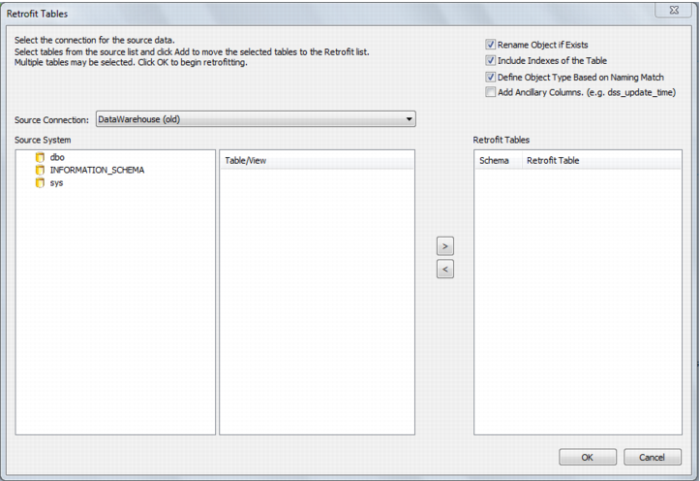
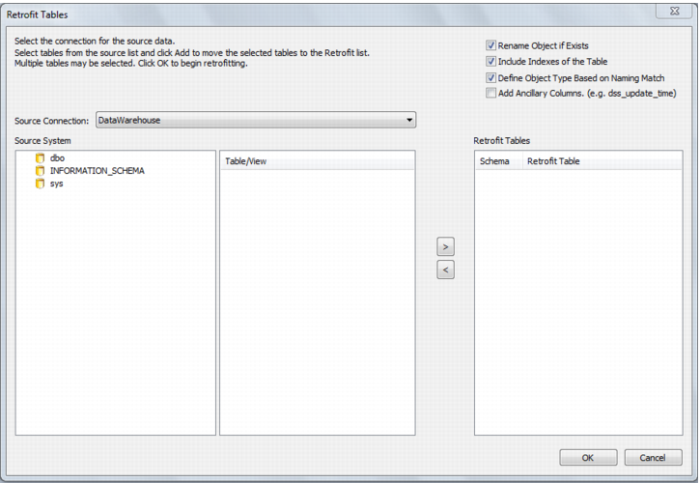
4 The Retrofit tables dialog appears. In the Source Connection drop down list choose the connection set up in step 1. A list of databases appears in the left pane:
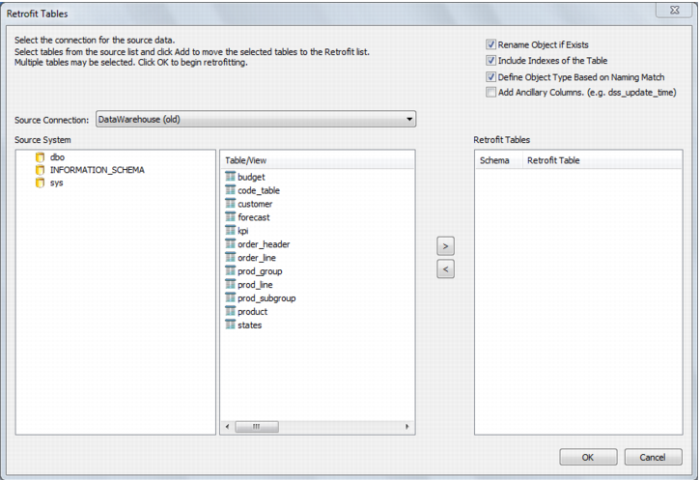
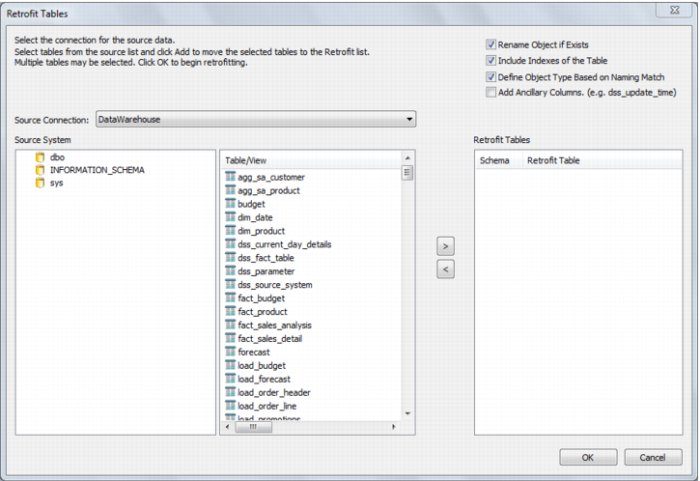
5 Double click on the database/user/schema in the left pane list. A list of tables in the database is displayed in the middle pane:
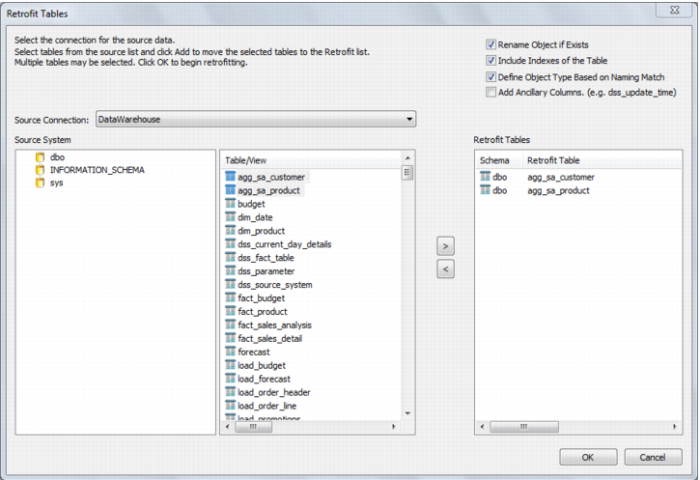
6 Select all the required tables from the middle pane list and click > to move them to the right pane. Then click the Add Ancillary Columns (e.g. dss_update_time) check box and click OK.
7 QAD Data Warehouse Designer now acquires the metadata for the tables being migrated and creates a new QAD Data Warehouse Designer Retro Copy object for each.
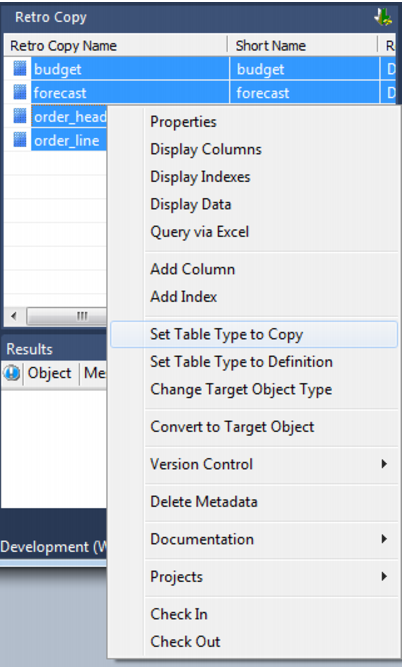
8 Double click on the Retro Copy object group in the left pane. Select all retro copies in the middle pane. Right click and choose Change Table Type to Copy. This allows the data in the legacy data warehouse to be copied across to the new data warehouse:
9 Click on the scheduler button on the toolbar:

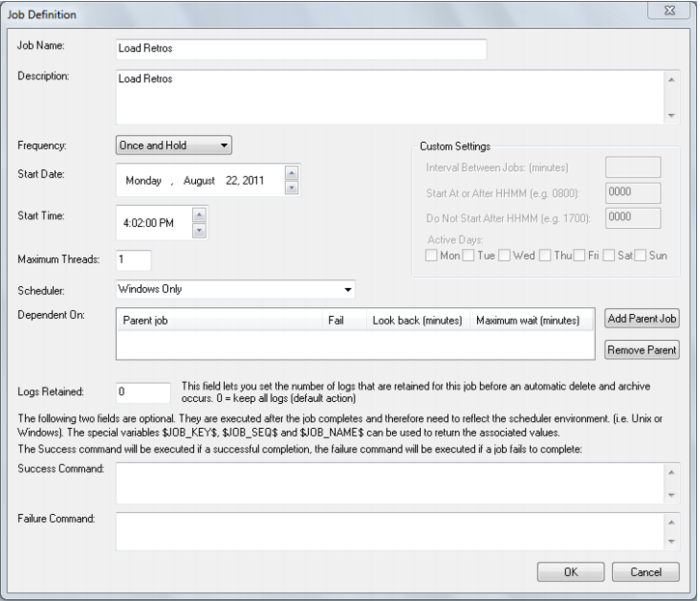
10 Create a new job to run straight away:
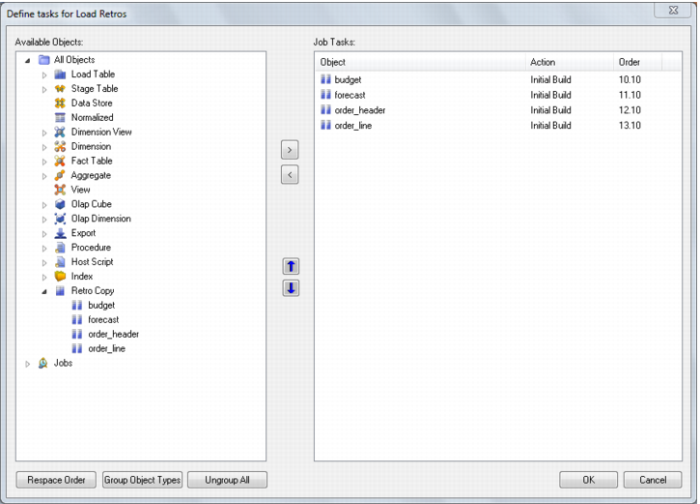
11 Add all Retro Copy objects created in steps (3) to (8) and click on Group Object Types:
12 Once the job has completed, return to the QAD Data Warehouse Designer builder. Double click on the Retro Copy object group. Select all objects in the middle pane and from the right click menu choose Set Table Type to Definition.
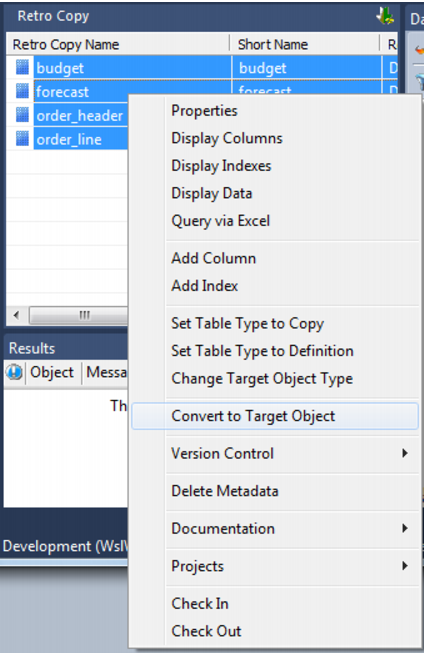
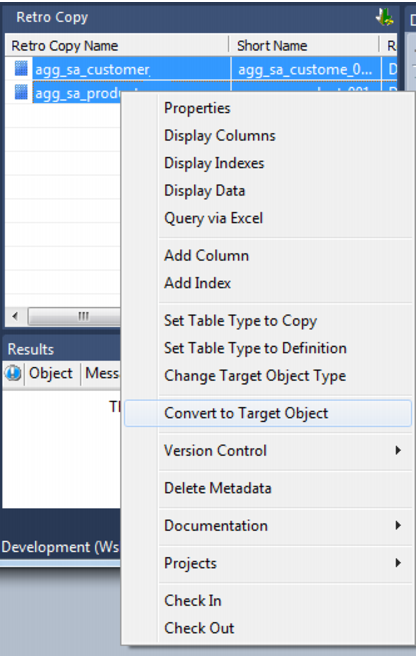
13 In the middle pane, select all objects. Right click and choose Convert to Target Object. QAD Data Warehouse Designer now converts the Retro Copy objects to the appropriate object types:
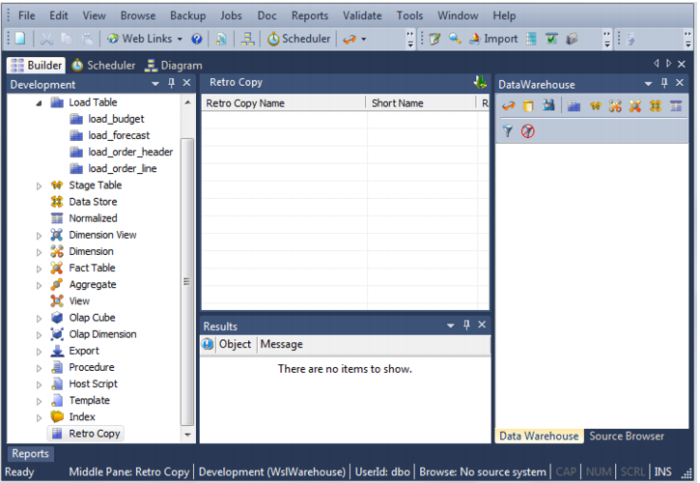
14 There are no longer any Retro copy objects. They have been converted to Load, Stage, Dimension and Fact objects:
15 Change the source table and source column values on all of the retrofitted objects using either the Re-target source table dialog, or by editing column properties. See
Re-target source tables (see "
Re-Targeting Source Tables" on page
969) for more information.
16 Convert the old data warehouses code to QAD Data Warehouse Designer procedure in the new data warehouse database. See
Integrate Procedures (see "
Integrating, Procedures" on page
986) for more information.
17 If necessary, create new connections to be used with any migrated load tables. Attach a connection to each load table. See
Loading Data (on page
227) for more information.
Importing a Data Model
QAD Data Warehouse Designer provides functionality for importing data models from modeling tools.
The process to import a model is:
1 Create the physical data model in the modeling tool.
2 Generate DDL for the physical model in the modeling tool.
3 Run the DDL in the data warehouse database to create empty versions of the model tables.
4 Retrofit the tables in the dummy database into the QAD Data Warehouse Designer metadata as Retro Copy objects.
5 Convert the Retro Copy objects to Dimensions and Facts.
The following instructions outline steps 4 and 5 above:
1 Right click on the Retro Copy object group in the object tree in the left pane and choose Select source tables:
2 The Retrofit tables dialog is displayed. In the Source Connection drop down list choose the Data warehouse connection. A list of databases appears in the left pane (yours list will be different).
3 Double click on the data warehouse database/schema in the left pane list. A list of tables in the database is displayed in the middle pane.
4 Click on the required tables in the middle pane list and click > to move them to the right pane. Then click the Add Ancillary Columns (e.g. dss_update_time) check box. Click OK.
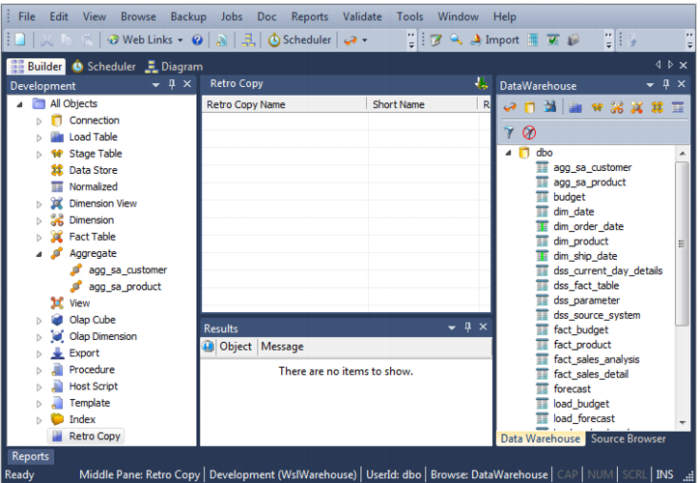
5 Double click on the Retro Copy object group in the object tree in the left pane. Select all objects in the middle pane and right click select Convert to Target Object.
The new aggregate tables have been imported. Your QAD Data Warehouse Designer screen should look like this when you have finished:
Re-Targeting Source Tables
Objects that have been retrofitted into the QAD Data Warehouse Designer metadata have themselves as their source table:
They can be re-targeted to the correct source table(s) using the QAD Data Warehouse Designer re-target wizard as follows.
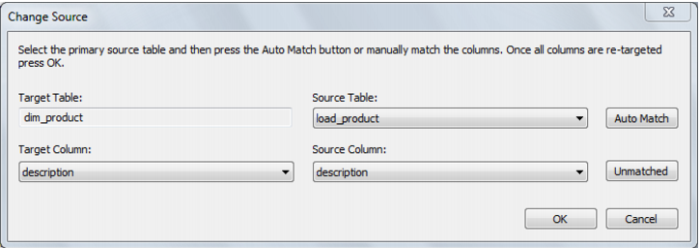
1 Right click on a table object in the left pane and choose Change Source.
2 From the Source table drop down list choose the first source table and click Auto Match. The Unmatched button is grayed out if all columns in the target object exist in the source object:
3 The Unmatched button can be used to iterate through the columns in the target object and match them to those columns not yet chosen in the source table. For each, choose the appropriate source column or select *** No Source ***; then click on Unmatched to move to the next column.
4 When all columns have been matched, click OK.
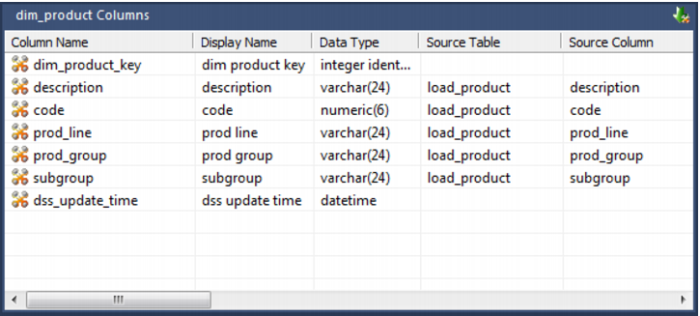
5 Click on the table in the left pane to check the source table and column values are correct:
Retro Copying Column Properties
Each Retro Copy column has a set of associated properties. The definition of each property is defined below.
If the Column name or Data type is changed for a column then the metadata will differ from the table as recorded in the database. Use the Validate/Validate Table Create Status menu option to compare the metadata to the table in the database. A right mouse menu option of 'Alter table' is available when positioned on the table name after the validate has completed. This option will alter the database table to match the metadata definition.
 TIP
TIP: If a database table's definition is changed in the metadata then the table will need to be altered in the database. Use the Tools/Validate table create status to compare metadata definitions to physical database tables. The option also provides the ability to alter the database table, through a pop-up menu option from the validated table name.