Work Order Close
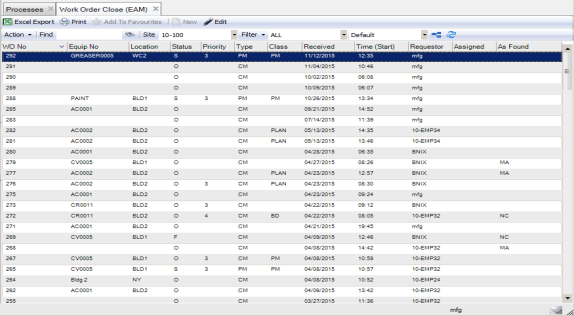
The WO Close browse provides a filtered view of work orders that you can update when maintenance or repair work has finished or when you are ready to finish or close a work order. You can enter maintenance codes, repair codes, and work performed, and view labor and downtime in a single entry form. Data entered in the WO Close browse is reflected in the standard WO module.
The browse is pre-filtered to exclude closed and canceled work orders, and contains a subset of information from the standard WO browse. You can add or remove columns in the browse to display the most relevant information for your organization.
Work Order Close Browse
Finishing a Work Order from the Work Order Close Browse
Standard WO rules apply. You must be the owner and the work order cannot have any open requisitions.
1 Highlight the WO that you want to finish.
2 Select Finish WO from the Action menu, accept the current date and time or enter the date and time to finish the WO, and click OK.
The WO remains visible in the WO Close browse with updated Finished Date, Time, and User ID information.
You can secure this action by role for WO Close.
Closing a Work Order from the Work Order Close Browse
Standard WO rules apply. You must be the owner and the work order cannot have any open requisitions.
1 Highlight the WO that you want to close.
2 Select Close WO from the Action menu, accept the current date and time or enter the date and time to close the WO, and click OK.
Because the WO is now closed, it is filtered out of the WO Close browse and no longer appears in the list.
3 You can go to the standard WO module to review this WO.
You can secure this action by role for WO Close.
Posting Additional Labor from the Work Order Close Browse
You can post labor to a work order directly from the WO Close browse.
1 Highlight the WO to which you want to post labor.
2 Select Post Labor from the Action menu.
3 Enter at least employee number and time worked, and then click the disc icon to save.
4 The labor charges post to the WO and the Labor window reopens with all values reset. You can review posted labor in the Labor History submenu.
Reversing Labor from the Work Order Close Browse
You can reverse labor on a work order directly from the WO Close browse.
1 Highlight the WO from which you want to reverse the labor.
2 Select Reverse Labor from the Action menu.
3 Select the labor posting you want to delete and double click the entry.
4 The labor is automatically reversed. The lookup window reopens, displaying the remaining labor that is posted to the WO. The Labor History submenu displays the labor charges that have been reversed.
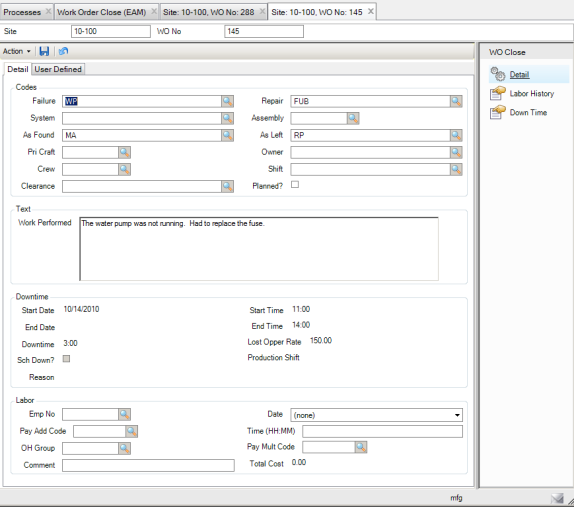
Detail Tab
The Work Order Close Detail tab displays all fields that are in the Codes section of the standard Work Order Codes tab and the Work Performed text from the WO Text tab. The Detail tab also displays downtime and labor information from the related submenus. You can enter your initial labor or downtime details in this tab. However, once you enter information in the tab or through the standard WO module, these fields can no longer be edited here.
The Labor information shows details from the last labor value entered and is not a cumulative amount. Each time you post additional labor, the new entry displays on the Detail tab. If you reverse labor, this section displays the most current labor posting.
Similar to Labor, the Downtime section displays the most current downtime value entered.
Work Order Close Detail Tab
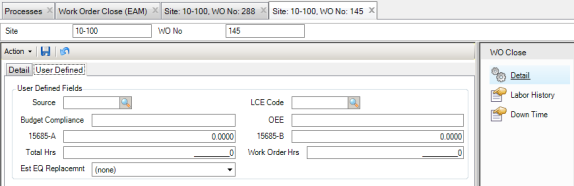
User Defined Tab
The User Defined tab contains the same user-defined fields displayed in the regular Work Order module. See
Work Orders: User Defined Tab.
Work Order Close User-Defined Tab
Labor History Submenu
You can view the labor that has been entered for this WO. To add additional labor performed or to reverse labor, use the Action menu on the main WO Close browse or on the WO Detail tab.
Down Time Submenu
You can view and edit existing downtime, as well as entering new downtime for the work order. See
Adding Downtime Records to a Work Order.